You have hardwood in the kitchen, dining area plus living area, tile in the bathrooms as well as carpet in the bedrooms. Another important consideration when it comes to basement flooring is if who's doing the flooring work: you or a hired professional? If it is you, bear in mind tiles & stained basement floor may take much more effort to haul and install.
Here are Images about Leveling A Basement Floor For Tile
Leveling A Basement Floor For Tile
Some people take much more of a step by step approach, waiting to discover the sorts of costs they'll be facing, exactly how everything is turning out and ultimately what the best option will be. A self contained suite or perhaps additional household bedrooms are also choices which come to mind. Install the new floor for the cellar in addition to the overlay.
Qu0026A of the Week: “Whatu0027s the Best Way to Level An Old, Wonky
Try to never to be overwhelmed & instead concentrate on finding a thing that really works for you inside as numerous ways as possible. Fortunately, there are many approaches to set up the basement flooring, which could be appealing and practical, without the need to make major structural changes. Cement flooring stops worry over excessive rain or possible flooding.
Images Related to Leveling A Basement Floor For Tile
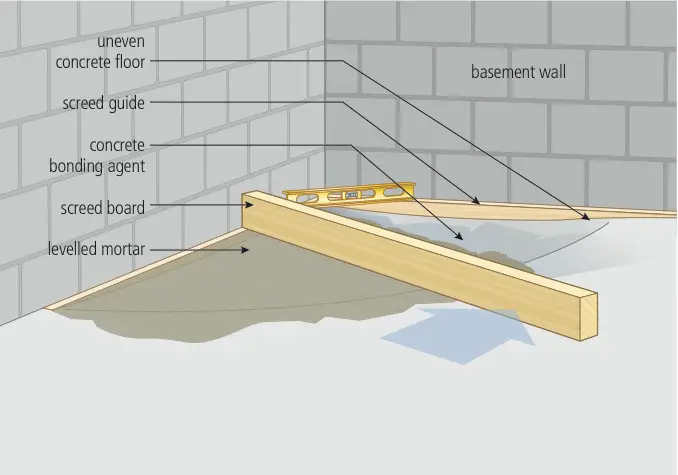
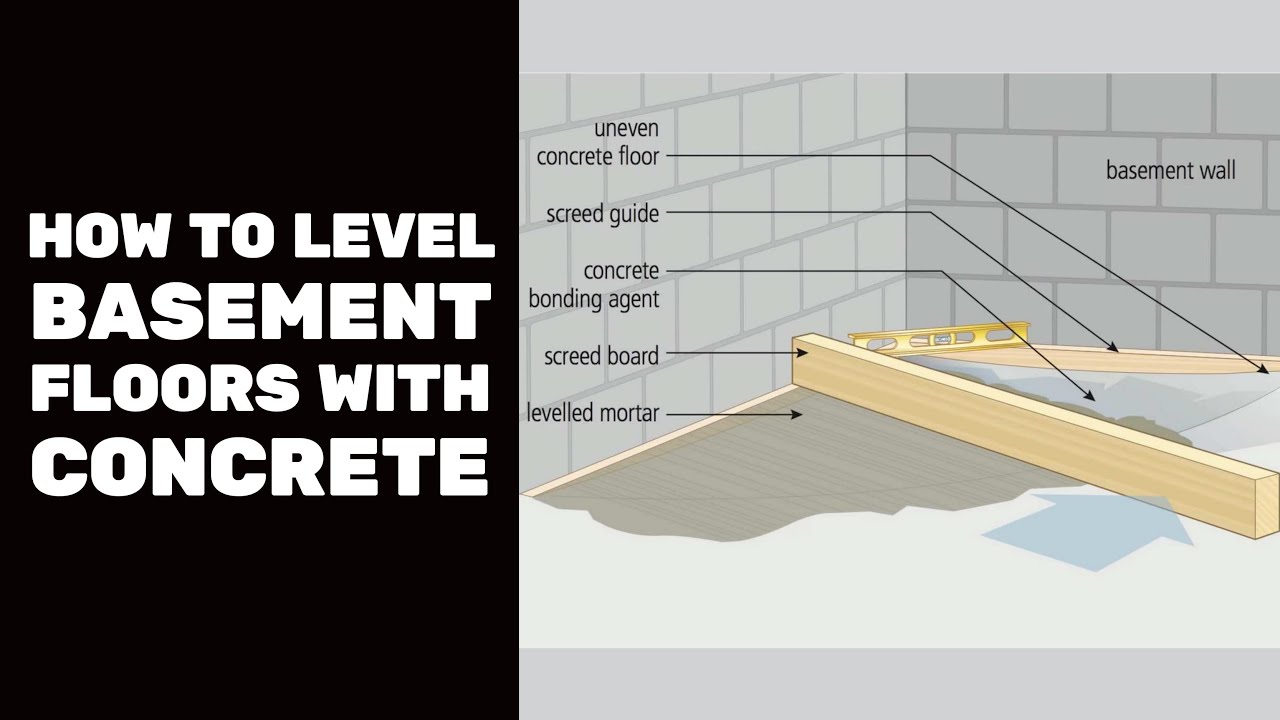
How to level floors for tile, get it ready for tile.

How to Level a Subfloor Before Laying Tile
How to Level Basement Floor (with Pictures) – wikiHow

How to Self Level Bathroom Floors Part 2Adding Leveler Over Concrete — by Home Repair Tutor

How To Level A Basement Floor With A Drain

How to Level a Subfloor Before Laying Tile
How to Self Level Concrete Floors Like Pros – Self Leveler
Self-leveling concrete – Wikipedia
How to level a concrete floor that slopes (Must read)
How to pour self levelling cement yourself.
Leveling a Concrete Floor – Bob Vila
Can I Cover Asbestos Floor Tiles With Concrete? HGTV
Related articles:
- Stained Concrete Basement Floor
- Finishing Basement Floor
- Refinish Concrete Basement Floor
- Best Flooring For Basement
- Basement Gym Flooring Ideas
- Laminate Flooring In Basement
- Basement Concrete Floor Sweating
- Basement Floor Finishing Ideas
- Painting Unfinished Basement Floor
- Unique Basement Flooring
Leveling a basement floor for tile can be a challenging task, but with the right tools and techniques, it is definitely achievable. Whether you are planning to transform your basement into a living space or simply want to upgrade the existing flooring, leveling the floor is an essential step to ensure a smooth and professional-looking tile installation. In this article, we will guide you through the process of leveling a basement floor for tile, providing detailed instructions, tips, and FAQs along the way.
1. Assessing the Basement Floor
Before you begin leveling the basement floor, it is crucial to assess its current condition. Look out for any cracks, uneven areas, or dips in the concrete surface. These imperfections can affect the overall quality of the tile installation and must be addressed prior to leveling.
FAQ: Can I level a basement floor myself?
Yes, leveling a basement floor can be done as a DIY project. However, it requires careful attention to detail and some experience in working with concrete. If you are not confident in your skills or if the floor has significant issues, it is recommended to hire a professional contractor.
2. Gathering the Necessary Tools
To level a basement floor for tile, you will need several tools and materials. Here are some essential items you should have on hand:
– Concrete grinder: This tool will help you smooth out any high spots or uneven areas on the floor.
– Self-leveling compound: A self-leveling compound is a cement-based material that can be poured onto the floor to create a flat surface.
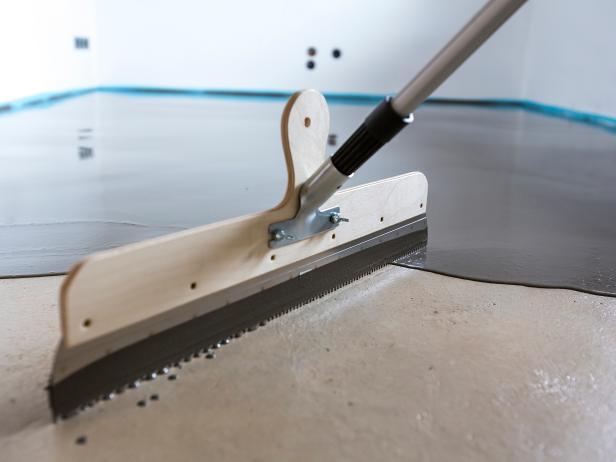
– Trowel: A trowel is used to spread and smooth out the self-leveling compound.
– Level: A level will help you determine if the floor is flat and even.
– Tape measure: You will need a tape measure to take accurate measurements of the area you plan to level.
– Safety equipment: Don’t forget to wear protective gear such as goggles and gloves when working with concrete.
FAQ: How much self-leveling compound do I need?
The amount of self-leveling compound you will need depends on the size and depth of the uneven areas on your basement floor. It is recommended to consult the manufacturer’s instructions or seek professional advice to determine the right quantity for your specific project.
3. Grinding High Spots
Before applying the self-leveling compound, it is essential to grind down any high spots or uneven areas on the basement floor. This step ensures that the surface is smooth and free from obstructions that could interfere with the leveling process.
Using a concrete grinder, carefully work your way across the floor, paying close attention to areas that are noticeably higher than the rest. Move in a back-and-forth motion, gradually grinding down the high spots until they are level with the surrounding surface.
FAQ: Can I skip grinding if my basement floor is relatively flat?
While grinding may not be necessary for minor imperfections, it is generally recommended to ensure a truly level surface. Even slight variations in the floor can affect the tile installation and lead to future problems such as cracked tiles or uneven grout lines.
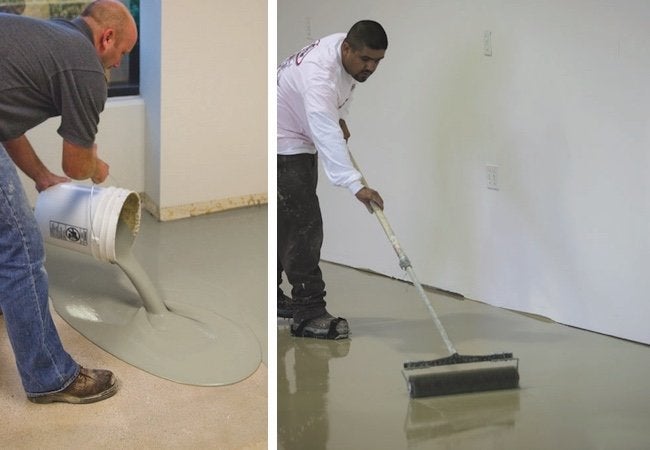
4. Preparing the Self-Leveling Compound
Once you have finished grinding down high spots, it’s time to prepare the self-leveling compound. Follow the manufacturer’s instructions carefully, as different products may have specific mixing ratios and application guidelines.
Start by pouring clean water into a clean bucket, then gradually add the self-leveling compound while stirring continuously. Use a drill with a mixing paddle attachment for efficient blending. Aim for A smooth, pourable consistency without any lumps or clumps.
FAQ: Can I use regular concrete mix instead of self-leveling compound?
Regular concrete mix is not recommended for leveling basement floors for tile. Self-leveling compound is specifically designed to create a flat and level surface, whereas regular concrete mix may not provide the same results. It’s best to use the recommended product for the job to ensure proper leveling and tile installation.
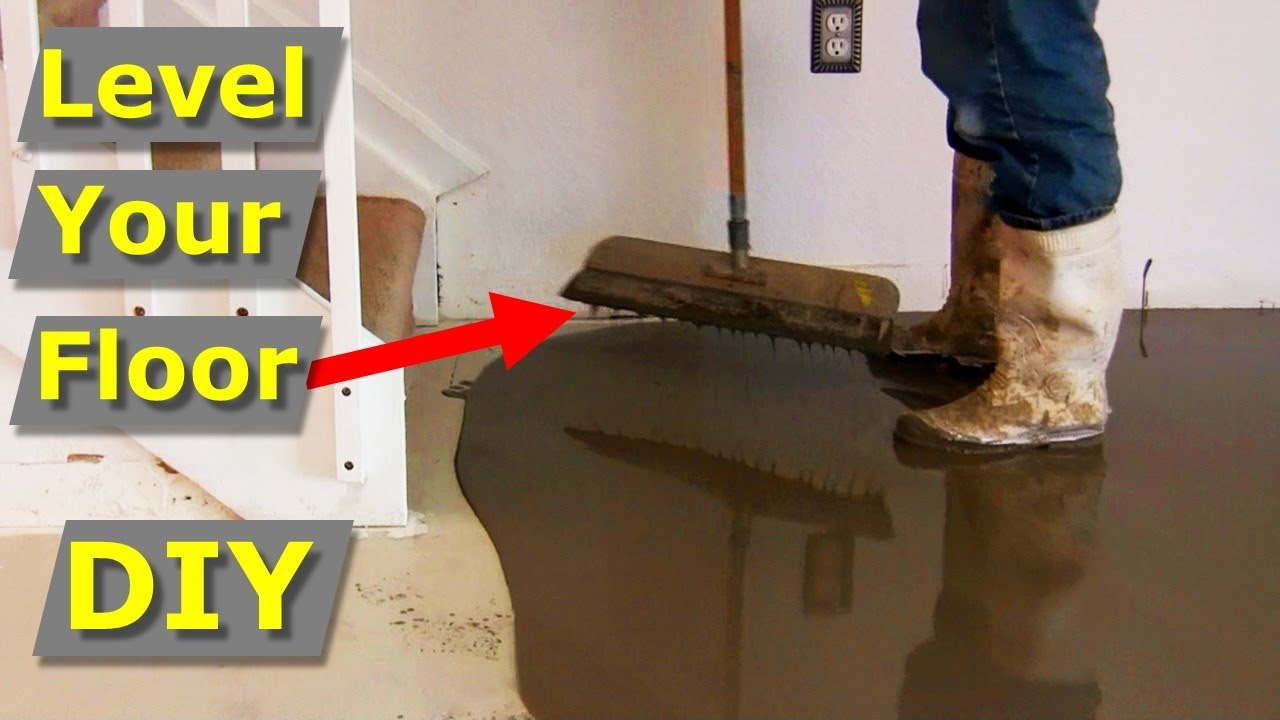
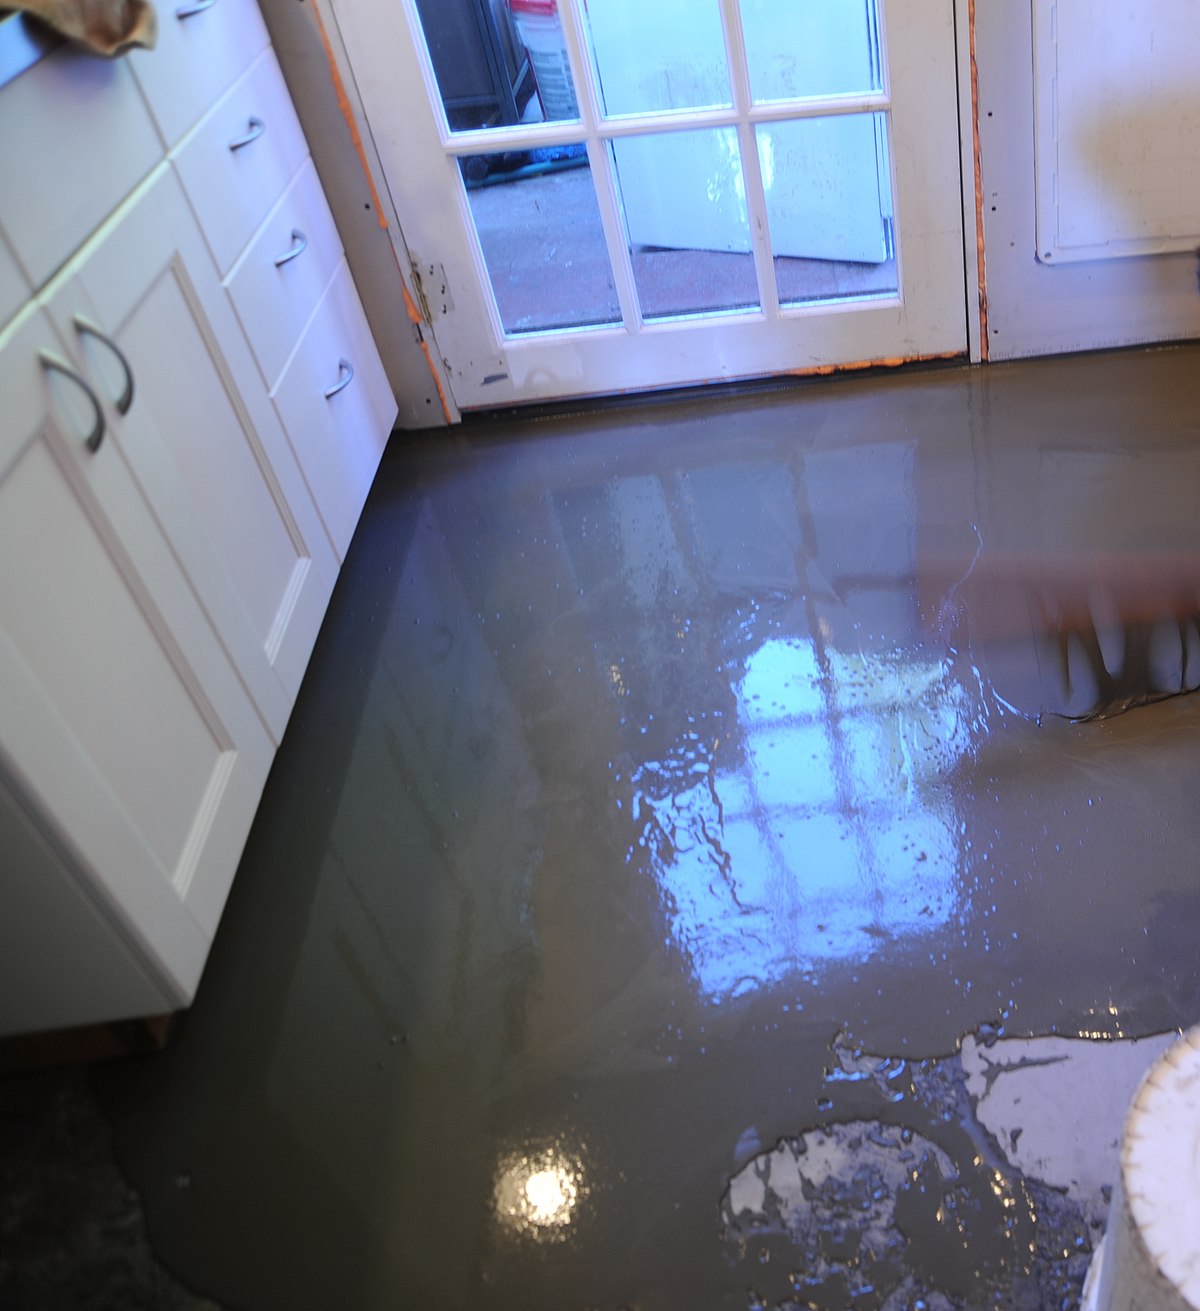
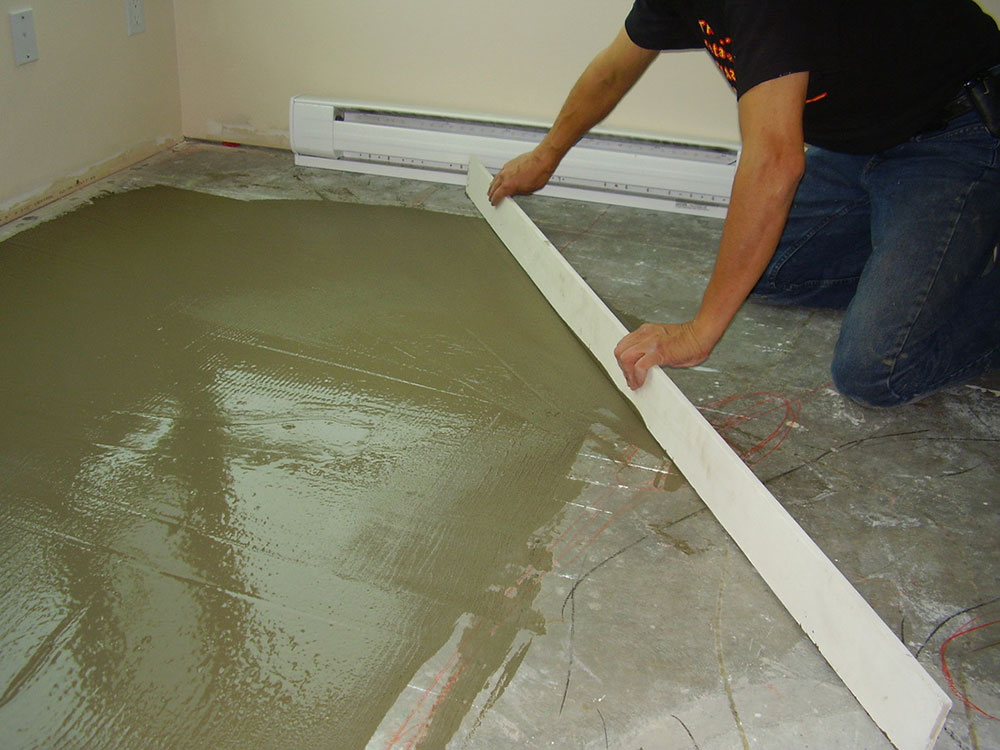
5. Applying the Self-Leveling Compound
Once your self-leveling compound is mixed and ready, it’s time to apply it to the basement floor. Start by pouring the compound onto the lowest point of the floor, then use a trowel to spread it out evenly. Work in small sections, gradually moving across the entire floor.
Use a level to check for evenness as you go along, adjusting and smoothing out any areas that may need it. Be sure to follow the manufacturer’s instructions regarding drying time and any additional coats that may be necessary.
FAQ: How long does it take for self-leveling compound to dry?
The drying time of self-leveling compound can vary depending on factors such as temperature and humidity. It is important to refer to the manufacturer’s instructions for specific drying times. In general, self-leveling compound can take anywhere from a few hours to a full day to dry completely before you can proceed with tile installation.
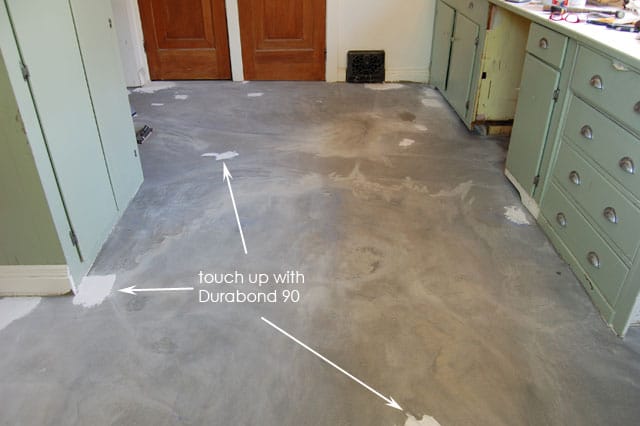
6. Checking for Levelness
After applying the self-leveling compound and allowing it to dry, it’s crucial to double-check for levelness before proceeding with tile installation. Use a level or straightedge to ensure that the entire floor is flat and even.
If you notice any areas that are still uneven, you may need to repeat the process of grinding down high spots and applying another coat of self-leveling compound. It’s important to achieve a smooth and level surface to ensure the longevity and durability of your tile installation.
7. Proceeding with Tile Installation
Once you have confirmed that the basement floor is level, you can proceed with tile installation. Follow the manufacturer’s instructions for proper adhesive application and tile placement. Take your time to ensure accurate measurements, straight lines, and proper spacing between tiles.
Remember to allow sufficient drying time for the adhesive and grout before using the tiled area. Properly maintaining and caring for your tiled basement floor will help prolong its lifespan and keep it looking beautiful for years to come.
Conclusion
Leveling a basement floor for tile can be a challenging but rewarding project. By following the steps outlined above and taking the necessary precautions, you can achieve a level surface that is ready for tile installation. If you are unsure or uncomfortable with any step of the process, it is highly recommended to hire a professional contractor who has experience in leveling basement floors. Their expertise and knowledge will ensure a successful and long-lasting tile installation in your basement.