Laminated flooring is produced- Positive Many Meanings – from artificial materials coupled with natural ingredients as well as decorated with applique. It's frequently used as a substitute to solid wood or maybe stone flooring which it can replicate effectively and easily. Nonetheless, the glueless laminate flooring surfaces and the glued laminate floors call for many applications if you want to tackle the job correctly.
Here are Images about Laminate Flooring Transition Installation
Laminate Flooring Transition Installation

Right here every thing is glued together and using pressure that is high that they start to be quite difficult and durable. You could be certain that laminate floor is going to give you the style you want for your home, and probably at a significantly lower cost compared to what it emulates. The laminate wood floors is practically invincible to spills, stains, burns along with a really excessive tolerance to chafing.
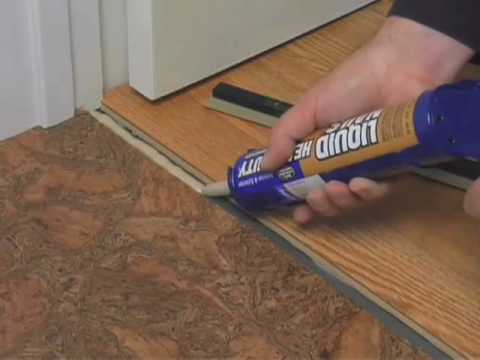
How to Install a T-molding – Glue Down
You'll find laminate floors which look and feel exactly like a hardwood floor, but these're a tad expensive. Furthermore, the following time round we think that they may use a different supplier. Pergo is a the leader within both design and laminate technology. Laminates are usually meant to digest a fair amount of wear and tear and this's the reason workplaces as well as commercial establishments generally opt for the premium or high-pressure quality laminates.
Images Related to Laminate Flooring Transition Installation
Installing Laminate Transitions, Step by Step Instructions
Installing Laminate Flooring : Finishing Trim and Choosing
![]()
Transition Strips – A BuildDirect Guide BuildDirectLearning Center
![]()
How to install laminate flooring without transitions
![]()
Laminate flooring transition strips u2013 Commercial – Tarkett
![]()
Laminate Flooring Transition Piece
How to install laminate flooring transition” laminate flooring Trick, Easy Fast Quick

Installing Laminate Flooring : Finishing Trim and Choosing
Transition Molding For Floating Floors – Laminate and Floating
![]()
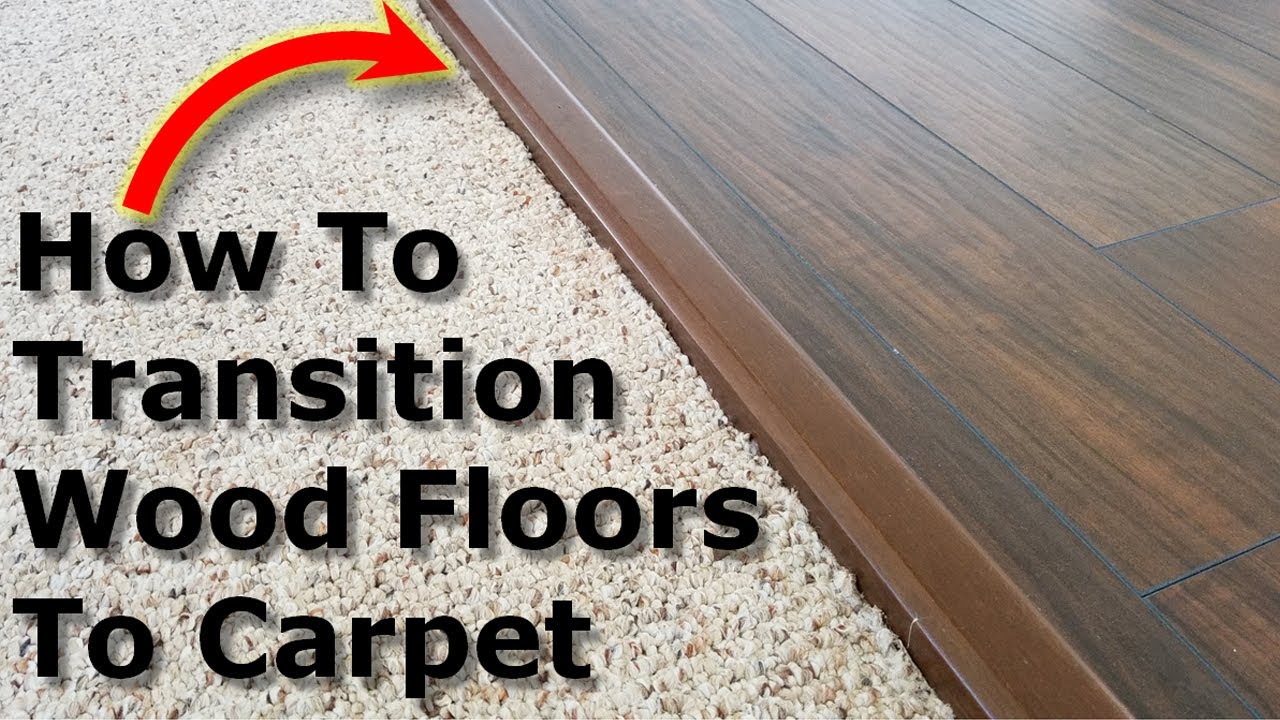
Carpet to Wood Floor Transition, Laminate Floors
How To Install Transition Strip On Vinyl Plank Flooring – Home
![]()
How to Properly Execute Flooring Transitions – Builders Surplus

Related articles:
- Black Laminate Flooring
- Tigerwood Laminate Flooring
- Royal Cherry Laminate Flooring
- Laminate Flooring Thickness For Basement
- Quick Step Commercial Laminate Flooring
- Espresso Oak Laminate Flooring
- Laminate Flooring Colors
- Modern Laminate Flooring Colors
- Dark Shiny Laminate Flooring
- Krono 8mm Laminate Flooring
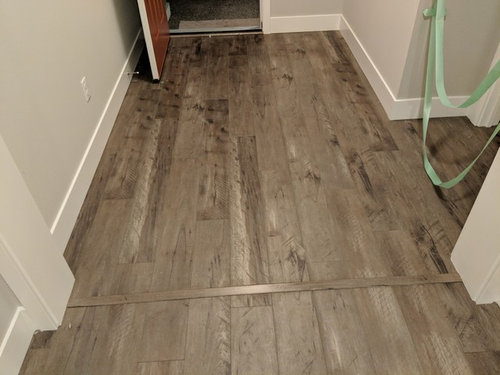
Laminate flooring transition installation is an important aspect of any flooring project that involves different types of flooring materials meeting at a doorway or joining other rooms. Properly installed transitions not only enhance the overall appearance of the floor but also provide a smooth transition between the different flooring surfaces, ensuring safety and durability. In this comprehensive guide, we will discuss the various types of laminate flooring transitions, the installation process, common FAQs, and tips for a successful installation.
Types of Laminate Flooring Transitions
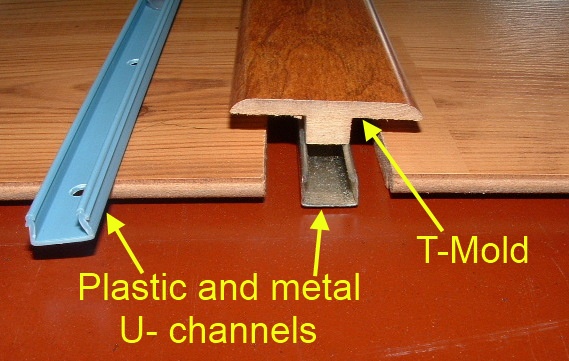
There are several types of transitions that can be used when installing laminate flooring. The most common types include T-molding, reducer molding, end molding, and stair nose molding.
– T-Molding: T-molding is used to join two floors that are of equal height. It creates a seamless transition between rooms and helps to cover the expansion gap between the two floors.
– Reducer Molding: Reducer molding is used when transitioning from laminate flooring to a lower surface, such as vinyl or carpet. It provides a smooth transition and helps to prevent tripping hazards.
– End Molding: End molding is used to finish off the edge of a laminate floor where it meets a vertical surface, such as a wall or fireplace. It provides a clean and finished look to the flooring.
– Stair Nose Molding: Stair nose molding is used on stairs to create a seamless transition between the laminate flooring on the stairs and the flooring on the landing. It also helps to protect the edges of the stairs from wear and tear.
Installation Process
The installation process for laminate flooring transitions is relatively simple and can be done by DIY enthusiasts with basic tools and some patience. Here is a step-by-step guide on how to install laminate flooring transitions:
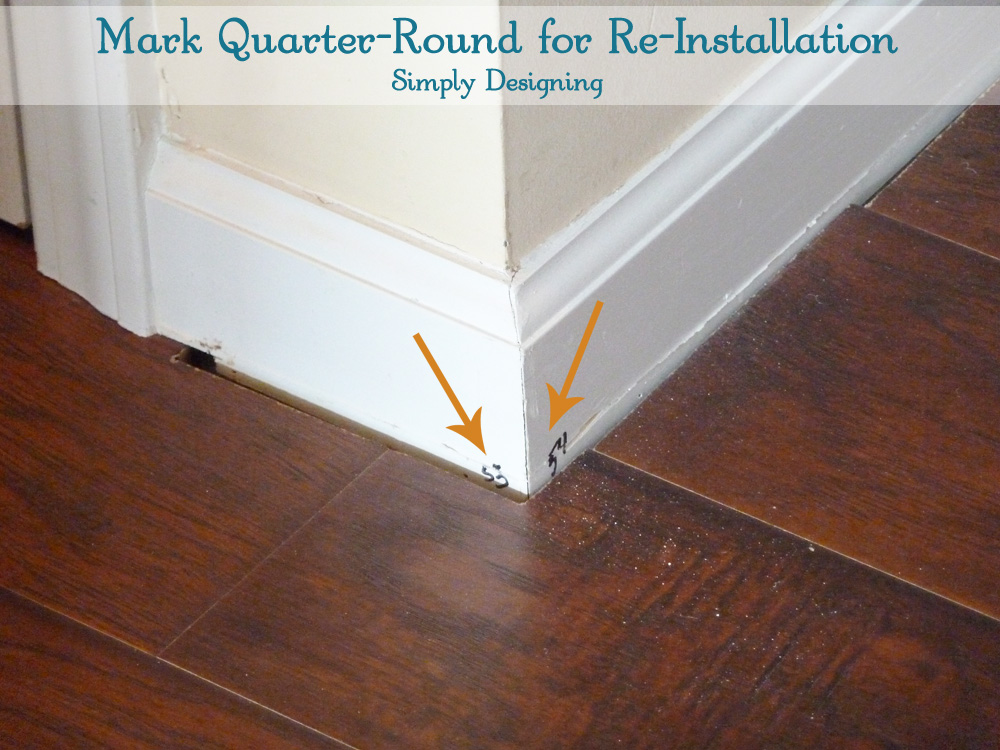
1. Measure and Cut: Start by measuring the length of the transition area and cutting the molding to fit using a miter saw or handsaw.
2. Prepare the Subfloor: Ensure that the subfloor is clean, level, and free of debris before installing the transition molding.
3. Attach Molding: Secure the molding in place using construction adhesive or screws, depending on the type of molding being installed.
4. Fill Gaps: Use wood filler or caulk to fill any gaps between the molding and the floor for a seamless finish.
5. Allow Time to Dry: Allow ample time for the adhesive or caulk to dry before walking on or applying pressure to the transition area.
FAQs
Q: Do I need special tools to install laminate flooring transitions?
A: You will need basic tools such as a miter saw, handsaw, measuring tape, construction adhesive, screws, wood filler or caulk, and a hammer.
Q: Can I install laminate flooring transitions over existing flooring?
A: Yes, you can install transitions over existing flooring as long as it is clean, level, and free of debris.
Q: How do I choose the right type of transition for my flooring project?
A: Choose a transition based on the height difference between floors, type of flooring materials being joined, and aesthetic preferences.
Tips for Successful Installation
– Measure twice, cut once: Take accurate measurements before cutting any molding to avoid mistakes.
– Use proper adhesive: Make sure to use construction adhesive that is compatible with both the molding material and subflooring.
– Allow time to dry: Give ample time for adhesive or caulk to dry before putting pressure on the transition area.
– Follow manufacturer instructions: Always follow the manufacturer’s instructions for installation To ensure a successful and long-lasting result.
In conclusion, laminate flooring transitions are essential for a seamless and finished look when transitioning between different flooring surfaces. With the right tools, materials, and proper installation techniques, you can easily install transitions yourself and enhance the overall appearance of your space. Remember to follow the provided steps, FAQs, and tips for a successful installation process. If you encounter any difficulties or have questions, don’t hesitate to seek help from professionals or consult the manufacturer’s guidelines. By following these steps and tips, you can achieve a professional-looking result while saving money on installation costs. Installing laminate flooring transitions is a DIY project that can be easily accomplished with some patience and attention to detail. Enjoy your newly transitioned floors! – Consider the aesthetics: Choose a transition molding that complements the overall design and style of your space for a cohesive look.
– Test fit before installation: Before securing the molding in place, test fit it to ensure it fits properly and aligns with the flooring surfaces.
– Seal edges: To prevent moisture from seeping underneath the transition molding, consider sealing the edges with silicone caulk for added protection.
– Clean regularly: To maintain the appearance and integrity of the transition molding, clean it regularly with a damp cloth or mild cleaning solution.
– Inspect for damage: Periodically inspect the transition molding for any signs of damage or wear and tear, and address any issues promptly to prevent further damage.