In the event that durability is an issue to you, you need to stay away from specific other types of material, such as rubber kitchen floor tiles, laminate floor tiles kitchen, terracotta floor flooring kitchen as well as vinyl kitchen area floor tiles. In the long run, your kitchen remodeling finances will affect the choice of yours of flooring, other kitchen additions and design.
Here are Images about Kitchen Flooring Karndean
Kitchen Flooring Karndean

Kitchen flooring can set the mood for the entire room. Cork flooring doesn't result in rotting even in case it is still wet for a very long time and it in addition has an all natural resistance to flame thus, it will not burn quickly. In mind, you can get the perfect type of kitchen floor tiles installed in the home of yours that not merely looks fabulous but is a fantastic complement to the life of yours.
Kitchen Flooring Tiles and Ideas for Your Home Floor Tiles u0026 Planks

Solid wood kitchen flooring is another choice that can be considered when it comes to kitchen floors. Heading right ahead to the local home improvement of yours or DIY store may seem to be your initial option but it would also be a good idea in case you know what you're searching for. It is manufactured from manufacturing cork shavings or perhaps slices of corks of bottles.
Images Related to Kitchen Flooring Karndean
Karndean Flooring for Kitchens Hamilton Flooring

Kitchen Flooring Tiles and Ideas for Your Home Floor Tiles u0026 Planks

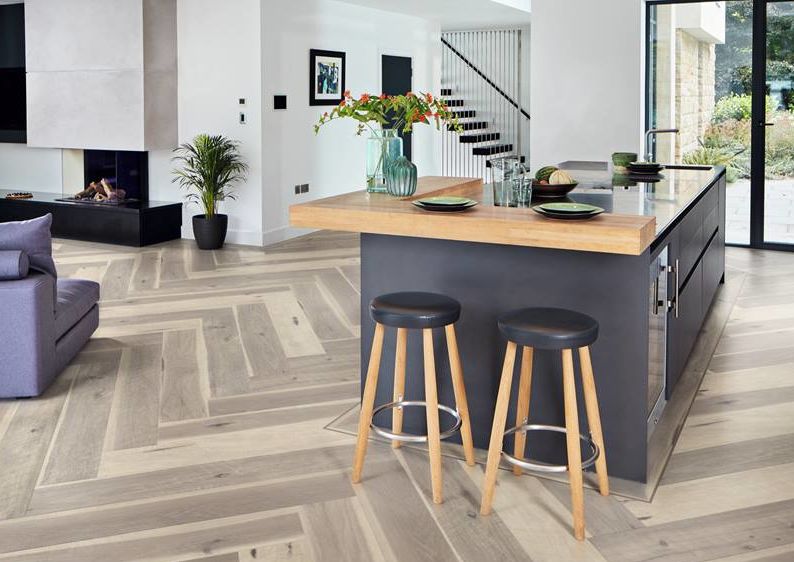
Karndean Opus flooring installed by us – the large tiles work in

Kitchen Flooring Tiles and Ideas for Your Home Floor Tiles u0026 Planks

Kitchen Flooring Tiles and Ideas for Your Home Floor Tiles u0026 Planks

Kitchen Flooring Tiles and Ideas for Your Home Floor Tiles u0026 Planks

1 AP07 StormOak Kitchen DS12-5mm_P1_CM Vinyl flooring kitchen

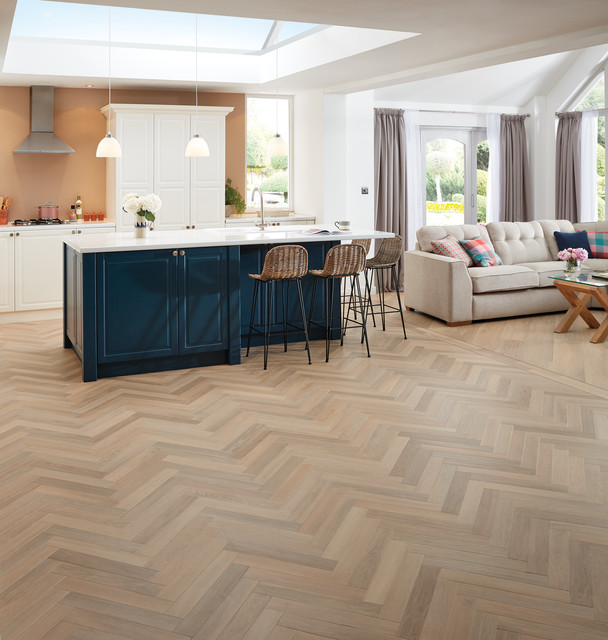
Karndean Design Flooring – Kitchen Ideas – Contemporary – Kitchen
Karndean Flooring for Kitchens Hamilton Flooring
Kitchen Flooring Tiles and Ideas for Your Home Floor Tiles u0026 Planks

Kitchen Flooring Tiles and Ideas for Your Home Floor Tiles u0026 Planks

Kitchen Flooring Tiles and Ideas for Your Home Floor Tiles u0026 Planks

Related articles:
- Stained Concrete Basement Floor
- Finishing Basement Floor
- Refinish Concrete Basement Floor
- Best Flooring For Basement
- Basement Gym Flooring Ideas
- Laminate Flooring In Basement
- Basement Concrete Floor Sweating
- Basement Floor Finishing Ideas
- Painting Unfinished Basement Floor
- Unique Basement Flooring
Kitchen Flooring Karndean: The Perfect Blend of Style and Durability
Introduction:
The kitchen is often considered the heart of the home, a place where families gather to cook, eat, and create lasting memories. As such, it’s essential to choose the right flooring that not only complements your kitchen’s design but also withstands the high traffic, spills, and wear and tear that come with this busy space. Karndean flooring has emerged as a popular choice for kitchen floors due to its exceptional blend of style and durability. In this article, we will explore the various aspects of Karndean flooring for kitchens, including its benefits, installation process, maintenance tips, and frequently asked questions.
Benefits of Karndean Flooring in the Kitchen:
1. Aesthetics: Karndean flooring offers an extensive range of design options that can replicate the look and feel of natural materials such as wood and stone. Whether you prefer a rustic farmhouse or a sleek modern kitchen, Karndean has a wide selection of styles, colors, and textures to suit every taste. From the warm tones of oak to the cool elegance of marble, there is a Karndean flooring option to enhance any kitchen design.
2. Durability: One of the standout features of Karndean flooring is its remarkable durability. Unlike hardwood or natural stone floors that are susceptible to scratches, dents, and stains, Karndean is engineered to withstand heavy foot traffic and everyday mishaps in the kitchen. Its protective surface layer acts as a shield against spills, making it easier to clean up any messes without leaving lasting marks.
3. Water Resistance: Kitchens are prone to spills and moisture buildup due to cooking activities and regular cleaning routines. With Karndean flooring’s water-resistant properties, you can have peace of mind knowing that your kitchen floor is well-protected against damage caused by water exposure. This makes it an ideal choice for kitchens, as it prevents the growth of mold and mildew, ensuring a healthier environment for your family.
4. Comfort and Noise Reduction: Standing in the kitchen for prolonged periods can be tiring on the feet. However, Karndean’s cushioned backing provides resilience and underfoot comfort, reducing fatigue and making it more enjoyable to work in the kitchen. Additionally, its sound-absorbing properties help minimize noise levels, creating a quieter space and preventing sound from echoing throughout the house.
Installation Process:
Installing Karndean flooring in your kitchen is a straightforward process that can be done by professionals or experienced DIY enthusiasts. Here is a step-by-step guide to help you understand the installation process:
1. Preparation: Before installing Karndean flooring, it is essential to ensure that your subfloor is clean, dry, level, and free from any imperfections. This will provide a smooth surface for the new flooring. Remove any existing flooring material and thoroughly clean the subfloor.
2. Acclimatization: Karndean flooring needs to acclimate to the room’s temperature for at least 24 hours before installation. This allows the planks or tiles to adjust to their environment, minimizing any potential expansion or contraction issues later on.
3. Subfloor Treatment: If your subfloor requires leveling or repair work, it should be done before proceeding with the installation. Ensure that any cracks or uneven areas are filled and smoothed out to create a stable base for your new floor.
4. Adhesive Application: Apply a suitable adhesive recommended by Karndean onto the Subfloor using a trowel. Follow the manufacturer’s instructions for the correct adhesive type and application method. Spread the adhesive evenly, ensuring full coverage of the subfloor.
5. Installation: Begin laying the Karndean flooring planks or tiles from one corner of the room, working towards the opposite wall. Use spacers to maintain a consistent gap around the edges for expansion and contraction. Press each plank or tile firmly into place, ensuring they are aligned properly and securely bonded to the adhesive.
6. Cutting and Trimming: When necessary, cut or trim the Karndean flooring to fit around obstacles such as cabinets or doorways. Use a utility knife or a suitable cutting tool recommended by Karndean to make precise cuts.
7. Finishing touches: Once all the flooring is installed, remove any spacers and clean up any excess adhesive. Install matching trim pieces, such as skirting boards or transition strips, to cover any gaps between the flooring and walls or other rooms.
8. Maintenance: To keep your Karndean flooring looking its best, follow the manufacturer’s recommended maintenance guidelines. Regularly sweep or vacuum to remove dirt and debris, and clean up spills promptly using a mild detergent and a damp cloth. Avoid using abrasive cleaners or tools that can damage the protective surface layer.
By following these steps and taking proper care of your Karndean flooring, you can enjoy its beauty and durability in your kitchen for many years to come. 9. Additional Tips:
– It is recommended to use a moisture barrier if your subfloor has a higher moisture level.
– Allow the adhesive to fully dry before walking on or placing heavy furniture on the newly installed flooring.
– Use felt pads on the legs of furniture to prevent scratches and damage to the flooring.
– Consider using rugs or mats in high traffic areas to further protect the Karndean flooring.
– Avoid dragging heavy objects across the floor as it can cause scratches or indentations.
– If you have any doubts or concerns during the installation process, consult a professional for assistance.
Remember, proper installation and maintenance are key to ensuring the longevity and appearance of your Karndean flooring. Following these steps and tips will help you successfully install and maintain your Karndean flooring:
1. Prepare the subfloor: Ensure the subfloor is clean, dry, and level. Fill any cracks or uneven areas to create a stable base.
2. Acclimate the flooring: Allow the Karndean flooring to acclimate to the room’s temperature and humidity for at least 24 hours before installation.
3. Gather the necessary tools: Make sure you have all the tools recommended by Karndean, such as a trowel, utility knife, and spacers.
4. Apply adhesive: Use a suitable adhesive recommended by Karndean and follow the manufacturer’s instructions for application. Spread the adhesive evenly on the subfloor.
5. Start installation: Begin laying the planks or tiles from one corner of the room, working towards the opposite wall. Use spacers to maintain a consistent gap around edges for expansion and contraction. Press each piece firmly into place.
6. Cut and trim: Use a utility knife or recommended cutting tool to make precise cuts when fitting flooring around obstacles like cabinets or doorways.
7. Finish touches: Remove spacers and clean up excess adhesive once all flooring is installed. Install matching trim pieces to cover gaps between flooring and walls or other rooms.
8. Maintenance: Follow the manufacturer’s recommended maintenance guidelines to keep your Karndean flooring looking its best. Regularly sweep or vacuum, clean up spills promptly, and avoid using abrasive cleaners or tools.
9. Additional tips: Consider using a moisture barrier for higher moisture levels in the subfloor. Allow adhesive to fully dry before walking on or placing heavy furniture on the floor. Use felt pads on furniture legs, use rugs or mats in high traffic areas, avoid dragging heavy objects, and consult a professional if needed.
By following these steps and taking proper care of your Karndean flooring, you can enjoy its beauty and durability for many years.