In the event that durability is an issue for you, you should stay away from certain other sorts of material, such as rubber cooking area floor tiles, laminate floor flooring kitchen, terracotta floor tiles kitchen as well as vinyl kitchen floor tiles. In the end, your kitchen remodeling spending budget will affect the choice of yours of flooring, design as well as other kitchen additions.
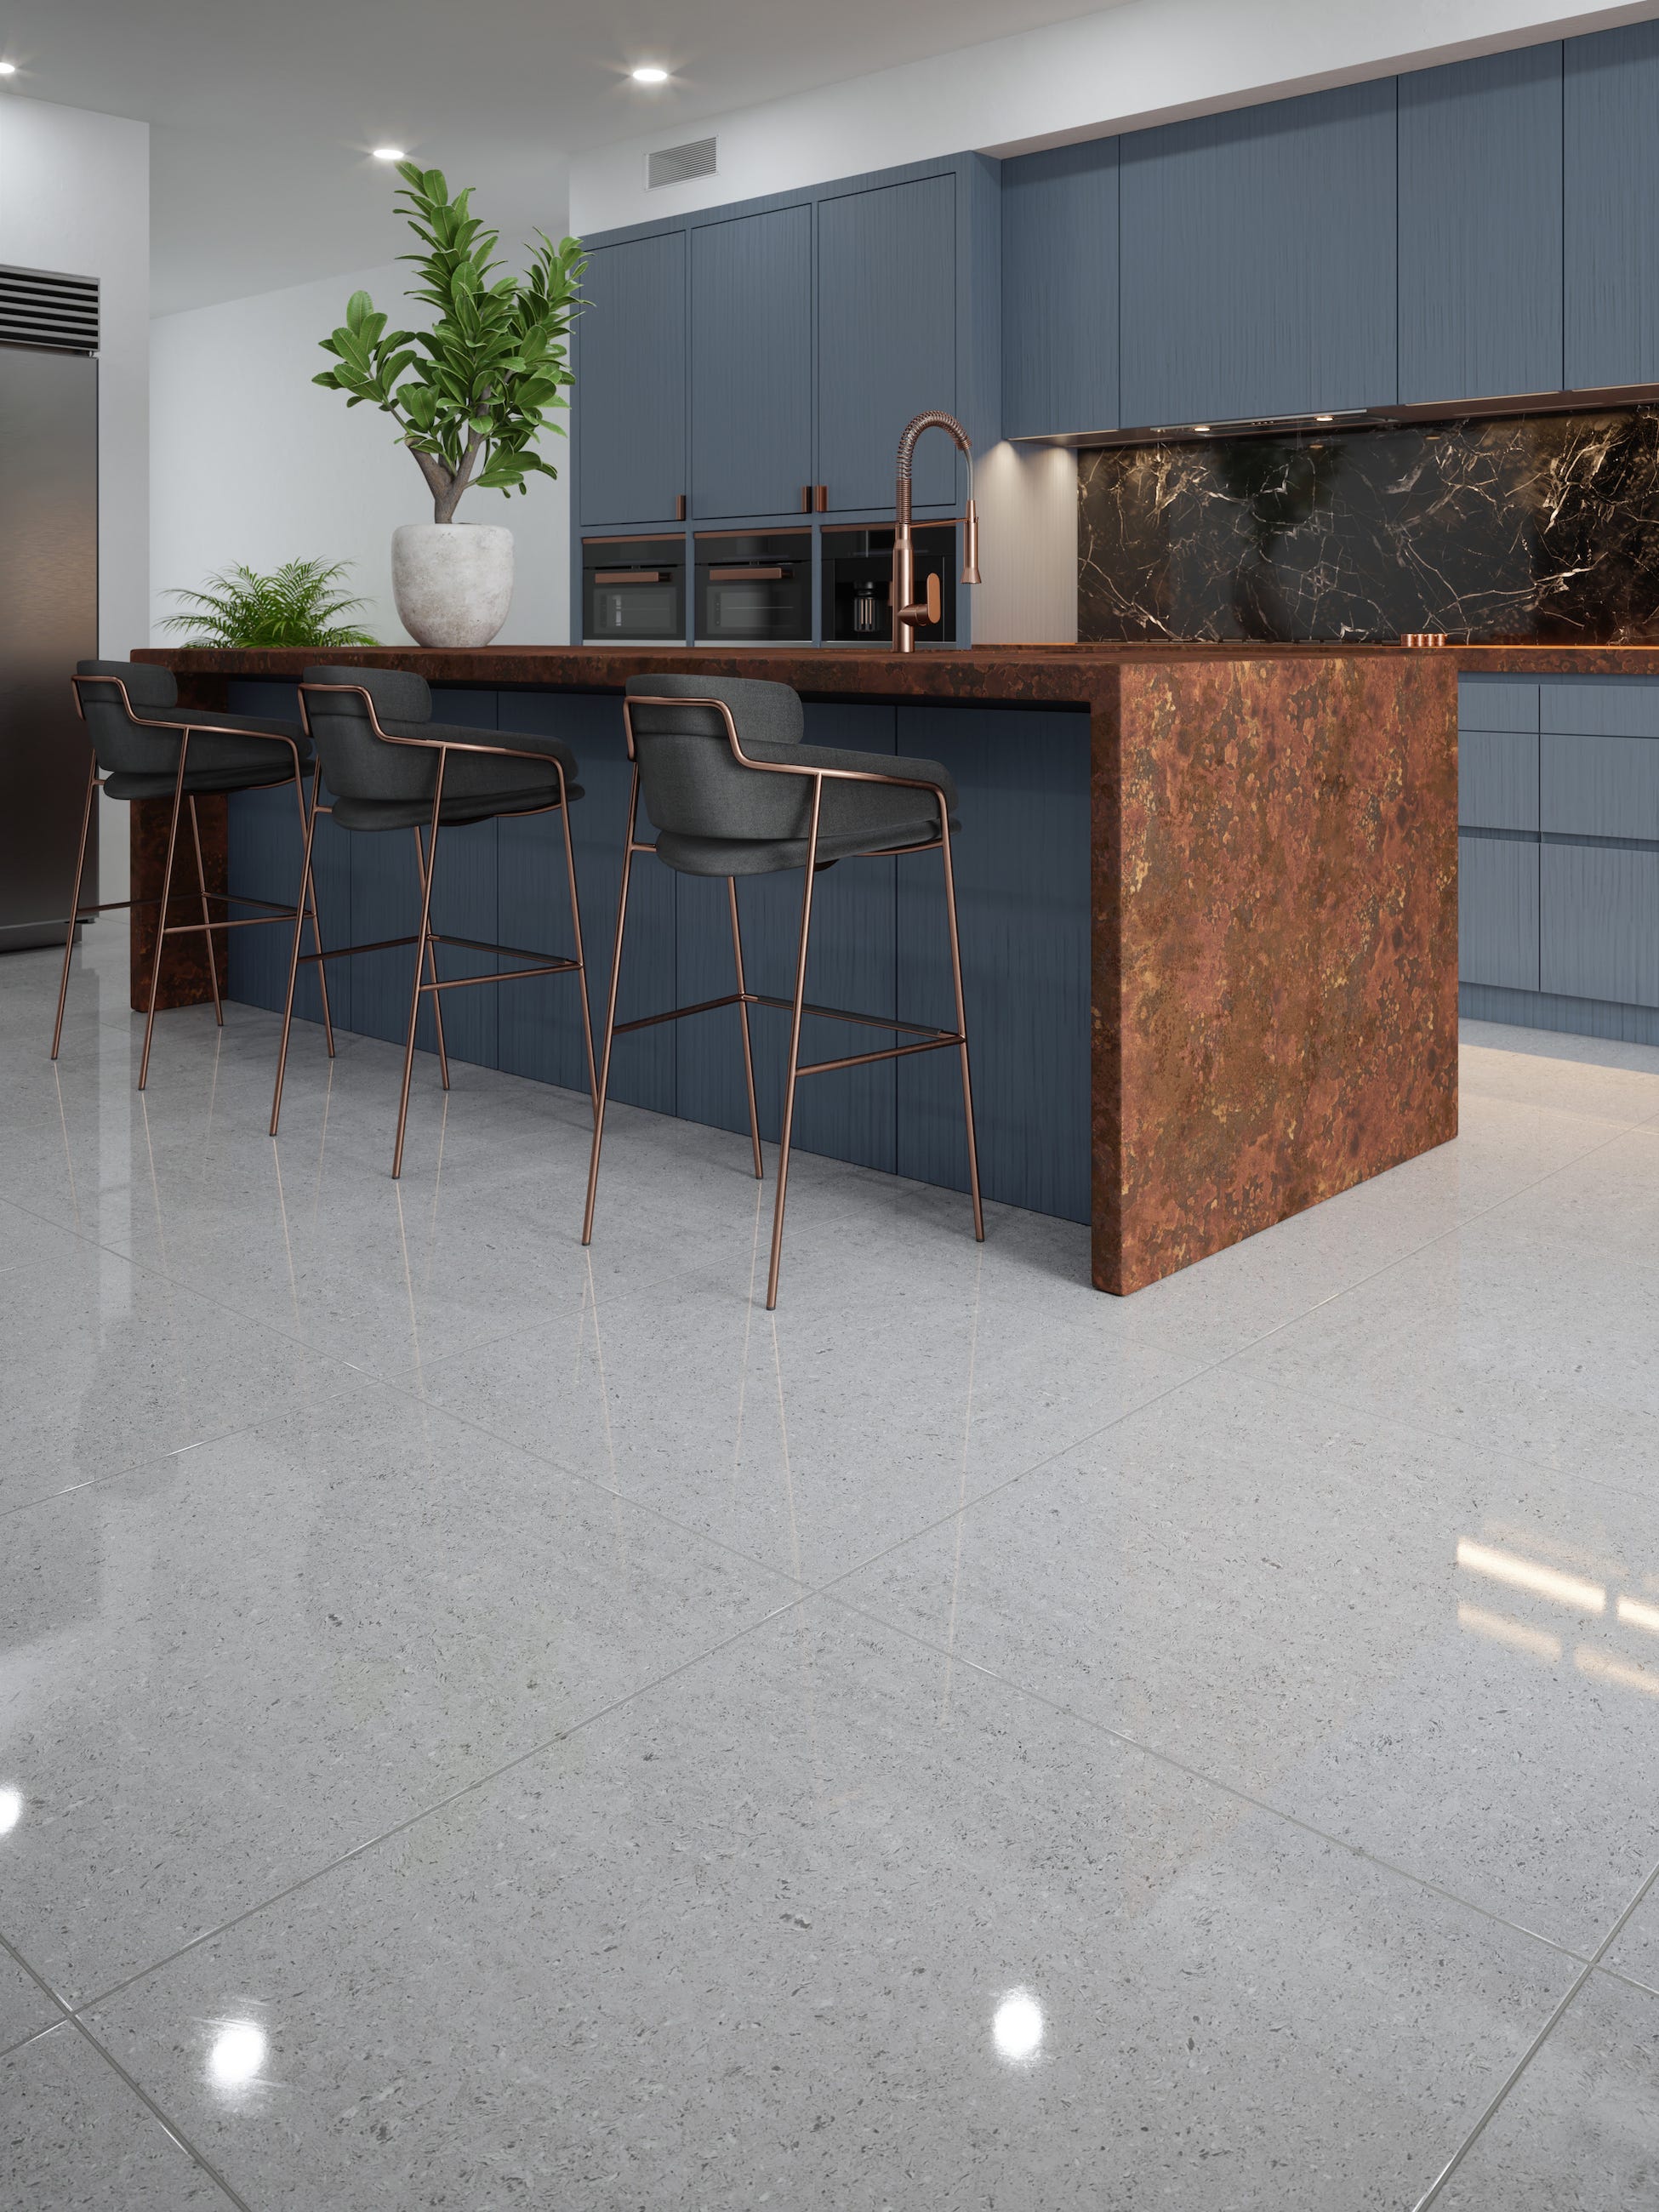
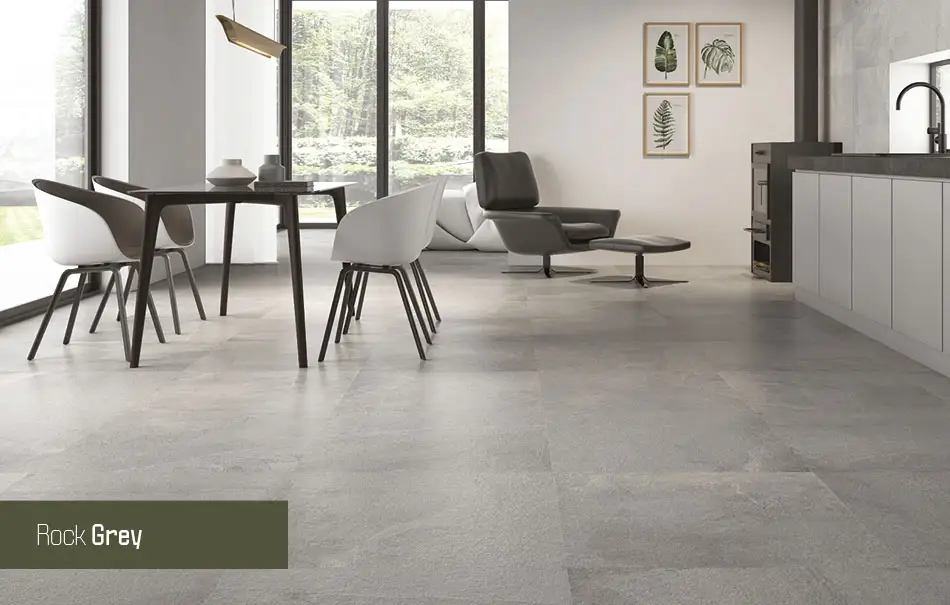
Here are Images about Kitchen Floor Grey Tiles
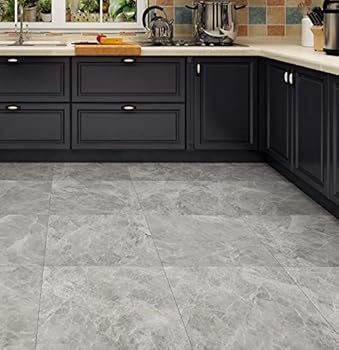
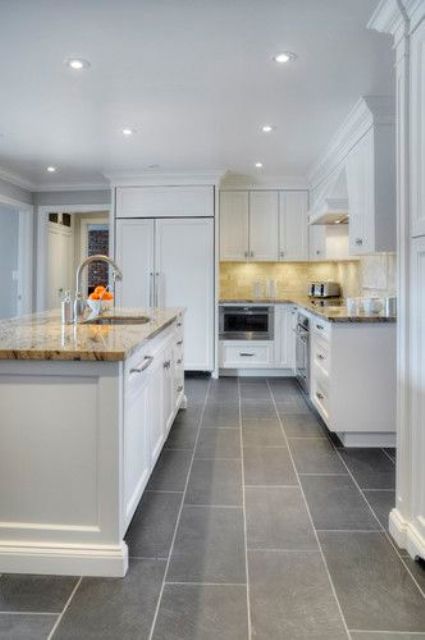
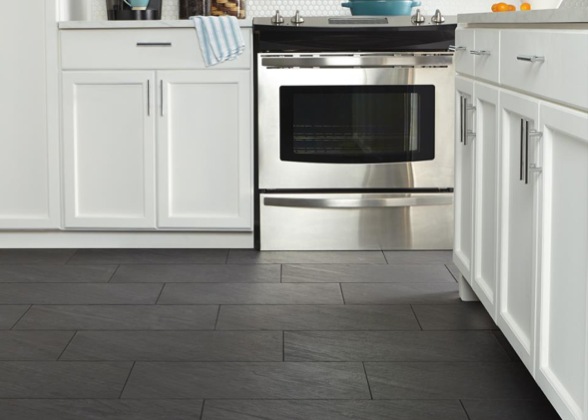
Kitchen Floor Grey Tiles
Bamboo kitchen flooring is recognized for being quite durable and strong. At some point the most ideal procedure for make the option on kitchen area flooring content is looking through samples that are free from factory, general, commercial enterprises and showrooms in the general vicinity of yours. Numerous house holders have an inclination to make the error of not giving enough thought to kitchen area flooring alternatives.
Muted Grey Tile Floor Kitchen and White Tile Kitchen Backsplash

Cork kitchen floors is a floating floor and are usually installed on any kind of sub floors with a difficult surface like wood, vinyl or ceramic and concrete. You will find a number of types of kitchen area floor available although you've to be mindful on which cooking area floor style suits your needs best, and still suits the spending budget of yours.
Images Related to Kitchen Floor Grey Tiles
Porcelain Tile – Tile – The Home Depot
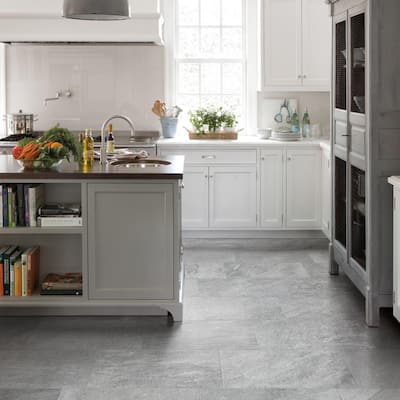
Gray Flooring Ideas for a Modern Kitchen BuildDirect® Blog

Pros u0026 Cons of Ceramic Kitchen Tile Ceramic Kitchen Floor

30 Tile Flooring Ideas With Pros And Cons – DigsDigs
22 Grey tile floor kitchen ideas tile floor, kitchen flooring

Tile u0026 Tile Accessories
Best Kitchen Flooring – Kitchen Floor Ideas For Your Home
Grey Kitchen Floor Tiles Guide – Kitchen Floor Tiles Grey
Manhattan Light Grey Matt Stone effect Porcelain Wall u0026 floor Tile

22 Stunning Kitchens With Tile Floors – Page 5 of 5 Grey kitchen

White Kitchen with Gray Plank Porcelain Tile Floor – Transitional

Top 50 Best Kitchen Floor Tile Ideas – Flooring Designs

Related articles:
- Stained Concrete Basement Floor
- Finishing Basement Floor
- Refinish Concrete Basement Floor
- Best Flooring For Basement
- Basement Gym Flooring Ideas
- Laminate Flooring In Basement
- Basement Concrete Floor Sweating
- Basement Floor Finishing Ideas
- Painting Unfinished Basement Floor
- Unique Basement Flooring
Kitchen Floor Grey Tiles: The Perfect Blend of Style and Functionality
Introduction:
The kitchen is often referred to as the heart of the home, and it’s no wonder why. It is where we gather to prepare meals, share stories, and create lasting memories with our loved ones. When it comes to designing a kitchen, one crucial element that should not be overlooked is the flooring. And if you’re looking for a versatile and stylish option, kitchen floor grey tiles are the perfect choice. In this article, we will delve into the world of kitchen floor grey tiles, exploring their benefits, installation process, maintenance tips, and much more.
Benefits of Kitchen Floor Grey Tiles:
1. Timeless Elegance:
Grey is a neutral color that exudes sophistication and elegance. Unlike trendy colors that may go out of style in a few years, grey tiles provide a timeless aesthetic that can effortlessly blend with any kitchen design. Whether your kitchen has a contemporary or traditional theme, grey tiles will enhance its overall look and feel.
2. Versatility:
Grey tiles come in various shades and finishes, offering homeowners a wide range of options to choose from. From light grey to dark charcoal hues, there’s a shade to suit every taste and preference. Additionally, grey tiles can be found in different materials such as porcelain, ceramic, or even natural stone like slate or marble. This versatility allows homeowners to create their desired look while maintaining durability and functionality.
3. Hides Dirt and Stains:
One of the main advantages of choosing grey tiles for your kitchen floor is their ability to hide dirt and stains effectively. Compared to lighter-colored floors that require constant cleaning and maintenance, grey tiles can withstand everyday wear and tear without showing signs of grime or discoloration easily. This makes them an ideal choice for busy households or those with young children or pets.
4. Reflects Light:
Grey tiles have a unique quality of reflecting light, which can significantly brighten up your kitchen space. Whether you have large windows or limited natural light, the reflective properties of grey tiles can create an illusion of a more open and spacious kitchen. This is especially beneficial for smaller kitchens or those with limited lighting fixtures.
Installation of Kitchen Floor Grey Tiles:
Installing kitchen floor grey tiles requires careful planning and execution. Here’s a step-by-step guide to help you get started:
1. Prepare the Surface:
Before installing the tiles, it is crucial to ensure that the subfloor is clean, dry, and level. Remove any existing flooring material and repair any cracks or imperfections in the surface. This will provide a smooth and solid foundation for the tile installation.
2. Measure and Layout:
Measure the dimensions of your kitchen floor accurately to determine the number of tiles needed. It is advisable to purchase some extra tiles to account for any breakages or future replacements. Next, create a layout plan by marking the center point of the room and laying out dry tiles without adhesive to visualize how they will fit together.
3. Apply Adhesive:
Using a notched trowel, apply thin-set adhesive to a small section of the subfloor at a time. Spread the adhesive evenly in one direction, creating ridges for better adhesion. Avoid applying adhesive over a large area at once, as it may dry before tiles can be laid.
4. Lay the Tiles:
Begin laying tiles from the center point marked earlier, working outward toward the edges of the room. Press each tile firmly into place using slight twisting motions to ensure Proper adhesion. Use tile spacers to maintain consistent spacing between tiles. Continue this process until all tiles are laid, cutting and shaping tiles as needed to fit around edges and obstacles.
5. Grout the Tiles:
After allowing the adhesive to dry according to the manufacturer’s instructions, it’s time to grout the tiles. Mix the grout according to package instructions and apply it using a grout float, pressing it into the gaps between tiles. Remove excess grout with a damp sponge, being careful not to disturb the newly laid tiles. Allow the grout to dry completely before walking on the floor.
6. Seal the Tiles:
To protect your kitchen floor grey tiles from stains and damage, it is recommended to seal them after installation and grouting. Apply a layer of tile sealer using a clean cloth or brush, following the manufacturer’s instructions. This will help maintain the appearance and longevity of your tiles.
In conclusion, choosing grey tiles for your kitchen floor can provide numerous benefits such as versatility in design options, hiding dirt and stains effectively, and reflecting light to brighten up your space. By following proper installation techniques, you can enjoy a beautiful and durable kitchen floor that will withstand daily use for years to come. Remember to always follow the manufacturer’s instructions for the specific tiles and adhesive you are using. If you are unsure about any step of the process, it is recommended to consult with a professional or seek additional guidance from tile experts. Overall, the instructions provided for installing grey tiles on a kitchen floor are clear and comprehensive. However, there are a few areas where more specific details or cautions could be added:
1. Subfloor Preparation: While it is mentioned to clean the subfloor, it would be helpful to include information about removing any existing flooring, such as carpet or vinyl, and ensuring that the subfloor is level and structurally sound.
2. Adhesive Application: It would be beneficial to include information about the appropriate drying time for the adhesive before laying tiles. This can vary depending on the specific adhesive used.
3. Tile Layout: While it is advised to mark the center point of the room and lay out dry tiles without adhesive, additional guidance on how to determine the best starting point for tile installation would be helpful. This could involve considering the layout of cabinets or appliances in the kitchen.
4. Tile Cutting and Shaping: More detailed instructions on how to cut or shape tiles to fit around edges and obstacles would be useful for beginners. This could include information on using a wet saw or tile cutter.
5. Grout Drying Time: It is important to emphasize that grout should be allowed to dry completely before walking on the floor. This typically takes 24-48 hours, but can vary depending on humidity levels and other factors.
6. Tile Sealing: In addition to sealing the tiles after installation and grouting, it may be beneficial to mention that regular resealing may be necessary over time, especially in high-traffic areas like kitchens.
Including these additional details and cautions would provide a more comprehensive guide for installing grey tiles on a kitchen floor.