The tiles are the very best choice for those individuals who have allergies from allergens. They also are available in different color, size as well as shape. Many difficulties with tile floors over wood are available by using excessive' bounciness' of this substrate. To ensure that you use the wide range of tile flooring suggestions, you've to learn about the many kinds of tiles which you are able to work with to put in on your floor.
Images Related to Installing Tile Flooring On Plywood
Installing Tile Flooring On Plywood
Linoleum tile floors very rarely scratch and this can be an enormous plus. Mix the formula correctly and soak a chunk of cloth throughout it. Run your damp mop of the floor as soon as a week and also you will have a clean floor. Users should be built with the very best hard tile floor cleaners. You are able to pick these tiles possibly for the bedroom of yours or maybe the living rooms of yours, kitchen as well as bathroom.
How to Lay Tile on a Plywood Subfloor
/Tile-install-GettyImages-183066355-588a1cb15f9b5874eed0a1ba.jpg)
This is important for you to find a way to calculate exactly the amount of tiles you will require. In the the usual days, tiles were merely used in rooms with a lot of moisture, traffic, rough and tumble. There is great freedom in the use of mosaic tiles in addition to most individuals who hire artists to design their house choose to work with these as their medium.
Tiling Over Plywood Subfloors JLC Online

How to Install Plywood Floor Tiles HGTV
Can You Lay Tile Directly Over a Plywood Subfloor? – Todayu0027s Homeowner
Can You Install Tile Over a Porch Floor? – Fine Homebuilding

Preparing Subfloor for Tile The Home Depot

Porcelain Floor Tile Over Plywood ⋆ 🌲 ThePlywood.com
How to Install Tile Backer Board on a Wood Subfloor (DIY)
How to Prepare a Subfloor for Tile Installation
How To Lay Floor Tiles RONA

How to install tile on plywood floor
How to Lay a Vinyl Tile Floor – This Old House
/cdn.vox-cdn.com/uploads/chorus_asset/file/19493864/howto_vinylfloor_05.jpg)
How to Lay Ceramic Tile over Plywood
Related articles:
- Vintage Bathroom Floor Tile Patterns
- Bathroom Floor Tile DIY
- Limestone Bathroom Floor Tiles
- Bathroom Floor Porcelain Tile
- Concrete Bathroom Floor Ideas
- White Bathroom Ceramic Tiles
- Bathroom Floor Baseboard
- Rustic Bathroom Flooring Ideas
- Bathroom Flooring Options
- Bamboo Bathroom Flooring Ideas
Tile flooring is a classic and attractive look for any home or business. Installing tile on plywood is a relatively simple process that can be completed in a few steps. Whether you’re installing tile for the first time or you’re an experienced professional, this guide will provide you with the necessary steps to make sure your tile flooring looks great and lasts for years to come.
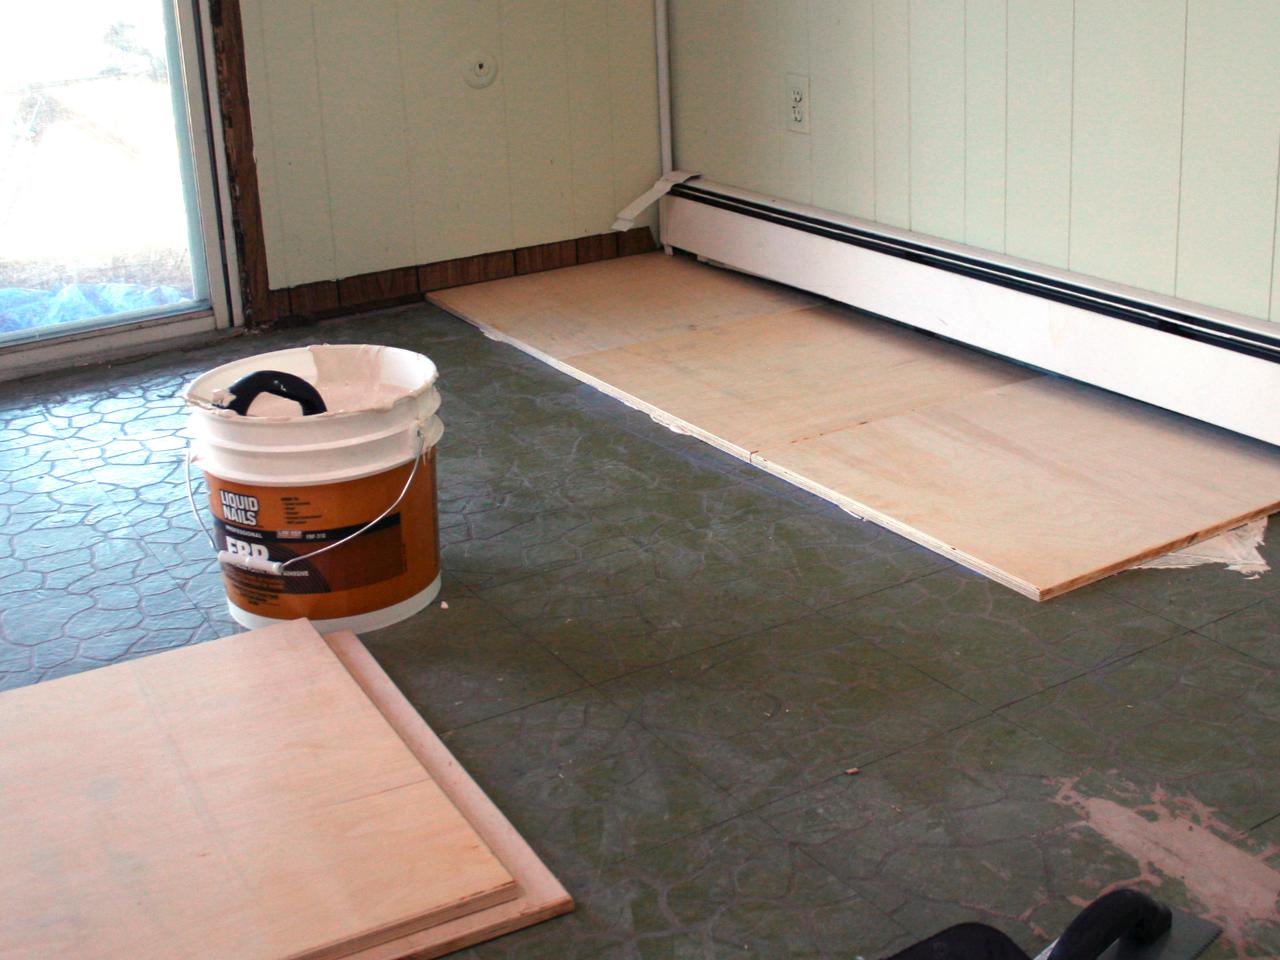
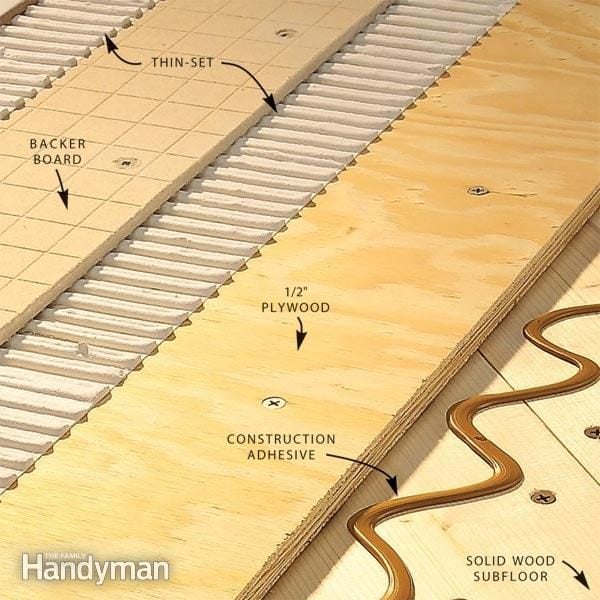
Preparing the Plywood Subfloor
The first step to installing tile on plywood is preparing the floor. Plywood should be at least 3/4 inch thick and must be completely smooth and level. If there are any imperfections in the plywood, they must be sanded down and filled in with wood putty before the tile is installed. Additionally, make sure to remove any staples, screws, nails, and other items that could interfere with the tiles.
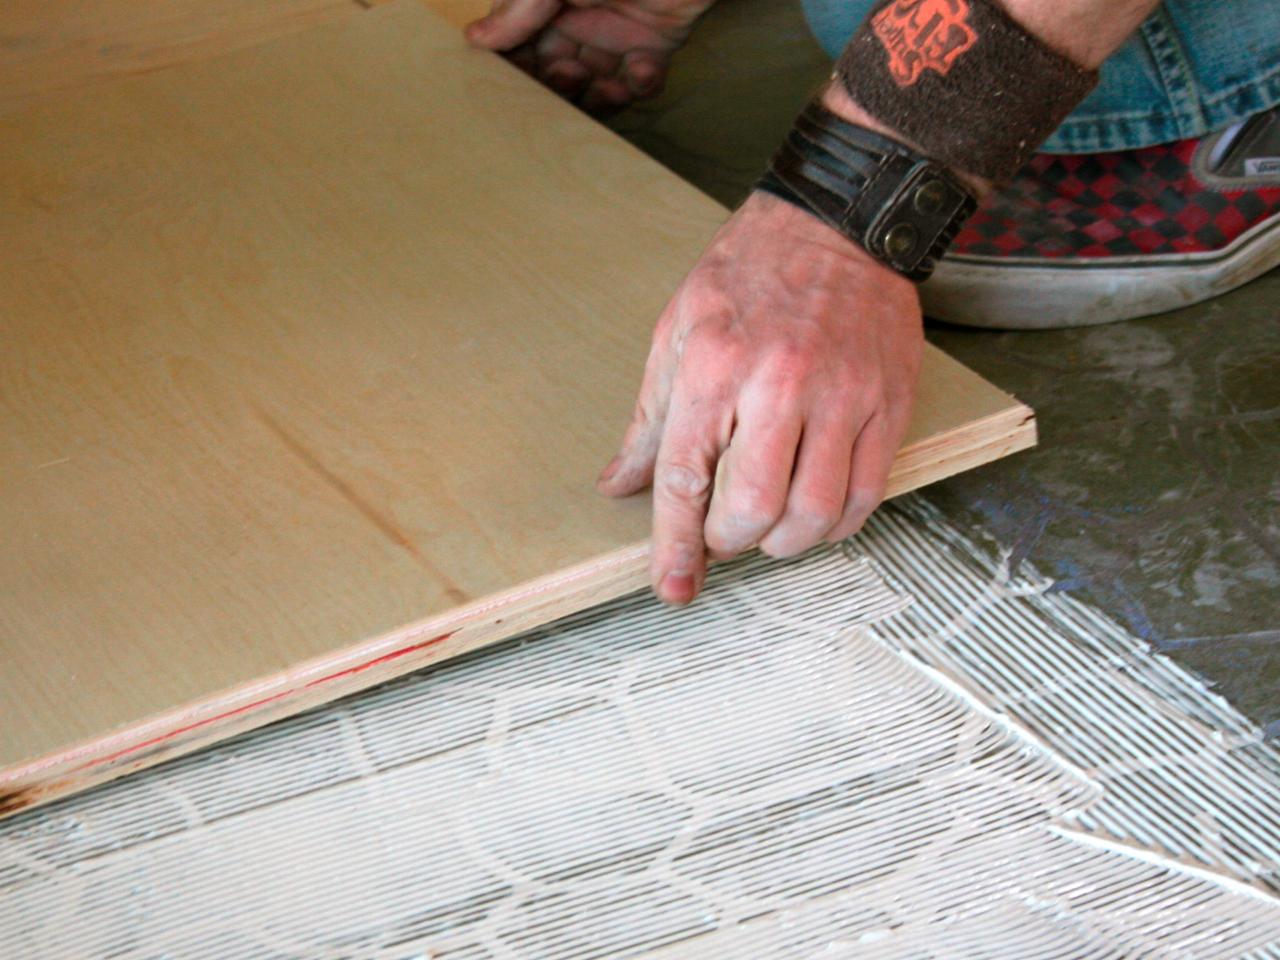
Applying Adhesive
Once the plywood subfloor has been properly prepared, it’s time to apply adhesive. Make sure to use an adhesive that is compatible with the type of tile you’ve selected. Spread the adhesive directly onto the plywood subfloor using a trowel. Cover the entire surface with a thin, even layer of adhesive and make sure to overlap any seams between pieces of plywood. Allow the adhesive to dry before continuing with installation.
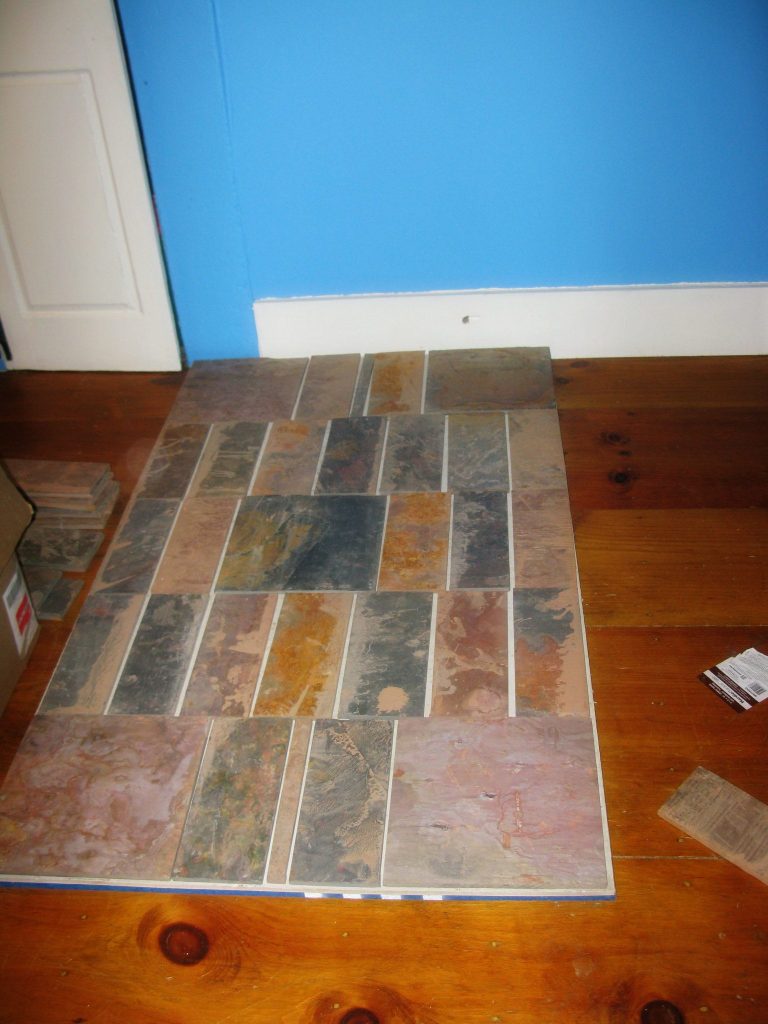
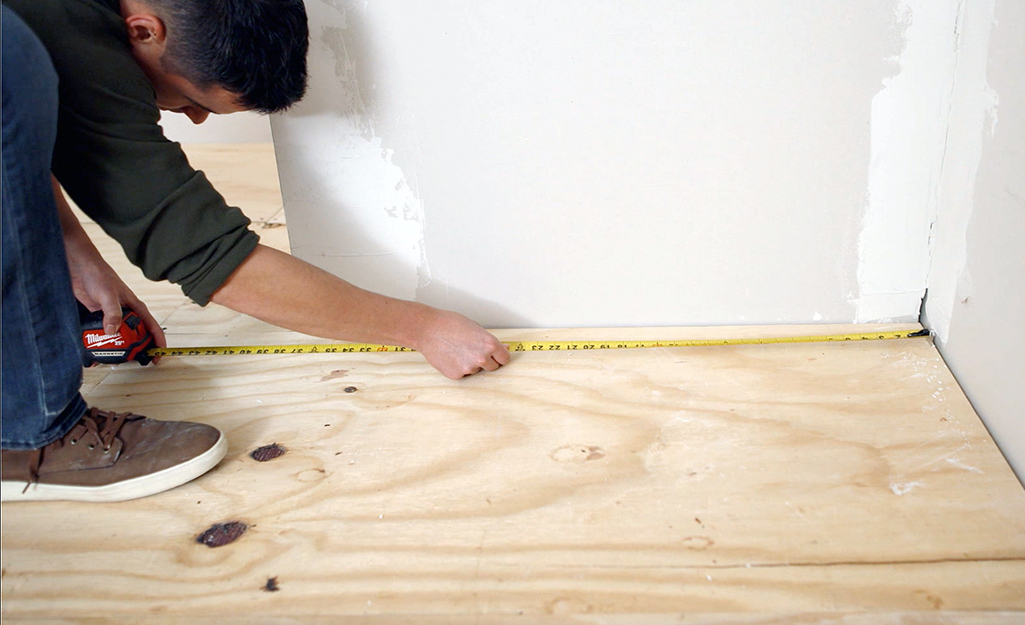
Laying Out the Tile
Before laying out the tile, make sure it’s been allowed to acclimate to room temperature and humidity for at least 48 hours. Start by laying out the tiles in their desired pattern without applying any adhesive or mortar. This will allow you to check whether or not they fit correctly and if they need to be cut down to size. If necessary, use a wet saw or tile nipper to trim down tiles before continuing with installation.
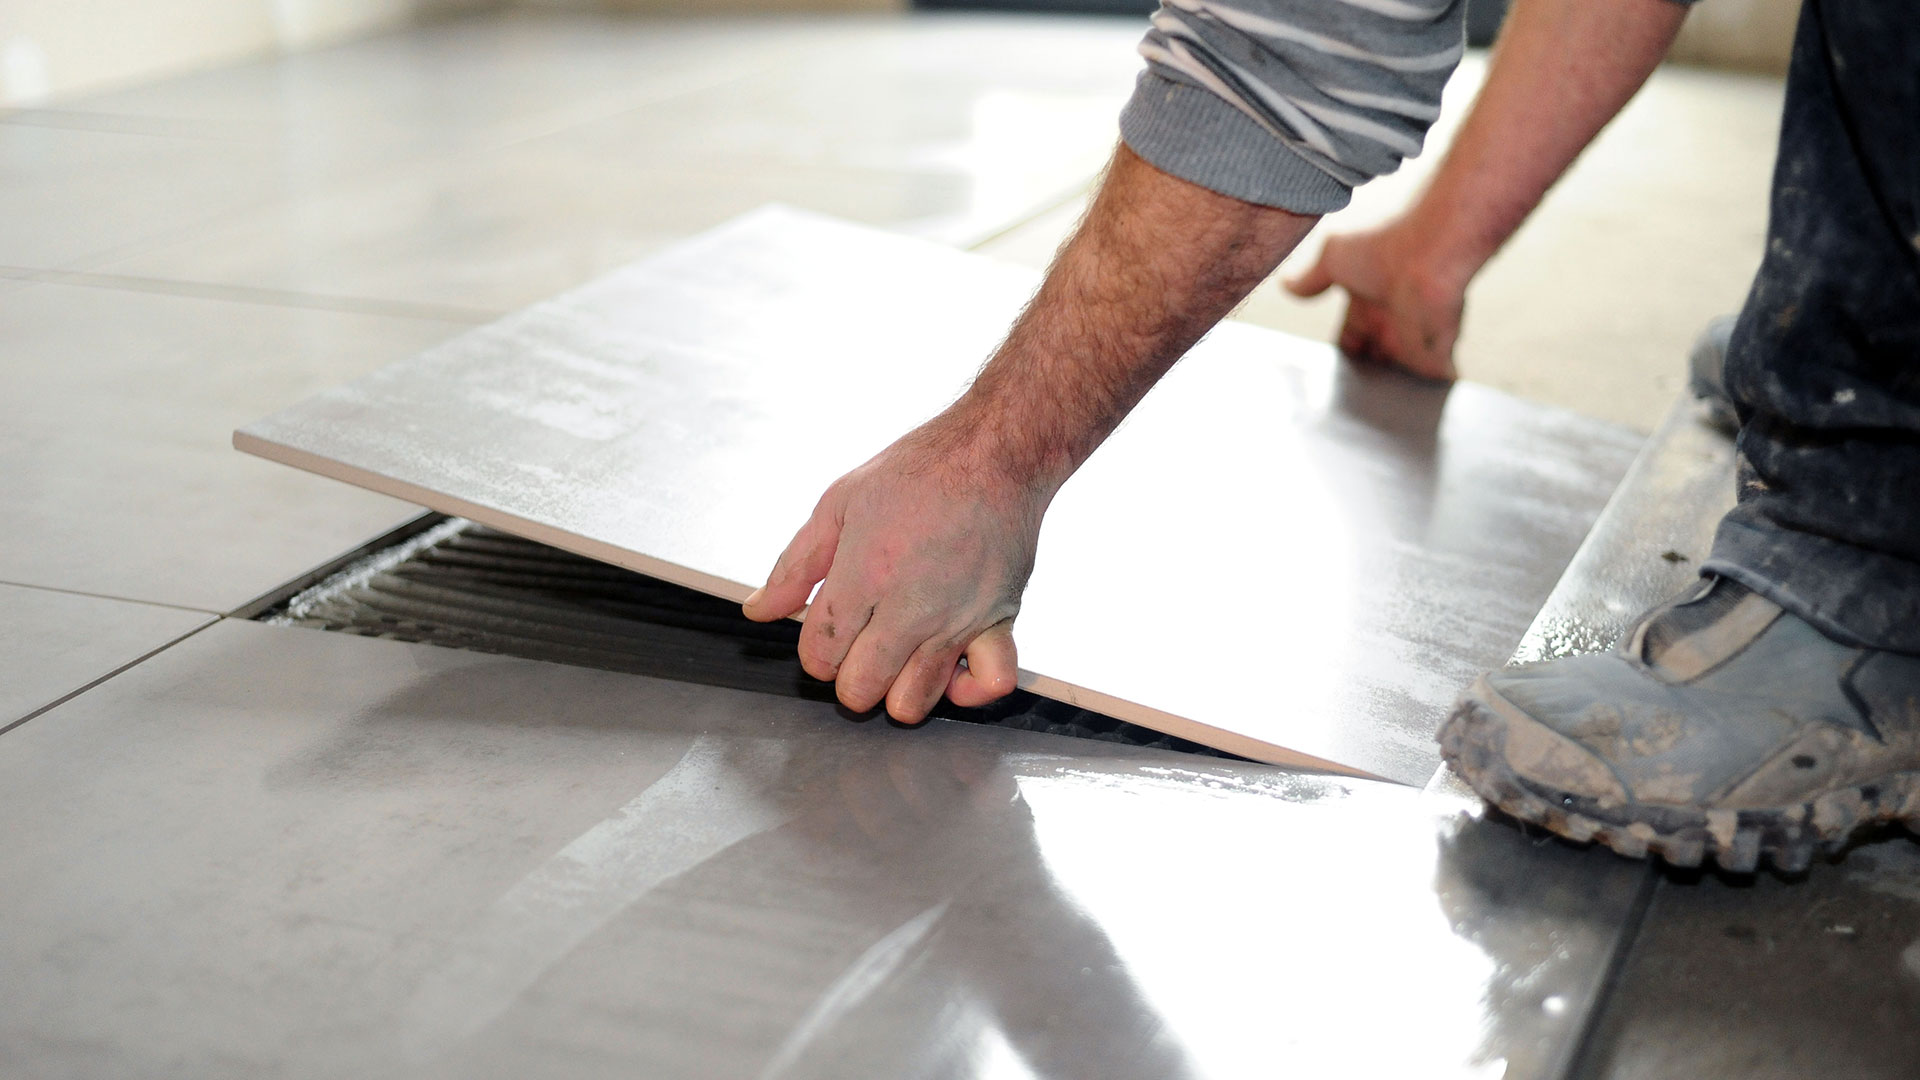
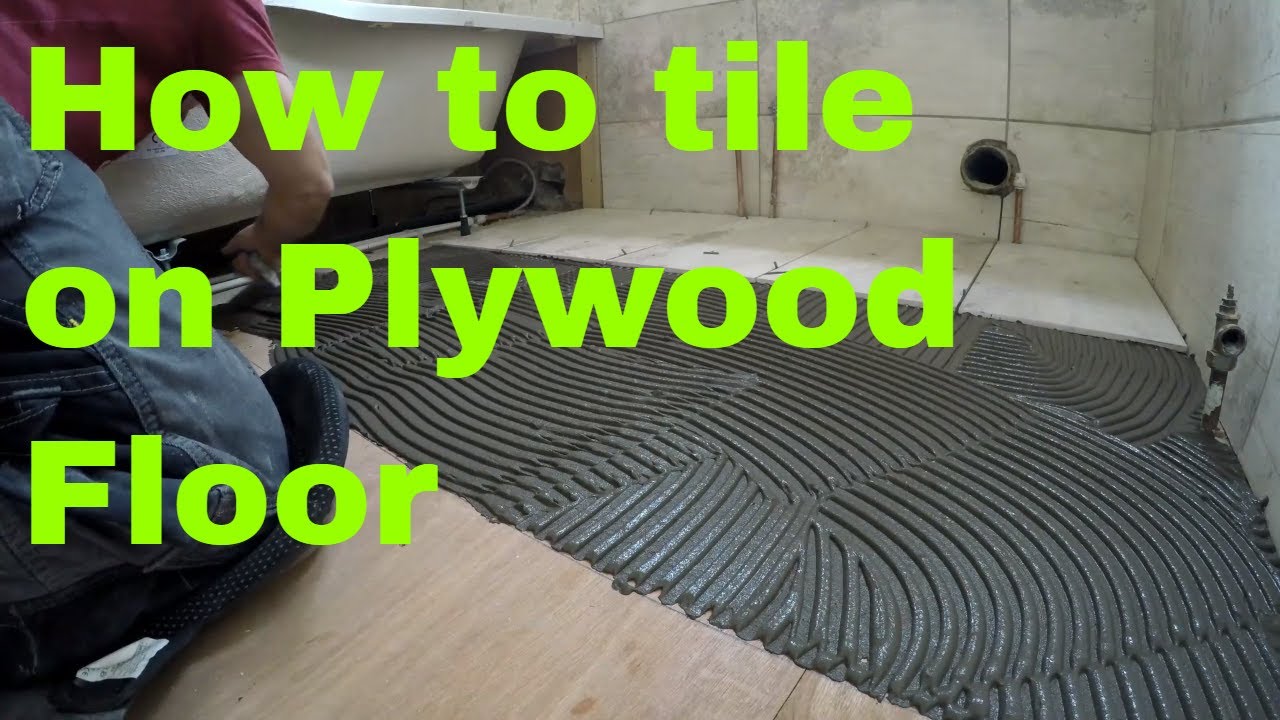
Applying Mortar and Setting Tiles
Once the tiles have been laid out, mix up a batch of thin-set mortar according to package instructions and spread a thin layer of mortar onto the plywood surface using a trowel. Start in one corner of the room and begin placing each tile into position, making sure to press them firmly into place. You can also use spacers between each tile if necessary. Once all of the tiles have been set into place, allow them to dry for at least 24 hours before continuing with grouting.
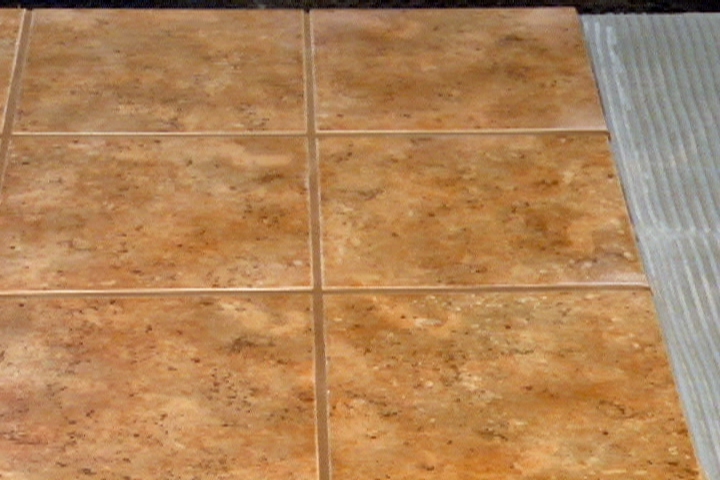
Grouting The Tile
Once the tiles have had time to fully dry and set, it’s time to grout them. Use a damp sponge to clean off any remaining mortar on all of the tiles before beginning grouting. Mix up a batch of grout according to package instructions and spread it over all of the tiles using a rubber grout float. Make sure to fill in all of the joints between each tile and wipe away any excess grout with a damp sponge before allowing it to dry for at least 24 hours.
Caring For Your Tile Floor
After your tile has been installed, it’s important that you properly care for it in order for it to last for years to come. Make sure that you regularly sweep and mop your tile floors in order to keep them free from dirt and debris that can cause damage over time. Additionally, avoid using abrasive cleaners on your floors as this can strip away sealants or cause scratches on your tiles.
FAQs
Q: How thick should my plywood subfloor be?
A: Plywood subfloor should be at least 3/4 inch thick in order for tile installation to be successful.
Q: How long should I let my adhesive dry before continuing?
A: Allow your adhesive to fully dry before continuing with installation which could take anywhere from 30 minutes to several hours depending on environmental factors such as temperature and humidity levels.
Q: How long should I wait before grouting my tiles?
A: Allow your tiles to fully set into place before grouting which could take anywhere from 24-48 hours depending on conditions such as temperature and humidity levels.