Cork takes heat absorption to a whole new level, and while hardwood floors can be noisy to hike on, cork floors are much quieter. Nonetheless, this is exactly the opposite of exactly how cork is harvested. We suggest you see a showroom which showcases cork as the flooring model of theirs. We would love to present one to a flooring solution which we think will boosts the homes decor of yours and be a fantastic investment.
Here are Images about Install Cork Flooring Over Ceramic Tile
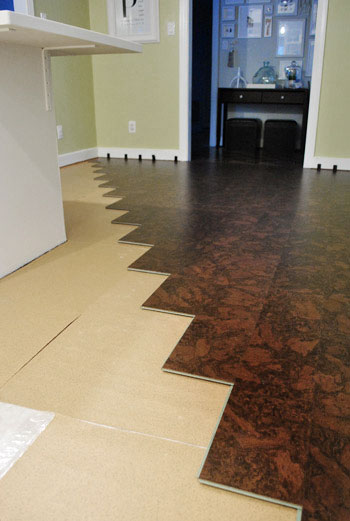
Install Cork Flooring Over Ceramic Tile
/cdn.vox-cdn.com/uploads/chorus_asset/file/22873091/H1006HANDBOOK01.jpg)
This particular removal process actually leaves the cork oak tree unharmed as well as in a position to re grow the bark of its for later harvests. The full production process is ecologically renewable conserving the environmental pollutants of oxygen from the trees inside the functioning. Actually, majority of the countries which produce cork have rigid laws protecting these trees and also the harvesting procedure.
Cork Flooring 101: Cost, Types, u0026 Installation – This Old House
:no_upscale()/cdn.vox-cdn.com/uploads/chorus_asset/file/23088021/0421_NB_All_About_Cork_Floors_Cork_flooring_iStock_950010876.jpg)
The cork tiles are more economical compared to tile floors. This permits it to soak up impacts, shocks and also allows cork to compress and decompress while cushioning your feet and joints if you stand on it. That is right; the wood-based flooring of yours will be green and sustainable for the foreseeable future. Moreover you are able to include distinct cork tiles for a distinct pattern.
Images Related to Install Cork Flooring Over Ceramic Tile
Cork Floor Install – How to install a cork glue down floor.
Using Cork Floor Tiles in Your Kitchen
/cork-flooring-in-unfurnished-new-home-647206431-57e7c0c95f9b586c3504ca07.jpg)
How to Install Cork Tile Flooring (DIY) Family Handyman

Cork tiles or Floating Cork Flooring
How to Install Cork Flooring – (Tips and Guidelines For Your DIY

Cork Flooring Installation – How to Do It DIY Home Improvement
Cork Flooring Installation: PRO or DIY?Learning Center

Can Cork Flooring Be Installed Over Ceramic Tile – SeniorCare2Share
How To Install A Floating Cork Floor Young House Love
Advantages Of A Cork Floating Floor Over Glue-Down Cork Tiles

What Type of Flooring Can You Put Over Ceramic Tiles?

Cork Flooring Installation: PRO or DIY?Learning Center

Related articles:
[catlist id=8]
Install Cork Flooring Over Ceramic Tile
Introduction:
Cork flooring has gained popularity in recent years due to its eco-friendly nature, durability, and unique aesthetic appeal. If you have ceramic tile flooring and are considering a change, installing cork flooring over it can be a great option. This article will guide you through the process of installing cork flooring over ceramic tile, providing detailed instructions and answering frequently asked questions to help you achieve a successful installation.
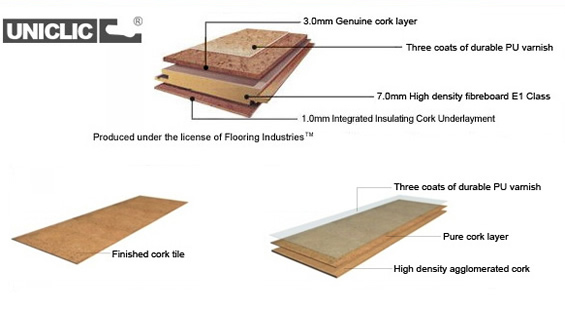
Benefits of Cork Flooring:
Before delving into the installation process, let’s briefly discuss the benefits of cork flooring. Cork is a sustainable material derived from the bark of the cork oak tree. It is highly resilient, which means it can withstand heavy foot traffic without losing its shape or texture. Cork also possesses natural thermal and acoustic insulation properties, making it an excellent choice for noise reduction and energy efficiency in your home. Additionally, cork floors are soft underfoot, providing comfort and reducing strain on joints.
Preparing the Ceramic Tile Surface:
To ensure a successful installation of cork flooring over ceramic tile, proper preparation is crucial. Follow these steps to prepare the surface:
1. Clean the Ceramic Tile: Thoroughly clean the ceramic tile surface using a mild detergent and warm water solution. Remove any dirt, grease, or grime that might hinder adhesion between the tiles and the cork floor.
2. Sand the Ceramic Tile: Lightly sand the ceramic tile surface to create a rough texture that promotes better adhesion. Use fine-grit sandpaper and make sure to remove any dust afterward with a vacuum or damp cloth.
3. Fill Grout Lines: Check for any cracked or deteriorated grout lines on your ceramic tile floor. If necessary, repair these areas using a grout repair kit or by replacing damaged grout with new grout. Allow sufficient time for the repairs to dry before proceeding.
4. Level Uneven Tiles: Inspect the ceramic tiles for any unevenness or bulges. If you find any, use a leveling compound to even out the surface. Follow the manufacturer’s instructions for mixing and applying the compound, ensuring a smooth and level base for the cork flooring.
Applying Adhesive and Installing Cork Flooring:
Once the ceramic tile surface is properly prepared, it’s time to apply adhesive and install the cork flooring. Follow these steps for a successful installation:
1. Choose the Right Adhesive: Select a high-quality adhesive specifically designed for cork flooring installation over ceramic tile. Consult with a professional or read the manufacturer’s recommendations to ensure compatibility with both materials.
2. Prepare the Adhesive: Mix the adhesive according to the manufacturer’s instructions. Use a clean bucket and paddle mixer to achieve a consistent texture. Let the mixed adhesive sit for a few minutes to activate its bonding properties.
3. Apply Adhesive on Ceramic Tile: Using a notched trowel, spread the adhesive evenly over a small section of the ceramic tile surface. Start from one corner of the room and work your way towards an exit point, ensuring consistent coverage.
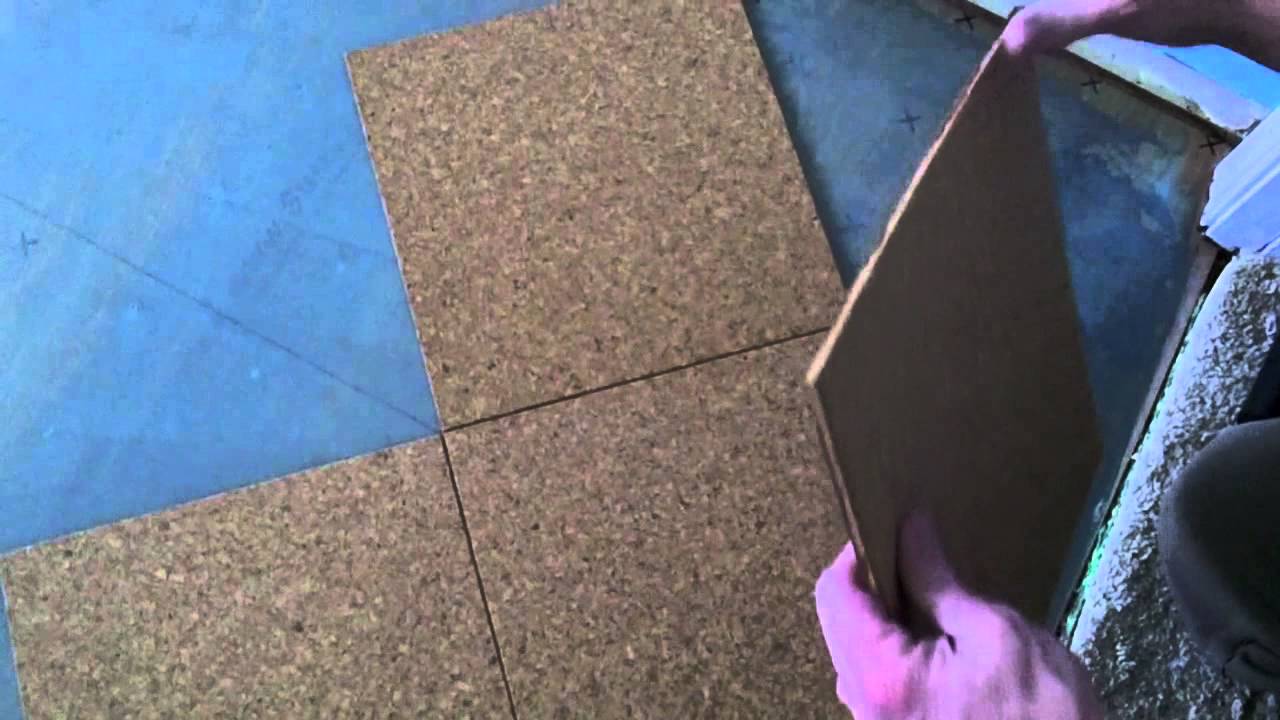
4. Install Cork Tiles: Carefully lay each cork tile onto the adhesive-covered ceramic tile surface, aligning them precisely. Apply light pressure on each tile to ensure proper adhesion. Avoid sliding or shifting tiles once they are in place.
5. Cut Tiles as Needed: Measure and mark any areas where full tiles cannot fit, such as corners or edges near walls or fixtures. Use a sharp utility knife or cork cutter to cut tiles accurately according to your measurements.
6. Continue Installation: Continue applying adhesive and installing cork tiles in small sections, following the same process as steps 3-5. Work your way across the entire ceramic tile surface until all areas are covered with cork flooring.
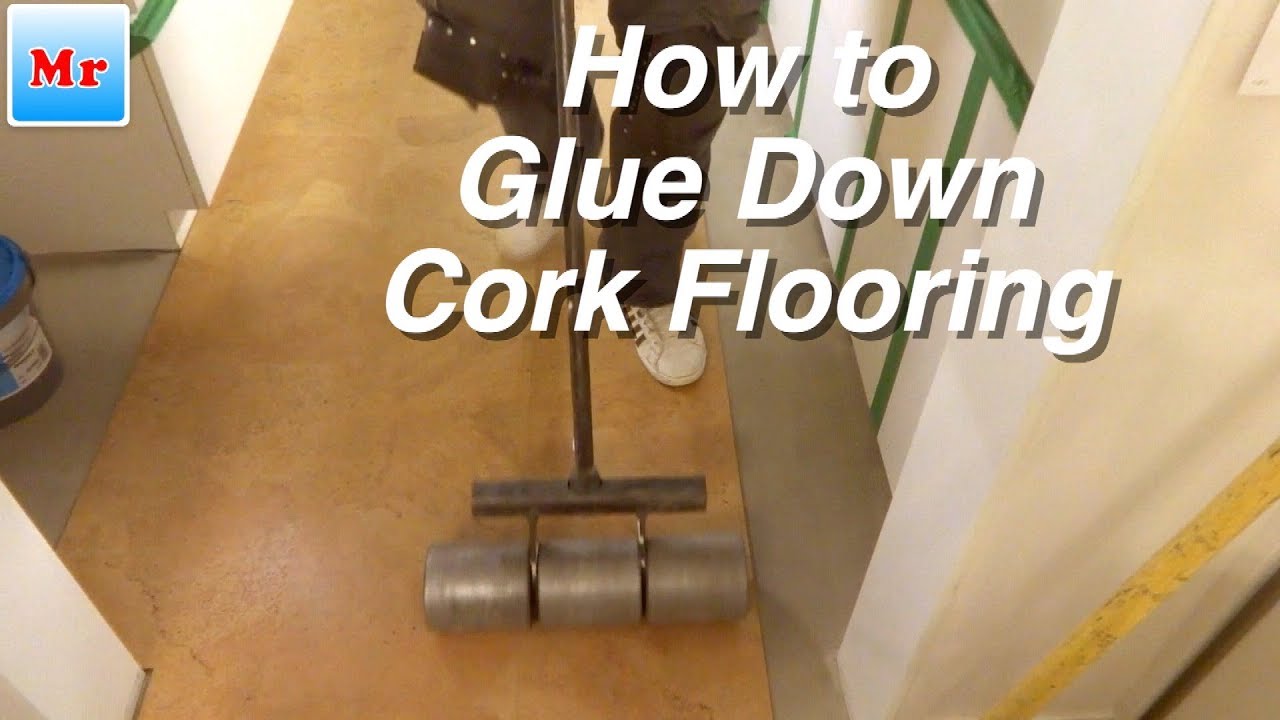
7. Allow Adhesive to Cure: After completing the installation, allow the adhesive to cure according to the manufacturer’s instructions. This typically takes 24-48 hours. Avoid walking on the newly installed cork flooring during this time.
8. Apply a Protective Finish: Once the adhesive has cured, apply a protective finish or sealant to the cork flooring. This will help protect it from stains, scratches, and moisture damage. Follow the manufacturer’s instructions for application and drying times.
9. Clean and Maintain Cork Flooring: Regularly clean and maintain your cork flooring to keep it in good condition. Use a pH-neutral cleaner and avoid excessive moisture. Follow any additional care instructions provided by the manufacturer.
By following these steps for proper preparation and installation, you can successfully install cork flooring over ceramic tile and enjoy its many benefits in your space. Some additional tips for a successful installation:
– Make sure the ceramic tile surface is clean and free of any debris before applying the adhesive. This will ensure proper adhesion.
– Use a level or straightedge to check that the ceramic tile surface is even and flat. If there are any high or low spots, use a leveling compound to create a smooth surface.
– Allow the adhesive to fully dry and cure before applying any weight or furniture on the cork flooring. This will prevent any shifting or damage to the tiles.
– When cutting tiles, always measure twice and cut once to ensure accuracy. It’s better to trim a tile slightly too small than too big, as you can always add a small amount of adhesive to fill in any gaps.
– Consider using a rolling pin or floor roller to apply even pressure on the cork tiles after installation. This will help ensure proper adhesion and eliminate any air pockets.
Remember to always follow the manufacturer’s instructions for both the adhesive and cork flooring for the best results. Following these steps and additional tips will help ensure a successful installation of cork flooring over ceramic tile. It is important to read and follow the manufacturer’s instructions for both the adhesive and cork flooring to achieve the best results.