As one of probably the busiest rooms in the residence, it has to stand up to its fair share of deterioration. Cut different colored vinyl into small squares or maybe rectangles to make nice borders for the bathroom floors. If you'd like cork flooring for the bath room of yours, you will find numerous prefinished alternatives that are water resistant as well as ready to stand up to heavy foot traffic.
Here are Images about How To Tile A Bathroom Floor On Plywood
How To Tile A Bathroom Floor On Plywood

Nonetheless, vinyl can be used in creative means to provide the bath room of yours great looks as well as style. No matter if you are contemplating luxury bath room designs or a simpler one, you need to take note that the flooring substance is dependent on the level of water spillage that occurs, the period of time you are able to devote for cleansing, along with the longevity of the material.
How to Prepare a Subfloor for Tile Installation
This particular sort of floor material is able to include many unique textures as well as styles which go along with virtually any interior design scheme. Wood responds to temperature extremes, cannot stop itself from vinyl as well as water damage is just not a very organic or desirable flooring choice. That's why it is surely smart to select a professional rather than striving to set up the flooring yourself.
Images Related to How To Tile A Bathroom Floor On Plywood
How to Lay Tile on a Plywood Subfloor
/Tile-install-GettyImages-183066355-588a1cb15f9b5874eed0a1ba.jpg)
Can You Lay Tile Directly Over a Plywood Subfloor? – Todayu0027s Homeowner
How to do Tiling on wooden floor 18 mm plywood board
How to install tile on plywood floor
How to Install Plywood Floor Tiles HGTV
Bathroom Remodeling Tips: Choosing a Subfloor Material
tile over subfloor Plywood flooring, Tile floor, Plywood subfloor

tiling – can you glue tile to plywood? – Home Improvement Stack
How to Install Cement Board on a Floor (DIY) Family Handyman
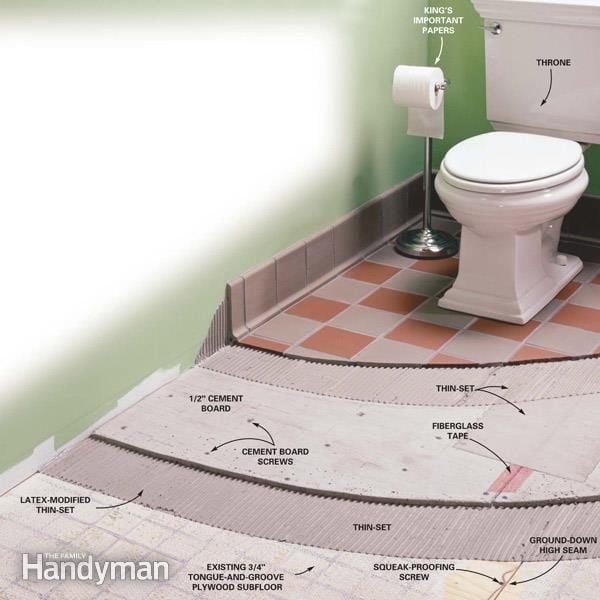
How to Level Old Plywood Floor Before Laying Ditra and Tile DIY
How to Tile a Bathroom, Shower Walls, Floor, Materials (100 pics
Porcelain Floor Tile Over Plywood ⋆ 🌲 ThePlywood.com
Related articles:
- Concrete Bathroom Floor Paint
- Bathroom Floor Edging
- Bathroom Flooring Alternatives
- Bathroom Safety Flooring
- Bathroom Floor Tiles Brown
- Floor Tile Design Ideas For Small Bathrooms
- Bathroom Wall Floor Tile Combinations
- Black And White Patterned Bathroom Floor Tiles
- What Kind Of Flooring For Bathroom
- Dupont Laminate Flooring Bathroom
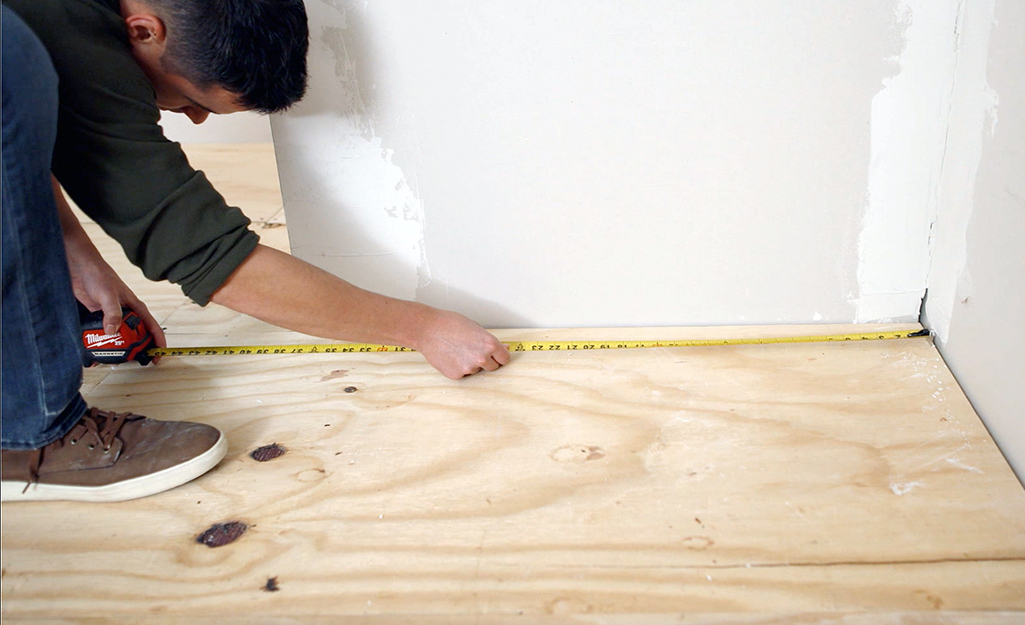
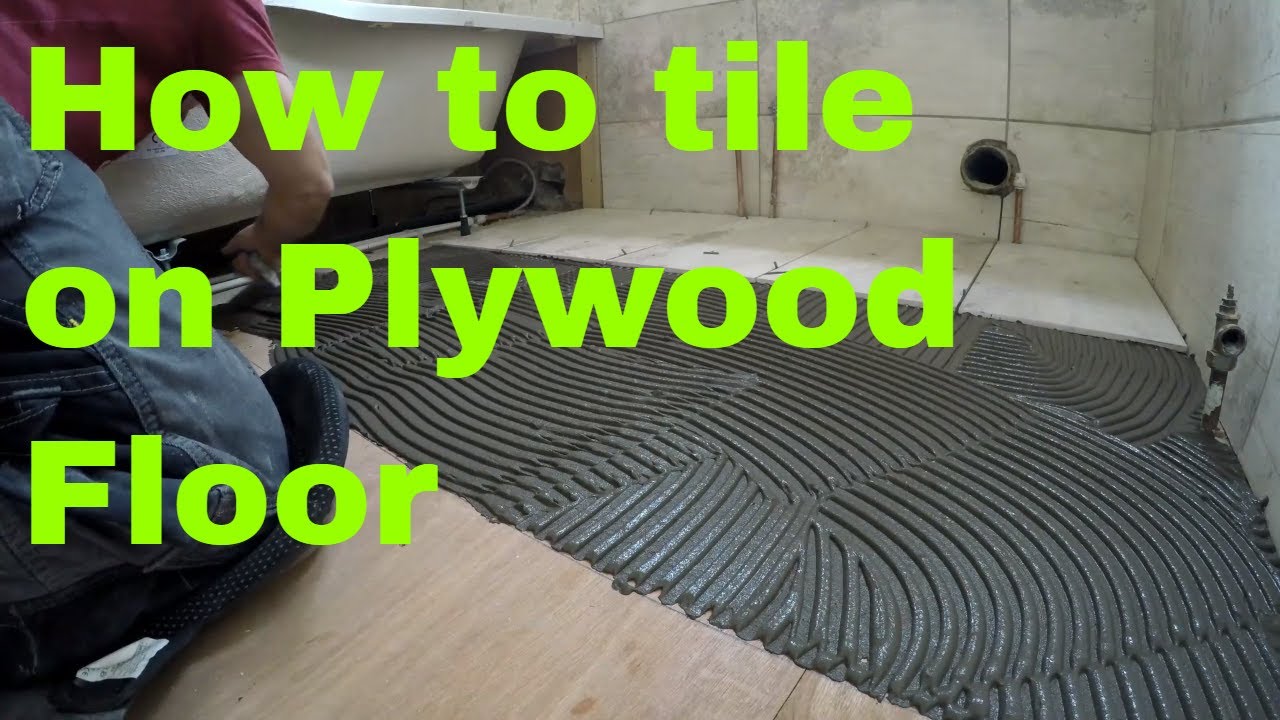
Tiling a bathroom floor on plywood is a great way to give your bathroom a fresh and updated look. However, it’s important to follow the proper steps to ensure that the tiles adhere correctly and last for years to come. In this comprehensive guide, we will walk you through the process of tiling a bathroom floor on plywood, from preparation to grouting.
Preparation:
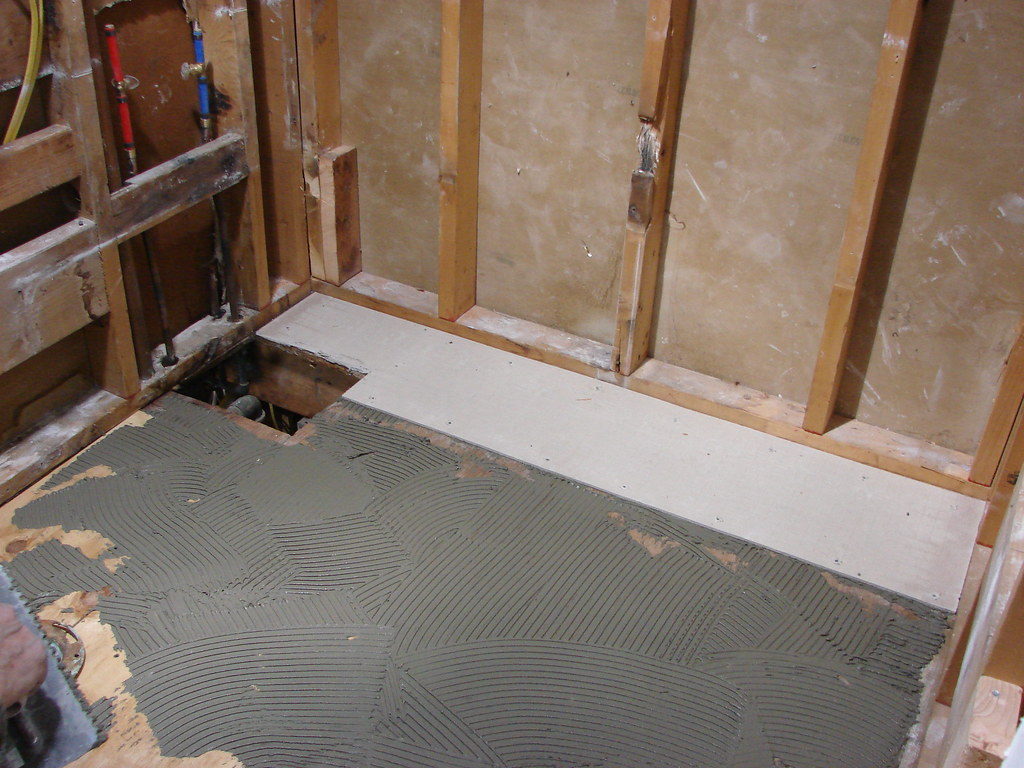
Before you begin tiling, it’s important to make sure that your plywood subfloor is in good condition. Check for any signs of damage, such as warping or rotting, and replace any damaged sections before proceeding. Next, make sure the subfloor is clean and free of any debris or dust. Sweep or vacuum the floor thoroughly before moving on to the next step.
FAQs:
Q: Can I tile directly onto plywood?
A: Yes, you can tile directly onto plywood as long as the surface is properly prepared and in good condition. However, it’s recommended to use a layer of cement backer board over the plywood to provide added stability and prevent cracking.
Priming:
After cleaning the subfloor, apply a coat of primer to help the mortar adhere to the plywood more effectively. This step will also help prevent moisture from seeping into the wood and causing damage over time. Allow the primer to dry completely before moving on to the next step.
FAQs:
Q: Do I need to prime plywood before tiling?
A: While priming is not always necessary when tiling on plywood, it can help improve adhesion and prevent moisture damage. It’s recommended to prime the plywood before tiling for best results.
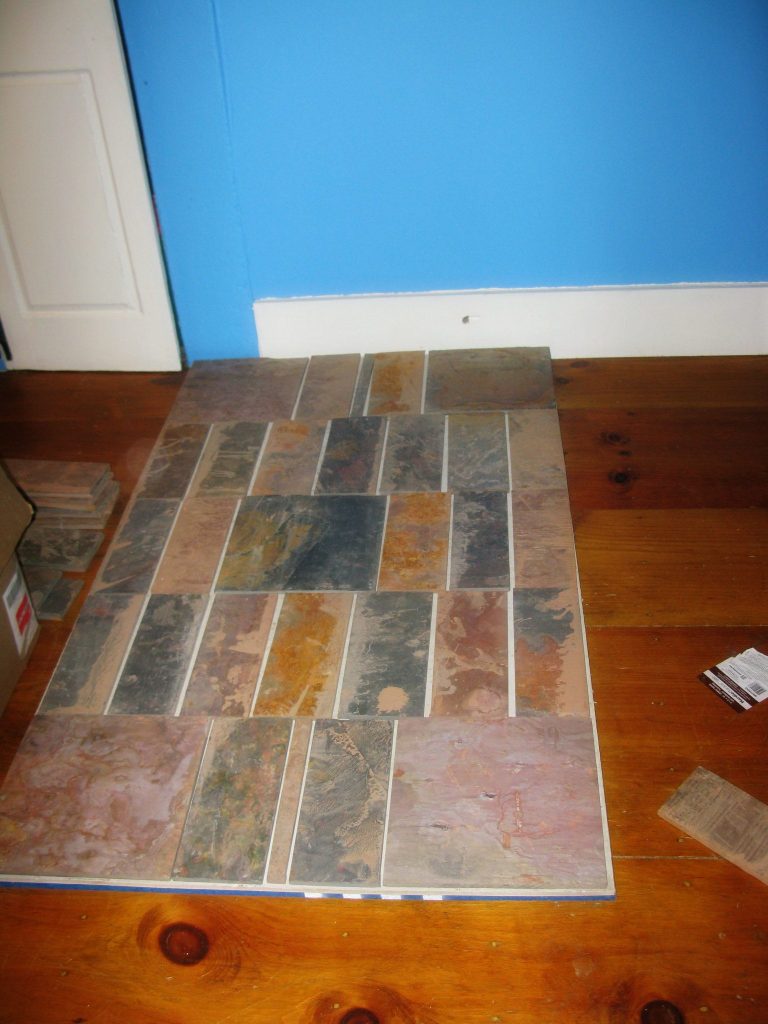
Layout:
Once the primer has dried, it’s time to plan out the layout of your tiles. Start by finding the center point of the room and marking it with a chalk line. This will help ensure that your tiles are laid out evenly and symmetrically. Begin dry-fitting your tiles from the center point outward, making any necessary cuts at the edges of the room.
FAQs:
Q: How do I find the center point of my bathroom floor?
A: To find the center point of your bathroom floor, measure the length and width of the room and mark the midpoint on each wall. Where these two points intersect is the center point of your floor.
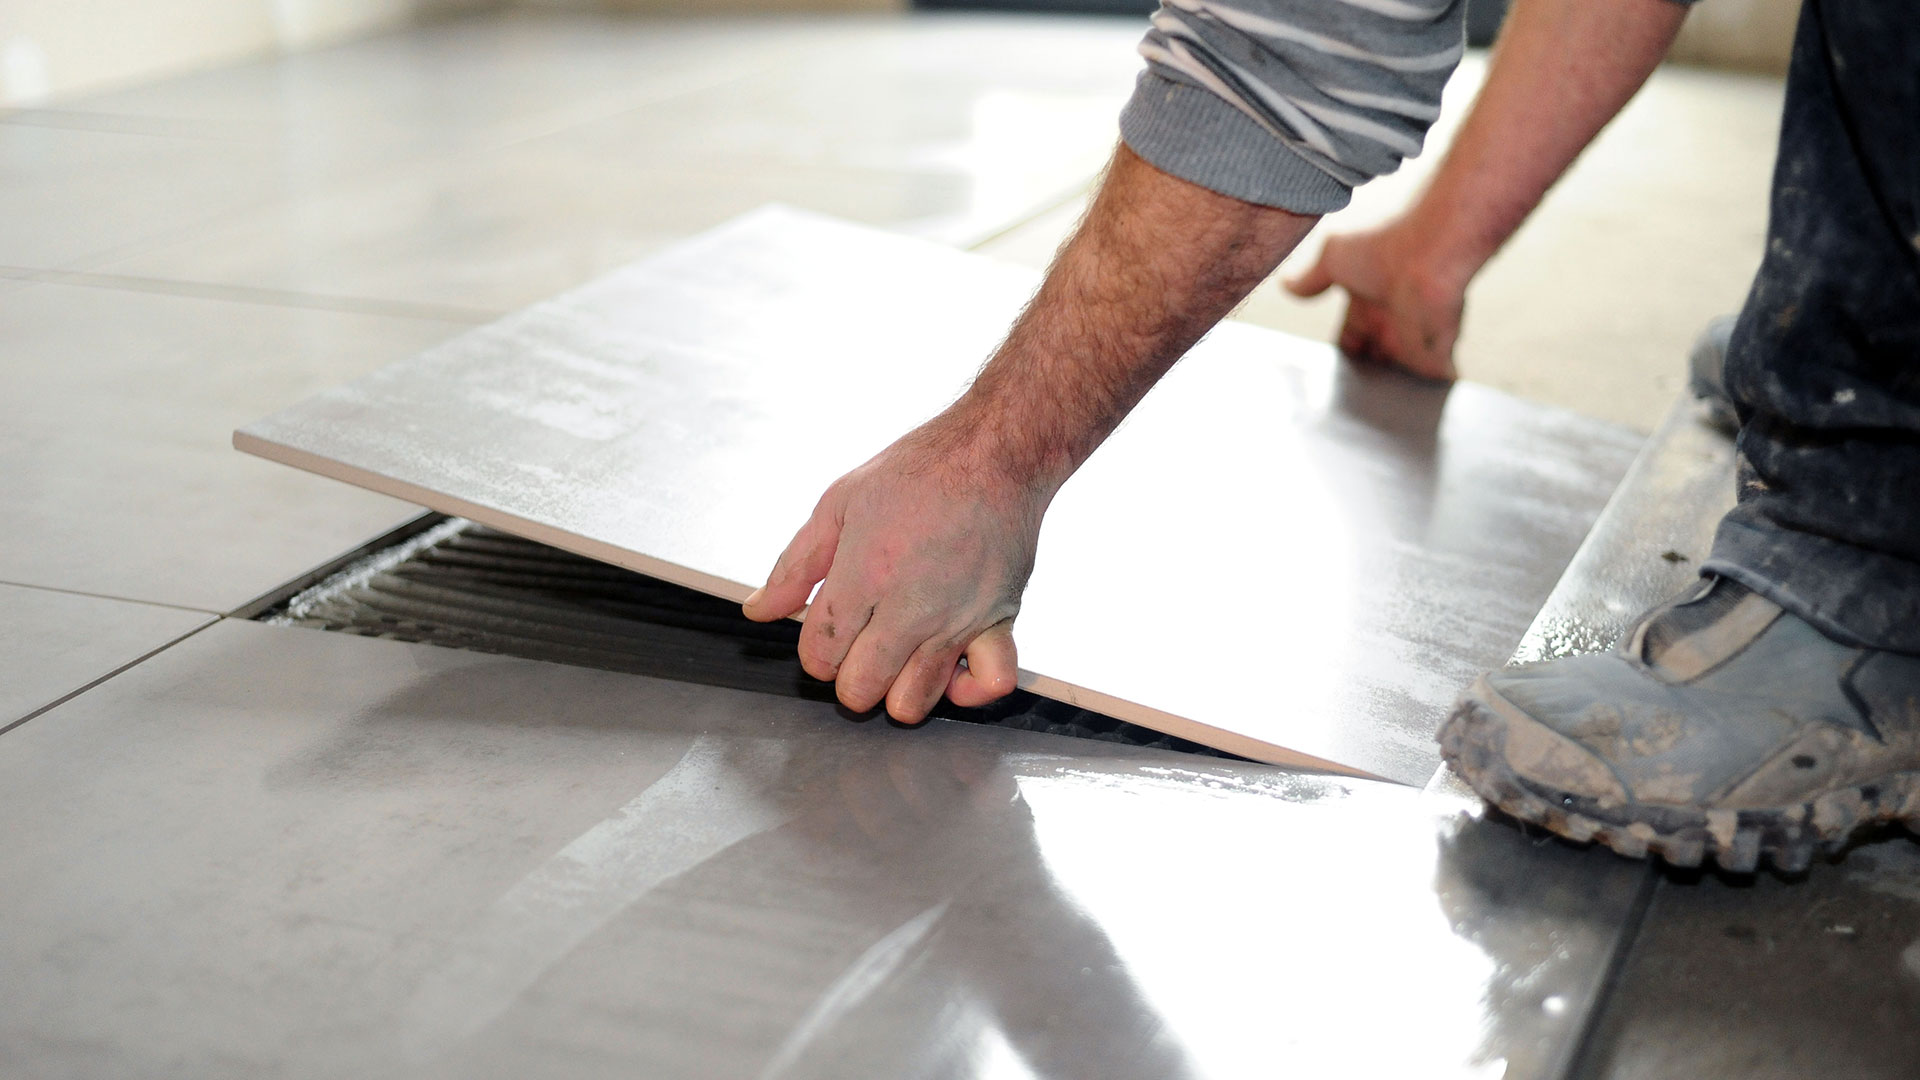
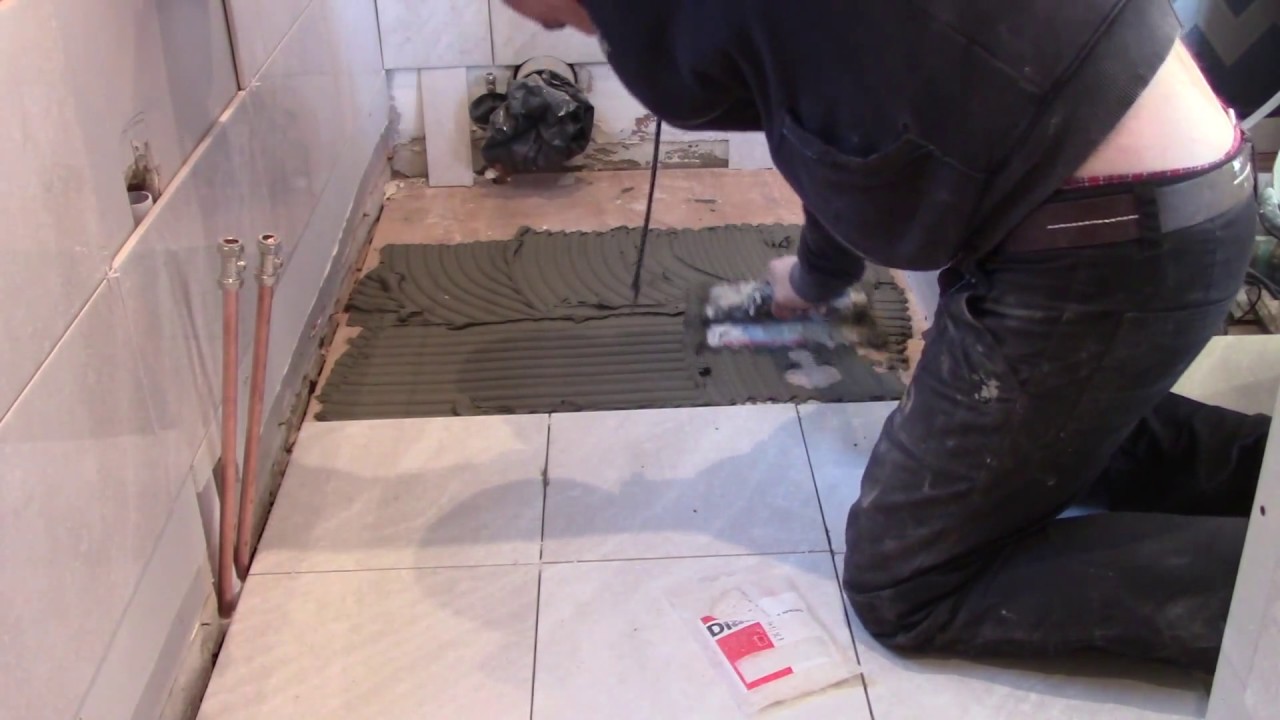
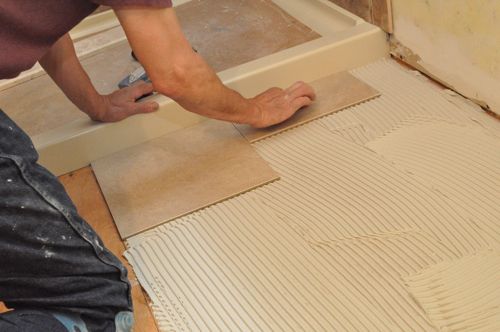
Setting the Tiles:
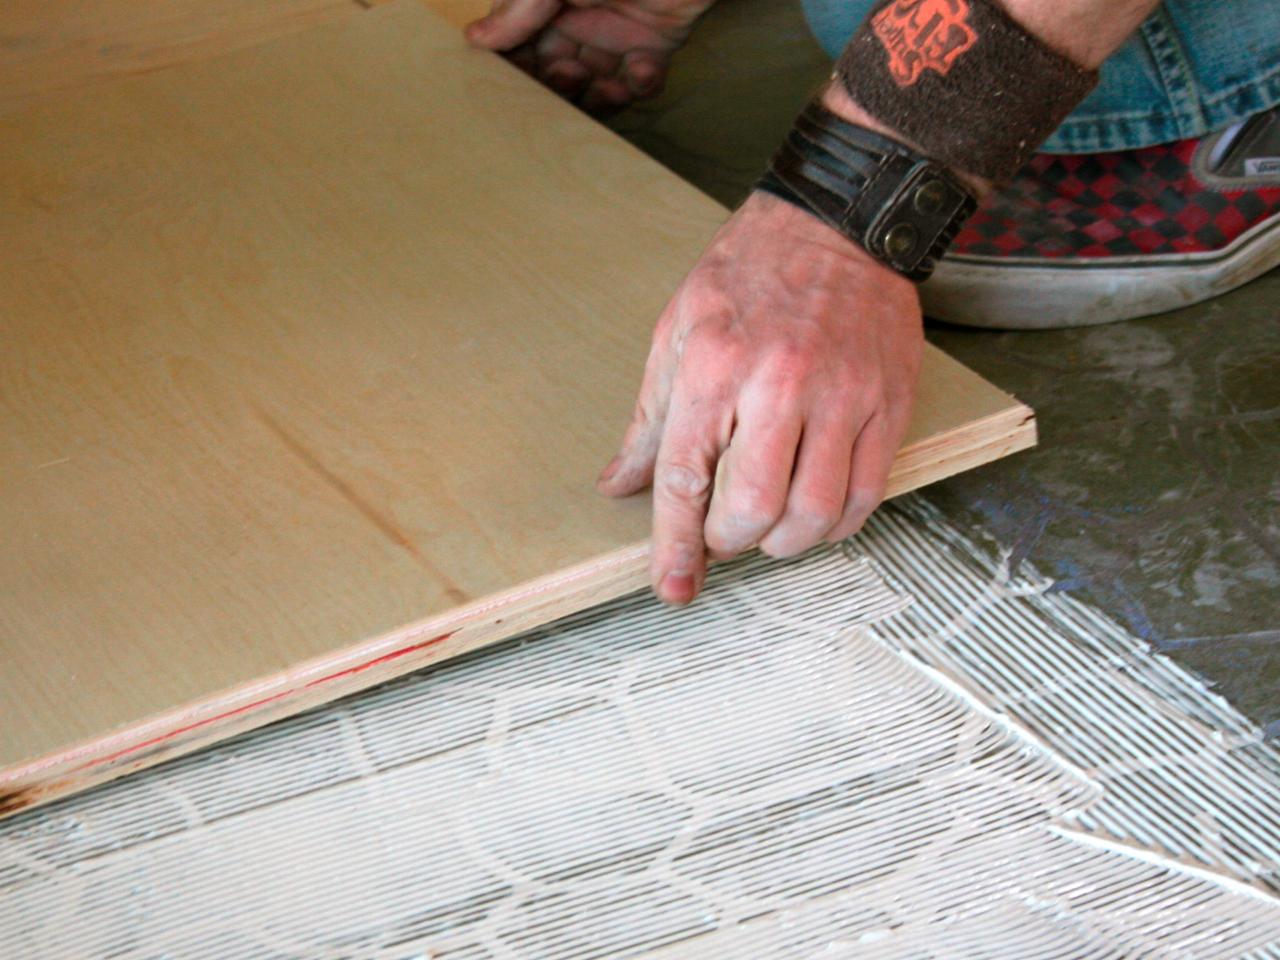
Once you have laid out your tiles, it’s time to start setting them in place. Mix thin-set mortar according to manufacturer instructions and apply a layer to a small section of the floor using a notched trowel. Press each tile into place firmly, making sure they are level and evenly spaced. Continue this process until all tiles are set.
FAQs:
Q: How do I ensure my tiles are level?
A: To ensure your tiles are level, use a tile leveling system or a straight edge to check for any uneven areas as you set each tile in place. Adjust as needed before moving on to the next tile.
Grouting:
After all tiles have been set and allowed to dry according to manufacturer instructions, it’s time to grout the joints between them. Mix grout according to manufacturer instructions and apply it with a grout float, pressing it into all joints at a 45-degree angle. Wipe away excess grout with a damp sponge before it dries completely.
FAQs:
Q: How long should I wait before grouting my tiles?
A: It’s recommended to wait at least 24 hours after setting your tiles before grouting them . This allows the mortar to fully cure and set before applying the grout.
Sealing:
Once the grout has dried completely, typically after 24-48 hours, it’s important to seal the grout to protect it from staining and moisture damage. Apply a grout sealer according to manufacturer instructions, making sure to cover all grout lines thoroughly. Allow the sealer to dry completely before using the tiled surface.
FAQs:
Q: How often should I reseal my grout?
A: Grout should be resealed every 1-2 years to maintain its protection against stains and moisture. However, high-traffic areas may require more frequent resealing.
Finishing Touches:
Once the grout sealer has dried, your tiled floor is ready for use. Install any necessary trim or transition pieces around the edges of the room to complete the look and provide a finished appearance. Regularly clean and maintain your tiled floor to keep it looking its best for years to come.
By following these steps and tips, you can successfully tile a plywood subfloor in your bathroom or any other room in your home. With proper preparation and attention to detail, you can create a beautiful and durable tiled floor that will enhance the overall look and functionality of your space. If you have any additional questions or concerns, it’s always best to consult with a professional tile installer or visit your local home improvement store for guidance. Happy tiling! Q: Can I tile directly onto plywood without using cement board?
A: While it is possible to tile directly onto plywood, it is generally recommended to use a cement backer board as a substrate for tiling in wet areas such as bathrooms. Cement backer board provides a more stable and moisture-resistant surface for the tiles to adhere to, reducing the risk of damage over time.
Q: How do I cut tiles to fit around obstacles or corners?
A: To cut tiles to fit around obstacles or corners, use a tile cutter or a wet saw for straight cuts, and tile nippers or a tile file for curved or irregular cuts. Measure the area that needs to be cut and mark the tile accordingly before cutting. Always wear safety goggles and gloves when cutting tiles to prevent injury.
Q: Can I install heated flooring under my tiled floor?
A: Yes, you can install heated flooring under your tiled floor for added comfort and warmth. Electric radiant heat mats or cables can be installed on top of the plywood subfloor before laying down the tiles. Make sure to follow manufacturer instructions carefully when installing heated flooring to ensure proper function and safety.
Q: How do I clean and maintain my tiled floor?
A: To clean and maintain your tiled floor, regularly sweep or vacuum to remove dirt and debris. Use a mild detergent and water solution to mop the floor periodically, avoiding harsh chemicals that may damage the grout or tiles. Avoid using abrasive cleaning tools that could scratch the tiles. Additionally, reseal the grout every 1-2 years to protect it from stains and moisture damage.
Q: What should I do if my tiled floor becomes damaged or cracked?
A: If your tiled floor becomes damaged or cracked, it’s best to consult with a professional tile installer to assess the extent of the damage and determine the best course of action for repair. Depending on the severity of the damage, you may need to replace individual tiles or sections of the floor to restore its appearance and functionality.