If you go for ceramic tile you might want to give some thought to an area rug for if you step out of the shower. Take your time in shopping for floors for the bath room of yours. If you are looking for a thing different go in for metal tiles. The 2 best options for the bathroom floors are tile vinyl or sheet and ceramic tiles.
Here are Images about How To Lay Bathroom Floor Tiles Vinyl
How To Lay Bathroom Floor Tiles Vinyl

Pebbled flooring give the bathroom of yours a fantastic Aztec era sort of look. Wall hung bathroom furniture is an excellent strategy to this particular conundrum, combining the practicality of equipped bathroom storage with the beauty of a totally clear bathroom floor. Bathroom flooring surfaces are usually completed in ceramic or perhaps vinyl tiles. Add some potted plants to obtain an all natural and welcoming ambiance.
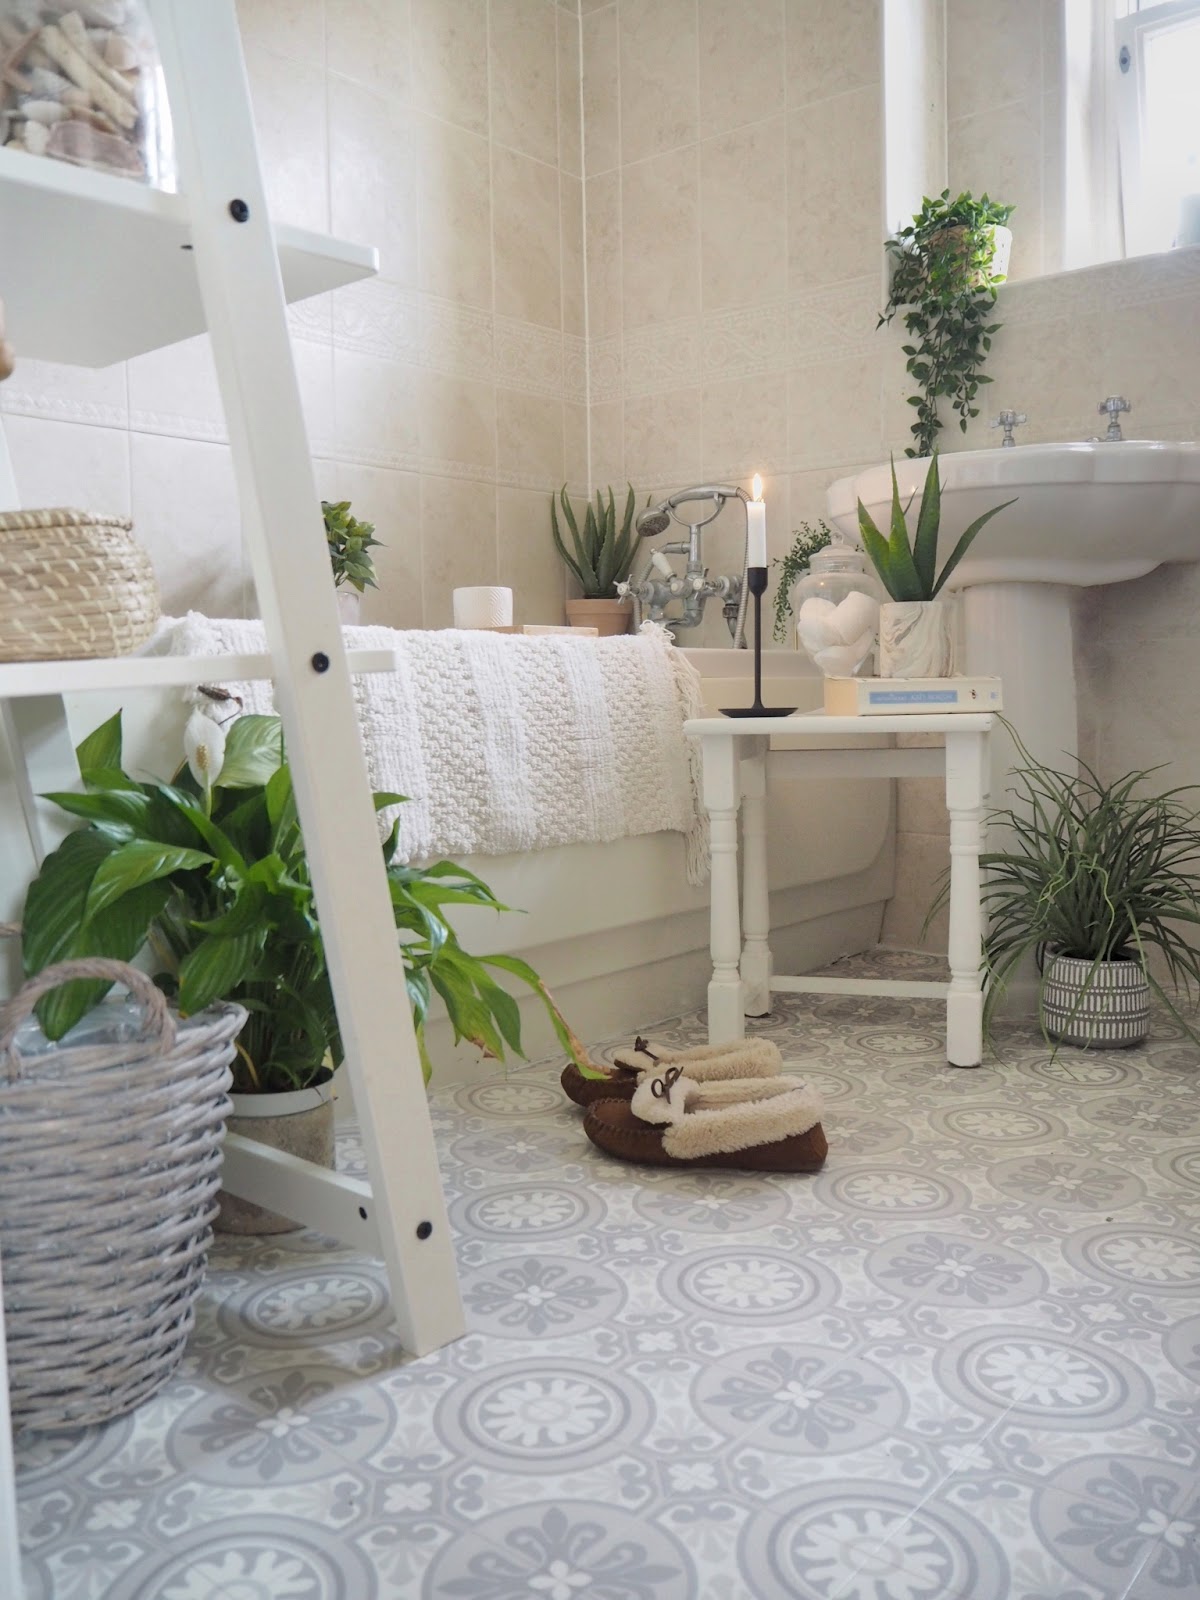
How to lay vinyl floor in a bathroom Dove Cottage
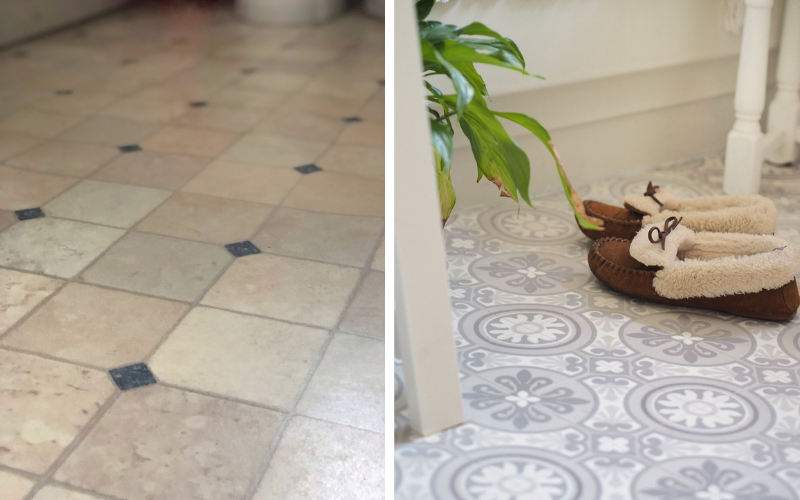
It's your decision to allow the creativity flow of yours and pick flooring that best suits the bathroom of yours. This's better than the other three choices because moisture finds it difficult to penetrate through that type of bath room flooring. The greatest thing about using bathroom floor vinyl tiles is that you can do it yourself. The most used bathroom floor tiles suggestions is to use ceramic flooring.
Images Related to How To Lay Bathroom Floor Tiles Vinyl
LVT Flooring Over Existing Tile the Easy Way – Vinyl Floor
How to lay vinyl tiles u0026 carpet tiles part 2: laying the tiles

Installing Your Peel-and-Stick Vinyl Tile Floor

LVT Flooring Over Existing Tile the Easy Way – Vinyl Floor
How to lay vinyl floor in a bathroom Dove Cottage
How to Prepare a Vinyl Floor for Ceramic Tile
/can-you-tile-over-vinyl-floor-1822596_FINAL_NEW-b4003c12b3ce48b382e80c57fb340b03.png)
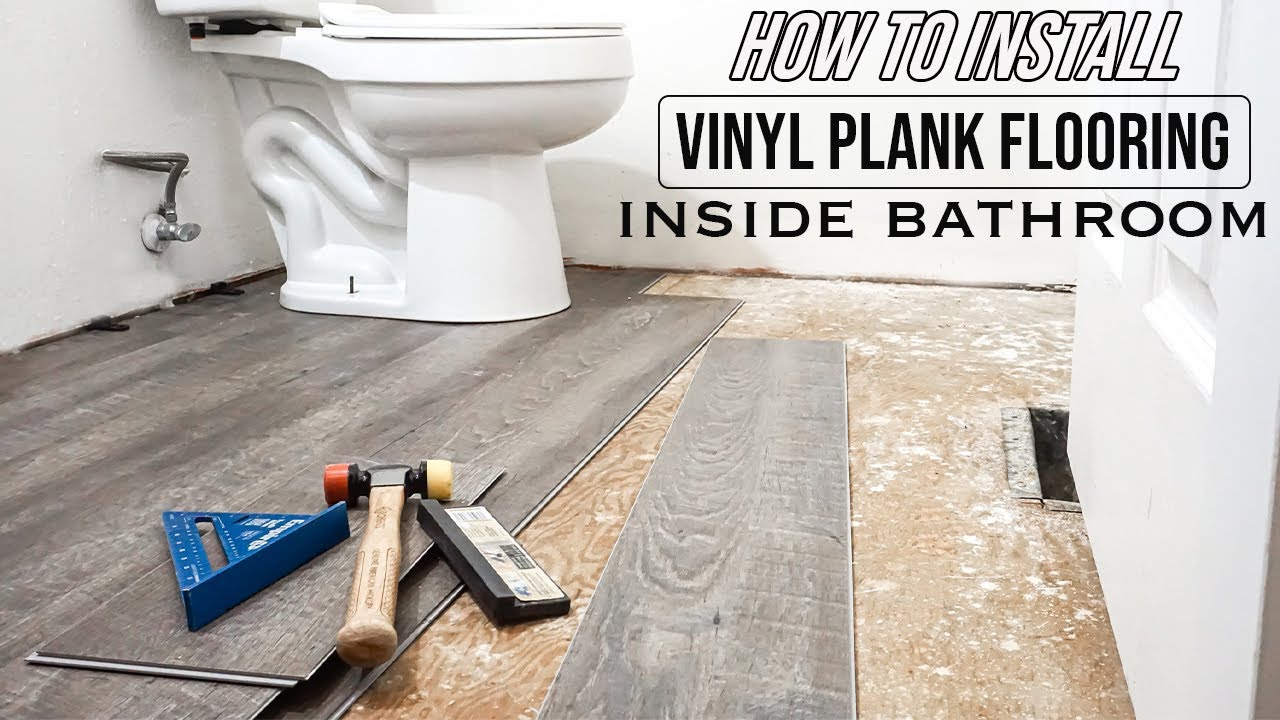
How To Install Vinyl Plank Flooring In A Bathroom As A Beginner Home Renovation
How to Lay Vinyl Tiles on Top of Old Flooring : Flooring Help

How to lay vinyl floor in a bathroom Dove Cottage
Best Vinyl Flooring for Bathrooms – This Old House
/cdn.vox-cdn.com/uploads/chorus_asset/file/22159959/CLX_Coastal_Riviera_Linen_10048776_H.0.jpg)
Laying Tile Over Vinyl: Should You Do It? BuildDirectLearning Center

Vinyl Flooring Bathroom Update – Angela Marie Made
Related articles:
- Vintage Bathroom Floor Tile Patterns
- Bathroom Floor Tile DIY
- Limestone Bathroom Floor Tiles
- Bathroom Floor Porcelain Tile
- Concrete Bathroom Floor Ideas
- White Bathroom Ceramic Tiles
- Bathroom Floor Baseboard
- Rustic Bathroom Flooring Ideas
- Bathroom Flooring Options
- Bamboo Bathroom Flooring Ideas
How to Lay Bathroom Floor Tiles Vinyl
When it comes to renovating your bathroom, one of the most important decisions you will make is choosing the right flooring. Vinyl floor tiles can be an excellent choice for a bathroom due to their durability, moisture resistance, and ease of installation. In this article, we will guide you through the process of laying bathroom floor tiles vinyl, step by step.
Preparation:
Before you start laying the vinyl floor tiles in your bathroom, it is crucial to prepare the surface properly. Here are the steps you should follow:
1. Clear the area: Remove any furniture or obstacles from the bathroom to create an empty space for working. This will give you ample room to move around and install the tiles with ease.
2. Clean the floor: Thoroughly clean the existing floor surface using a broom or vacuum cleaner to remove any dirt, dust, or debris. Afterward, mop the floor with warm water and a mild detergent to ensure it is free from grease and grime.
3. Check for imperfections: Inspect the floor for any imperfections such as cracks, holes, or unevenness. If you spot any issues, use a filler compound or leveling agent to repair and level the surface. Allow sufficient time for these repairs to dry before moving on to the next step.
Choosing the Right Vinyl Tiles:
Selecting the right vinyl tiles is essential to achieve a beautiful and long-lasting bathroom floor. Consider these factors when making your choice:
1. Style and design: Choose vinyl tiles that complement the overall aesthetic of your bathroom. Consider colors, patterns, and textures that match your existing decor or desired theme.
2. Size and shape: Vinyl tiles come in various sizes and shapes, including square, rectangular, and plank-like designs. Select a size that suits your bathroom’s dimensions and layout.
3. Thickness: The thickness of vinyl tiles determines their durability and resistance to wear. Thicker tiles, ranging from 2mm to 6mm, are more robust and suitable for high-traffic areas like bathrooms.
4. Waterproof features: Ensure that the vinyl tiles you choose are explicitly designed for wet areas like bathrooms. Look for tiles with a waterproof or water-resistant label to prevent damage caused by moisture.
5. Slip resistance: Bathrooms can be prone to slippery surfaces, so it is essential to choose vinyl tiles with slip-resistant properties. Look for tiles with textured or embossed surfaces that provide better traction.
Laying the Vinyl Floor Tiles:
Once you have prepared the surface and selected your vinyl floor tiles, it’s time to start the installation process. Follow these steps carefully:
1. Measure and plan: Begin by measuring your bathroom’s dimensions to determine the number of tiles you will need. It is crucial to plan the layout beforehand to ensure a seamless installation. Start by finding the center point of the room and work outward.
2. Prepare adhesive: Read the manufacturer’s instructions on the adhesive packaging carefully and prepare it accordingly. Most vinyl floor tiles require a special adhesive designed specifically for this purpose.
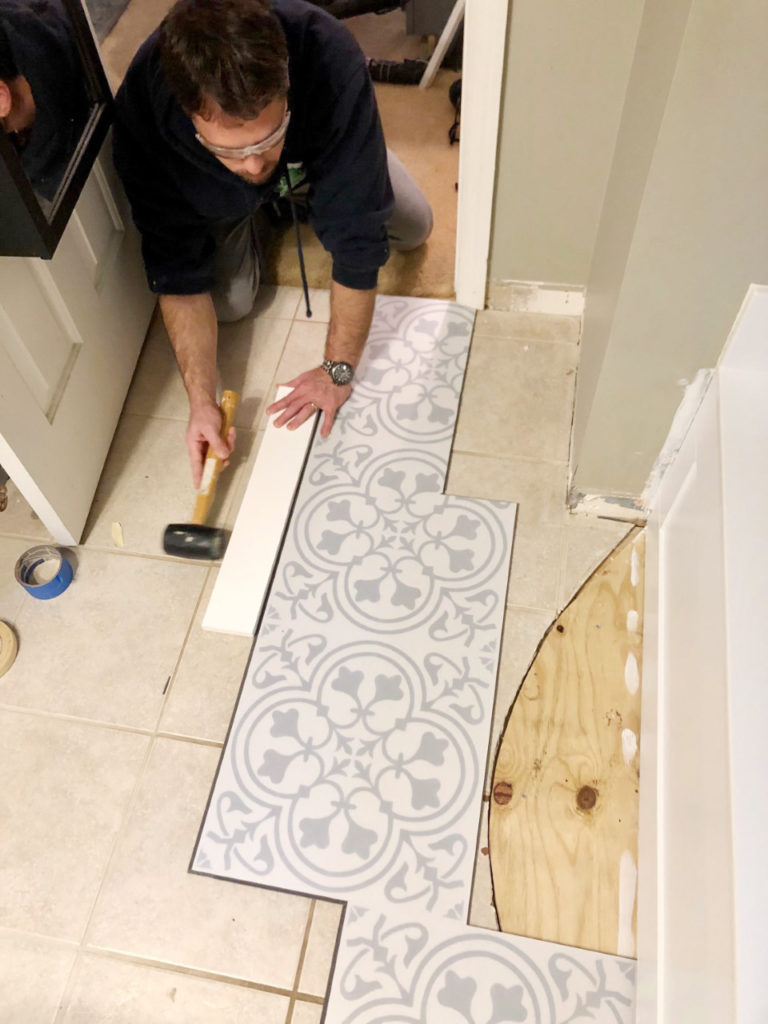
3. Apply adhesive: Use a trowel or putty knife to spread the adhesive evenly onto the floor surface, starting from the center and working your way outward. It is vital to apply an even layer of adhesive, as an inconsistent application may cause uneven tile placement.
4. Lay the first tile: Place the first vinyl tile at the center point of your bathroom and press it firmly into the adhesive. Ensure that it aligns perfectly with The guidelines you have marked on the floor. Use a rolling pin or a tile roller to firmly press the tile into place and remove any air bubbles.
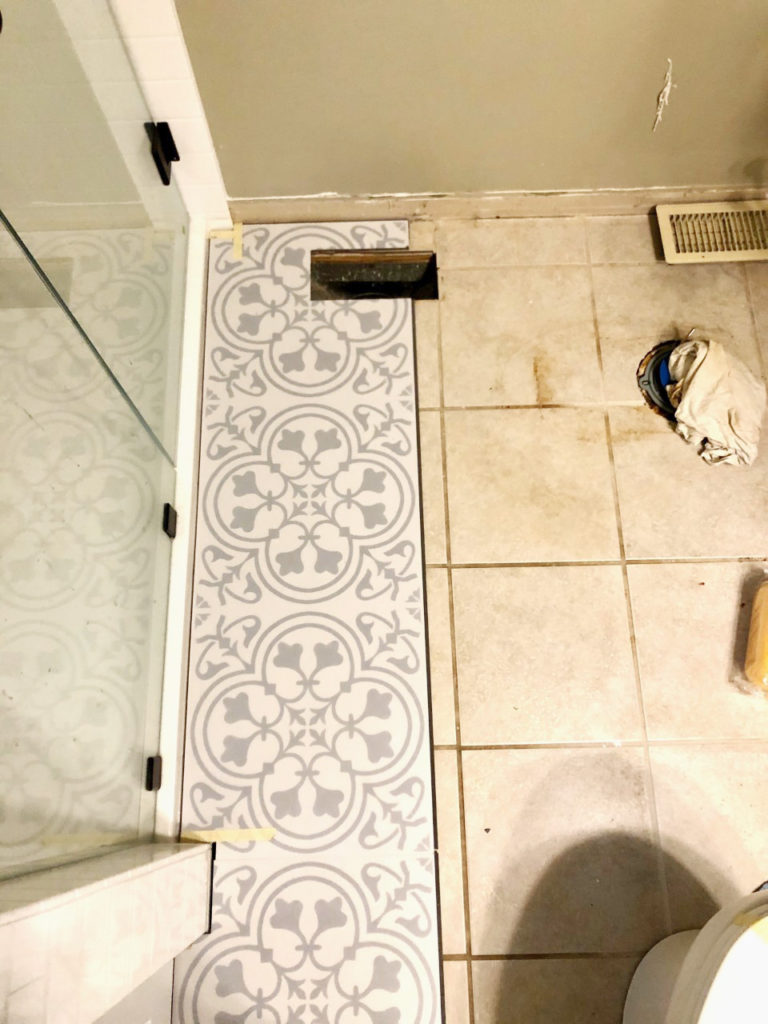
5. Continue with the rest of the tiles: Working from the center point, continue laying the vinyl tiles in a desired pattern or layout. Leave a small gap between each tile to allow for expansion and contraction. Use tile spacers to ensure even spacing.
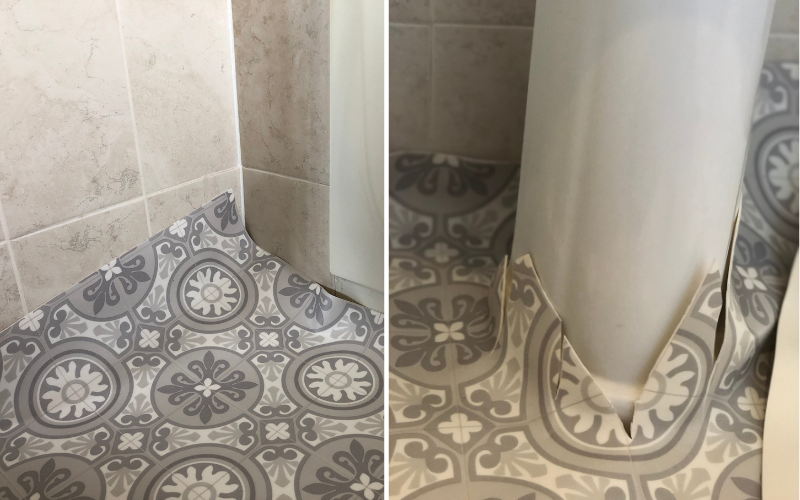
6. Cut tiles if necessary: Use a utility knife or vinyl tile cutter to trim tiles that need to fit around corners, edges, or obstacles. Measure and mark the tile before cutting it carefully along the marked line.
7. Press down and roll: Once all the tiles are in place, use a rolling pin or tile roller to firmly press them into the adhesive and ensure a secure bond.
8. Allow for drying time: Follow the manufacturer’s instructions regarding drying time for the adhesive. It is essential to allow sufficient time for the adhesive to dry completely before exposing the floor to foot traffic or moisture.
9. Seal the edges (optional): If desired, you can seal the edges of your vinyl floor tiles with a silicone sealant to provide extra protection against moisture and prevent dirt or water from seeping underneath.
10. Maintain and clean regularly: To keep your vinyl bathroom floor looking its best, regularly sweep or vacuum up any loose dirt or debris. Clean spills promptly with a mild detergent and water solution, avoiding abrasive cleaners that may damage or dull the surface.
By following these steps, you can successfully install vinyl floor tiles in your bathroom and enjoy a durable, waterproof, and visually appealing flooring option for years to come. Remember to always refer to the manufacturer’s instructions for specific guidance on your chosen vinyl tiles and adhesive. Installing vinyl floor tiles in your bathroom can be a relatively straightforward process if you follow these steps:
1. Prepare the surface: Ensure that the existing floor is clean, dry, and smooth. Remove any old adhesive or other substances that may interfere with the bond of the new tiles. If necessary, level the floor using a self-leveling compound.
2. Read the manufacturer’s instructions: Carefully read and understand the instructions provided by the manufacturer of both the adhesive and the vinyl tiles. Different products may have specific requirements and recommendations for installation.
3. Apply adhesive: Using a trowel or putty knife, spread the adhesive evenly onto the floor surface, starting from the center and working your way outward. It is important to apply an even layer of adhesive to ensure proper tile placement.
4. Lay the first tile: Place the first vinyl tile at the center point of your bathroom, aligning it with any guidelines you have marked on the floor. Press it firmly into the adhesive, using a rolling pin or tile roller to remove any air bubbles and ensure a secure bond.
5. Continue with the rest of the tiles: Working from the center point, continue laying the vinyl tiles in your desired pattern or layout. Leave a small gap between each tile to allow for expansion and contraction. Use tile spacers to ensure even spacing between tiles.
6. Cut tiles if necessary: Use a utility knife or vinyl tile cutter to trim tiles that need to fit around corners, edges, or obstacles. Measure and mark each tile before cutting it carefully along the marked line.
7. Press down and roll: Once all the tiles are in place, use a rolling pin or tile roller to firmly press them into the adhesive and ensure a secure bond between each tile and the floor.
8. Allow for drying time: Follow the manufacturer’s instructions regarding drying time for the adhesive. It is important to allow sufficient time for the adhesive to dry completely before exposing the floor to foot traffic or moisture.
9. Seal the edges (optional): If desired, you can seal the edges of your vinyl floor tiles with a silicone sealant to provide extra protection against moisture and prevent dirt or water from seeping underneath.
10. Maintain and clean regularly: To keep your vinyl bathroom floor looking its best, regularly sweep or vacuum up any loose dirt or debris. Clean spills promptly with a mild detergent and water solution, avoiding abrasive cleaners that may damage or dull the surface.
By following these steps and referring to the manufacturer’s instructions, you can successfully install vinyl floor tiles in your bathroom. Enjoy your new durable, waterproof, and visually appealing flooring option for years to come.