Normally the install could be done with relatively average competencies and simple tools such as a chop saw and then rented flooring nailer. Beautiful solid wood flooring can seem wonderful, creating a true sense of individuality and style and a modern, contemporary atmosphere within any home. All wood floors, no matter what the exterior therapy or quality of the wood, will be susceptible to area scratching.
Images Related to How To Install Tile That Looks Like Wood Flooring
How To Install Tile That Looks Like Wood Flooring
However this luxury is going to come with a substantial price because it is not only needed to pay for the cost of the specific wood flooring, you will have to take into account the selling price of pro installation. Having said that, make sure you prepare your house for a wood floor ahead of the set up. Unlike whenever you place a tiled floor, there's no need to draw out the role of each timber board that you lay.
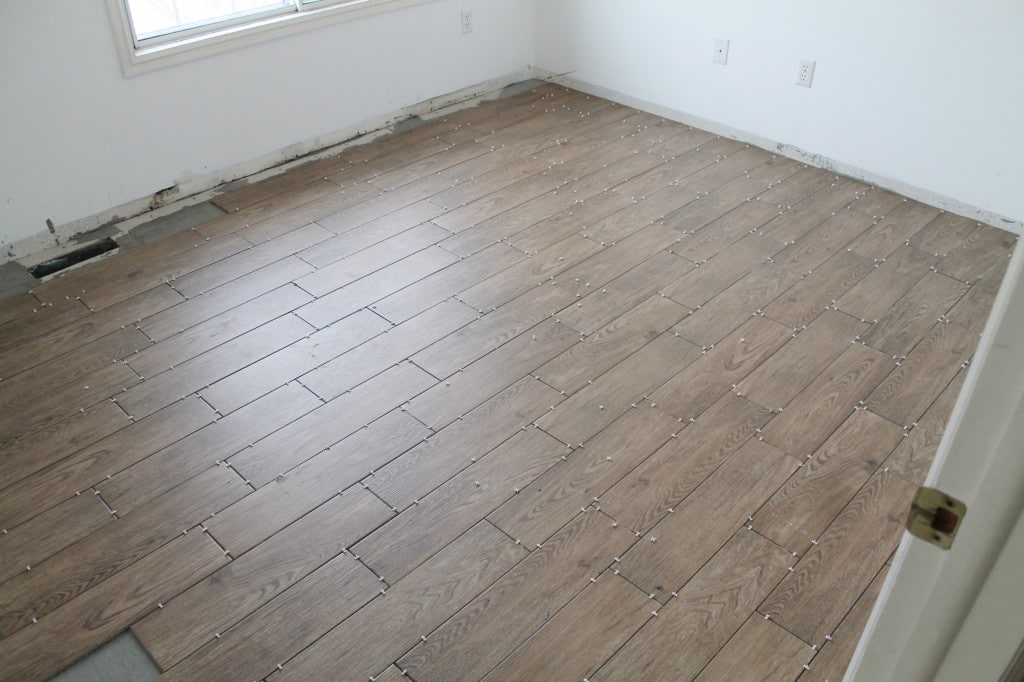
How to Install Wood-Look Floor Tile
Wood flooring also typically comes with a wear warranty from five to fifty years in length. Often overlooked and perhaps the most beautiful of all wood flooring supplies is antique wood, reclaimed wood from ancient dilapidated, decaying buildings which have withstood time in all weather problems. For starters you need to determine what floor type you've, and most importantly that it's wood.
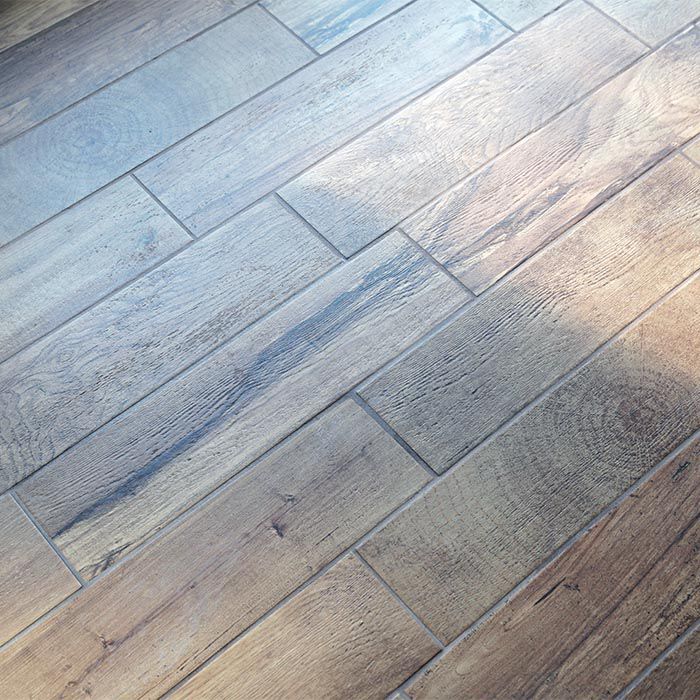
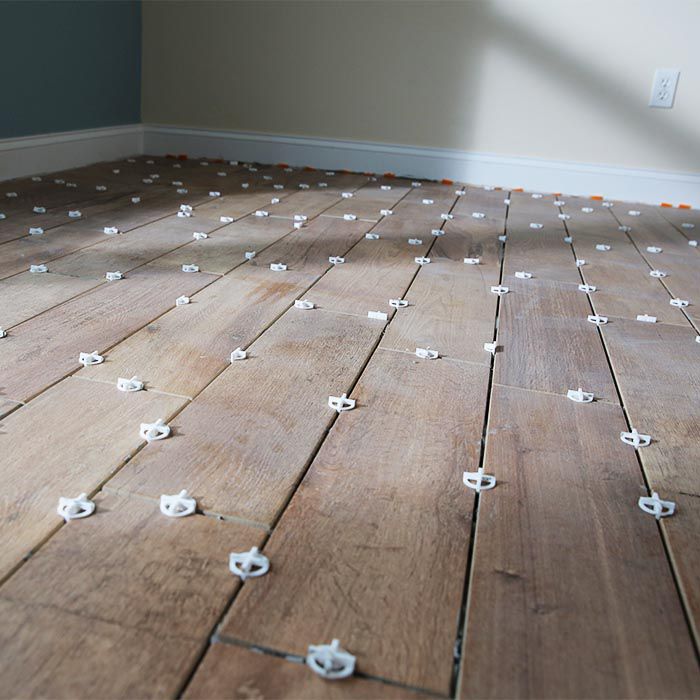
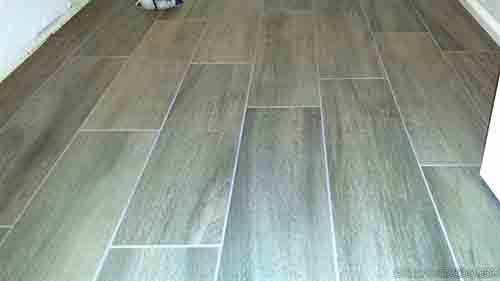
Wood-look Tile Flooring: How to Lay Tile That Looks like Wood
Wood-look Tile Flooring: How to Lay Tile professionally – Blog RUBI
How to Install Wood-Look Floor Tile
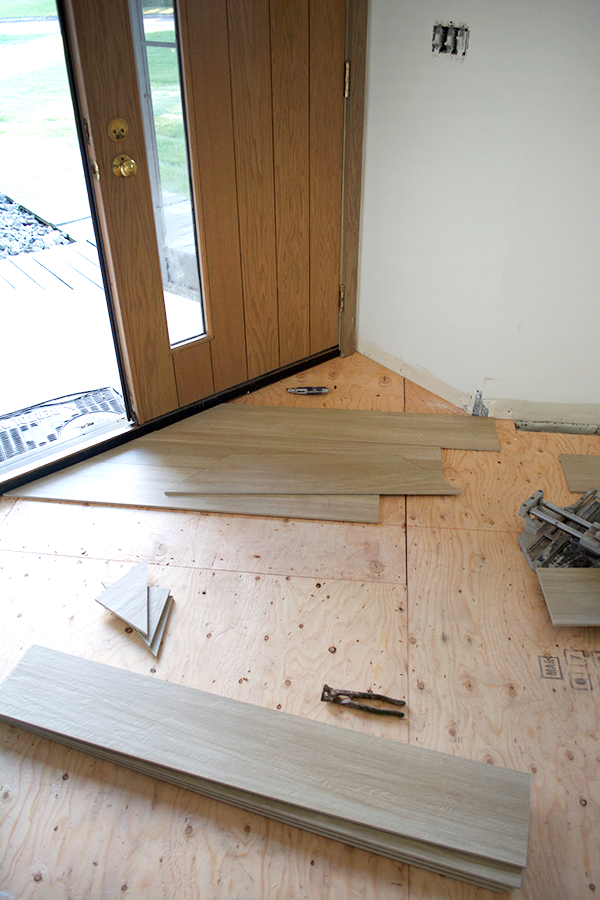
Installing Tile That Looks Like Hardwood

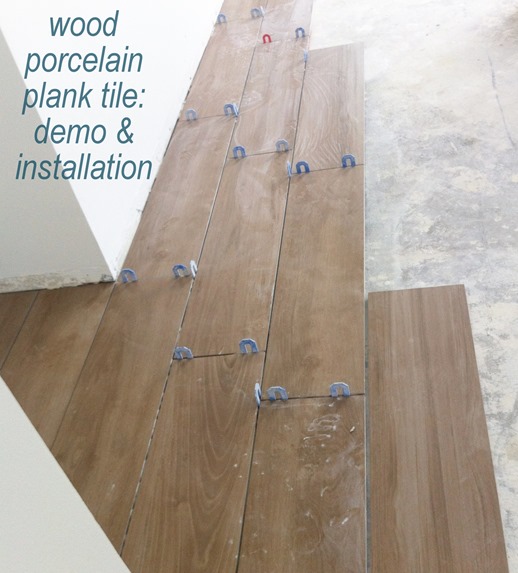
Tile Flooring: Demo + Installation Centsational Style
Installing Wood Look Tile + Tips from a Pro! BREPURPOSED
How Do It on Twitter Wood grain tile, Wood tile floors, Wood tile

Tips for Achieving Realistic Faux Wood Tile – Chris Loves Julia
More tips for installing wood look tile flooring DIYTileGuy
Installing Wood Look Tile + Tips from a Pro! BREPURPOSED
Tips when installing wood-look tiles
Tile That Looks Like Wood

Related articles:
- Black Walnut Wood Flooring
- Wood Flooring Designs
- Wood Flooring Options For Kitchens
- Contemporary Wood Flooring Ideas
- Dark Wood Floor Bedroom Ideas
- Real Wood Flooring For Kitchens
- Natural Wood Floor Stain
- Oak Wood Flooring
- Birch Wood Flooring Reviews
- Wood Floor Damage Repair
Title: How To Install Tile That Looks Like Wood Flooring: A Comprehensive Guide
Introduction:
Tile that looks like wood flooring has gained immense popularity in recent years due to its durability, low maintenance, and aesthetic appeal. This innovative flooring option offers the warmth and natural beauty of wood while providing the practical benefits of tile. If you’re considering installing tile that looks like wood flooring, this comprehensive guide will walk you through the step-by-step process.
I. Pre-Installation Preparation:
Before beginning the installation process, it’s crucial to prepare your space adequately. Follow these steps to ensure a smooth installation:
1. Measure and Plan:
Measure the room where you intend to install the tile that looks like wood flooring. Consider any irregularities in shape or obstacles such as doorways and cabinets. This will help you determine the amount of tile needed for your project.
FAQ: How much extra tile should I purchase for wastage?
It is recommended to purchase around 5-10% more tiles than what your measurements suggest, allowing for potential breakages during installation or future repairs.
2. Acclimate the Tiles:
Allow the tiles to acclimate to the room’s temperature and humidity for at least 48 hours before installation. This step prevents any potential expansion or contraction of the tiles after installation.
FAQ: Can I install tile that looks like wood flooring over existing tiles?
Yes, you can install tile that looks like wood over existing tiles. However, ensure that the existing surface is clean, level, and free from any cracks or damage.
II. Installation Process:
Now that you have prepared your space, it’s time to dive into the installation process itself. Follow these detailed steps for a successful installation:
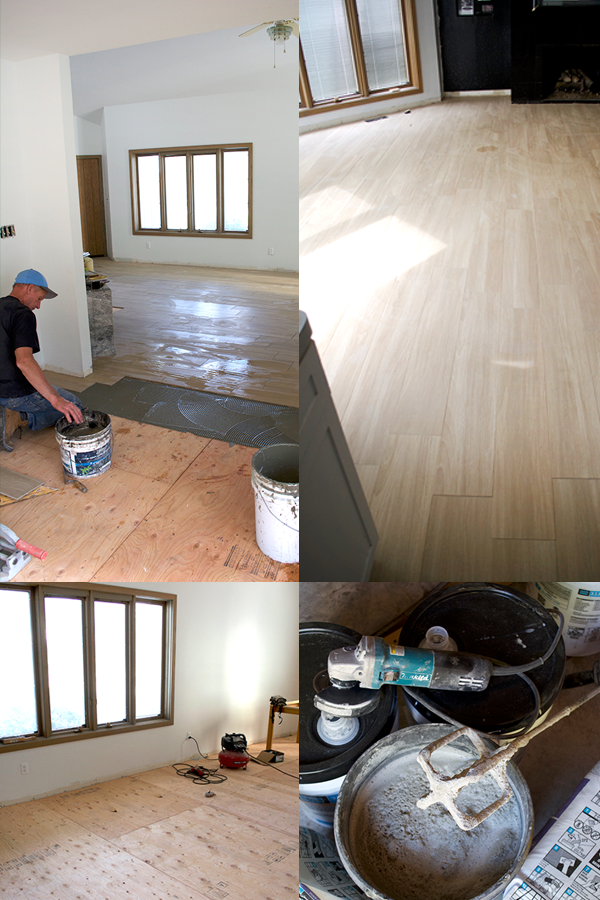
1. Prepare the Subfloor:
Ensure that the subfloor is clean, dry, level, and free from any imperfections or debris. Use a leveling compound if necessary to correct any uneven spots.
2. Lay Down Underlayment:
Apply an underlayment, such as cement backer board or an uncoupling membrane, over the subfloor. This provides stability and helps prevent cracks or movement in the tile.
FAQ: Can I install tile that looks like wood flooring directly on concrete?
Yes, you can install tile that looks like wood flooring directly on a concrete subfloor. However, it’s crucial to ensure that the surface is clean, level, and free from any moisture issues.
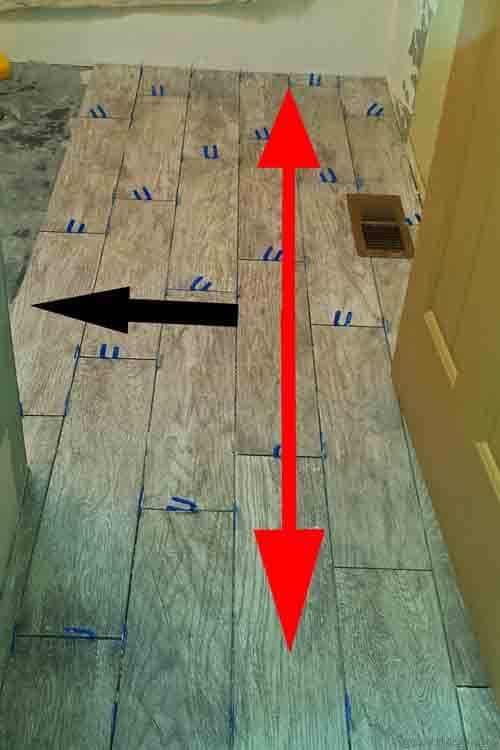
3. Plan the Layout:
Start by dry-laying the tiles in your desired pattern to visualize how they will fit into the space. Consider staggering the tiles for a more natural wood-like appearance.
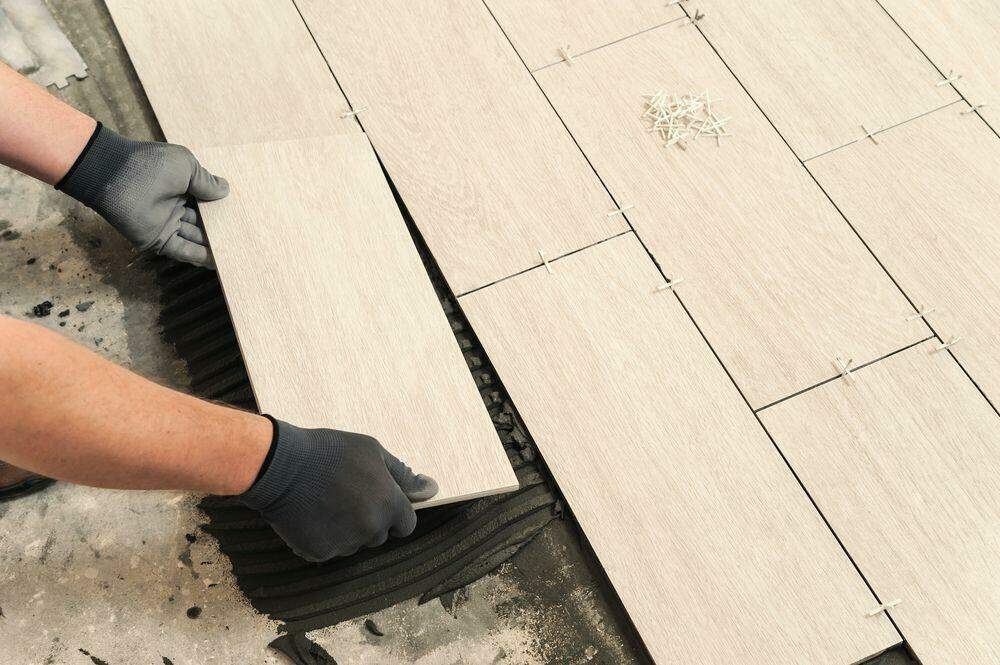
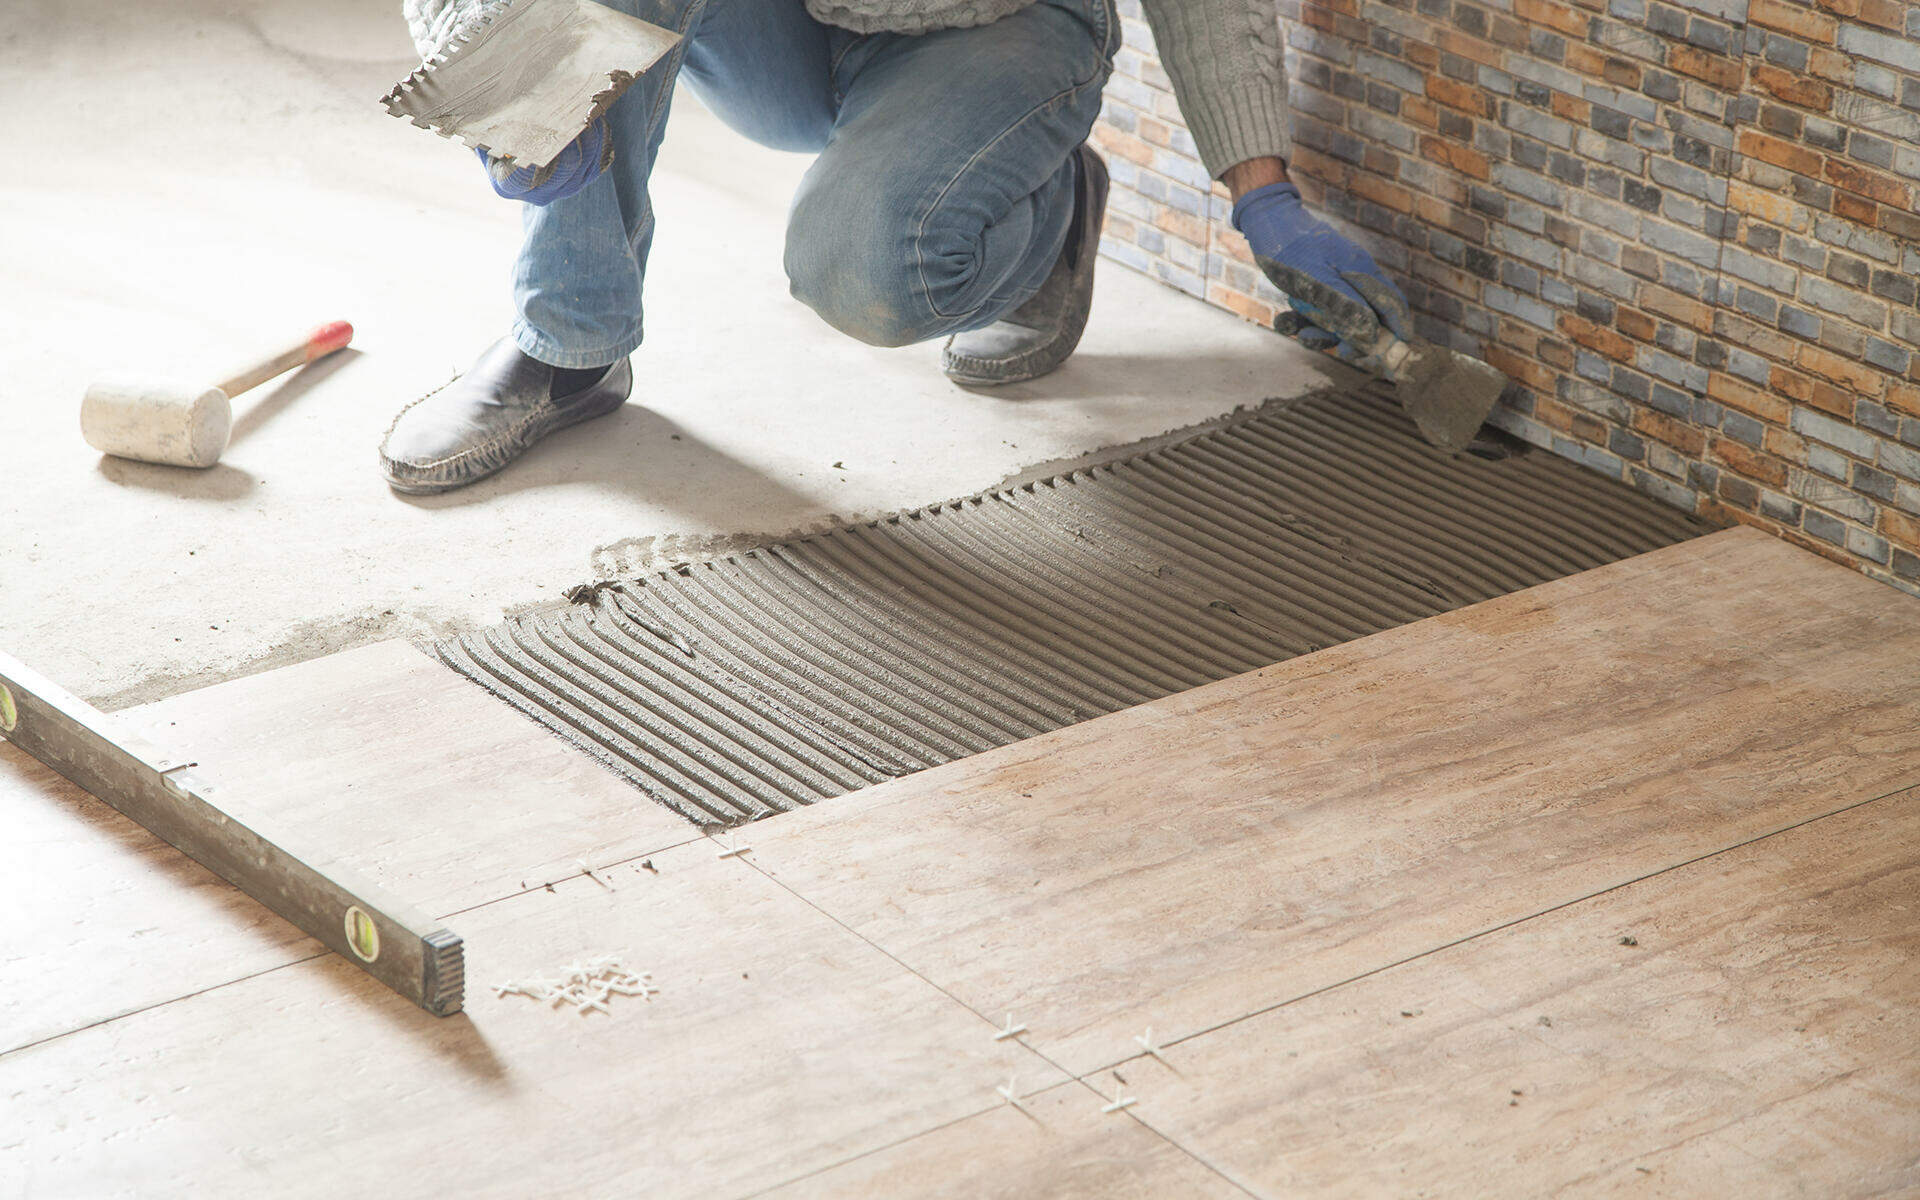
4. Apply Thinset Mortar:
Using a notched trowel, apply thinset mortar to a small section of the floor. Begin with an area that allows you to work comfortably without stepping on freshly laid tiles.
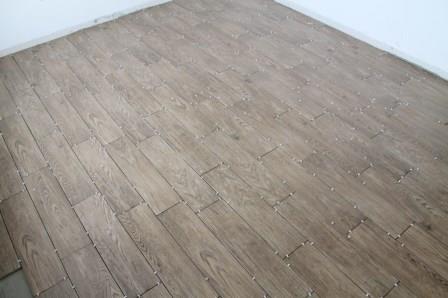
5. Lay the Tiles:
Place each tile onto the thinset mortar bed and press it firmly into place. Use spacers to maintain consistent grout lines between each tile.
6. Cut Tiles When Needed:
Measure and mark any tiles that need to be cut to fit around obstacles or along edges. Use a wet saw or tile cutter to make precise cuts, ensuring a seamless installation.
7. Allow Mortar to Dry:
Give the mortar ample time to dry according to the manufacturer’s instructions before proceeding with grouting.
III. Grouting and Finishing Touches:
Once the tiles are securely in place, it’s time to complete the installation process with grouting and finishing Touches. Follow these steps to finish your tile installation:
1. Mix the Grout:
Prepare the grout according to the manufacturer’s instructions. Use a mixing paddle and a bucket to combine the grout powder with water until it reaches a smooth, paste-like consistency.
2. Apply the Grout:
Using a grout float, spread the grout over the tile surface at a 45-degree angle, making sure to push it into the joints between the tiles. Work in small sections at a time to prevent the grout from drying too quickly.
3. Remove Excess Grout:
After applying the grout, use a damp sponge or cloth to wipe away any excess grout from the surface of the tiles. Rinse and wring out the sponge frequently to ensure a clean finish.
4. Let the Grout Cure:
Allow the grout to cure for the recommended amount of time before walking on or sealing it. This can take anywhere from 24 hours to several days, depending on the type of grout used.
5. Seal the Grout (Optional):
If desired, apply a grout sealer to protect the grout from stains and moisture. Follow the manufacturer’s instructions for application and drying times.
6. Clean and Maintain:
Regularly clean your tile floor with a mild detergent and warm water to keep it looking its best. Avoid using harsh cleaners or abrasive materials that could damage the tiles.
By following these steps, you can successfully install tile that looks like wood flooring in your space. Remember to take your time, plan ahead, and follow the manufacturer’s instructions for each product used. With proper installation and maintenance, your tile floor will provide beauty and durability for years to come. Installing tile that looks like wood flooring requires careful preparation and attention to detail. Here is a step-by-step guide to help you successfully install this type of tile:
I. Pre-Installation Preparation:
1. Gather Materials:
– Tile that looks like wood flooring
– Thinset mortar
– Notched trowel
– Tile spacers
– Wet saw or tile cutter
– Grout
– Mixing paddle and bucket
– Grout float
– Damp sponge or cloth
– Grout sealer (optional)
– Mild detergent
2. Prepare the Subfloor:
– Ensure that the subfloor is clean, level, and free from any debris or dust.
– Repair any cracks or uneven areas in the subfloor before proceeding.
II. Tile Installation:
1. Plan the Layout:
– Measure the area where you will be installing the tile and determine the best layout to minimize cuts and ensure a balanced look.
– Mark guidelines on the subfloor using a chalk line to guide your installation.
2. Apply Thinset Mortar:
– Mix the thinset mortar according to the manufacturer’s instructions.
– Use a notched trowel to apply a thin layer of mortar onto a small section of the subfloor, following the guidelines marked earlier.
– Press the first tile firmly into place on top of the mortar, using a twisting motion to ensure good adhesion.
3. Continue Installing Tiles:
– Apply more mortar and continue installing tiles, working in small sections at a time.
– Use tile spacers to maintain consistent grout lines between each tile.
4. Check for Levelness:
– Use a level periodically to ensure that the tiles are being installed evenly and are level with each other.
– Adjust as needed by adding or removing mortar under individual tiles.
5. Press Tiles Firmly and Use Spacers:
– As you install each tile, press it firmly into place.
– Use spacers to maintain consistent grout lines between each tile.
6. Cut Tiles When Needed:
– Measure and mark any tiles that need to be cut to fit around obstacles or along edges.
– Use a wet saw or tile cutter to make precise cuts, ensuring a seamless installation.
7. Allow Mortar to Dry:
– Give the mortar ample time to dry according to the manufacturer’s instructions before proceeding with grouting.
III. Grouting and Finishing Touches:
1. Mix the Grout:
– Prepare the grout according to the manufacturer’s instructions.
– Use a mixing paddle and a bucket to combine the grout powder with water until it reaches a smooth, paste-like consistency.
2. Apply the Grout:
– Using a grout float, spread the grout over the tile surface at a 45-degree angle.
– Make sure to push it into the joints between the tiles.
– Work in small sections at a time to prevent the grout from drying too quickly.
3. Remove Excess Grout:
– After applying the grout, use a damp sponge or cloth to wipe away any excess grout from the surface of the tiles.
– Rinse and wring out the sponge frequently to ensure a clean finish.
4. Let the Grout Cure:
– Allow the grout to cure for the recommended amount of time before walking on or sealing it.
– This can take anywhere from 24 hours to several days, depending on the type of grout used.
5. Seal the Grout (Optional):
– If desired, apply a grout sealer to protect the grout from stains and moisture.
– Follow the manufacturer’s instructions for application and drying times.
6. Clean and Maintain:
– Regularly clean your tile floor with a mild detergent and warm water to keep it looking its best.
– Avoid using harsh cleaners or abrasive materials that could damage the tiles.
By following these steps, you can successfully install tile that looks like wood flooring in your space. Remember to take your time, plan ahead, and follow the manufacturer’s instructions for each product used. With proper installation and maintenance, your tile floor will provide beauty and durability for years to come.