Lots of heads might be turning about this statement, although the truth of the matter is that there's not one other room of the home that will increase the value to the home of yours than the basement. In this regard, you are going to have to choose the sort of flooring that is sturdy and doesn't ruin very easily after water touch.
Here are Images about How To Install Shower Drain In Basement Floor
How To Install Shower Drain In Basement Floor
Even worse, a flooded basement is able to provide a great deal of headaches. In addition, you have to remember that the basement can very often be susceptible to flooding so whatever flooring answer you choose, make certain that the room is suitably insulated or maybe the type of flooring you decide on won't perish with flooding.
Installing a Curbless Shower on a Concrete Slab
If your basement allows moisture into the area, it'll probably ruin any floor your choose. What'll you would like to make use of this specific room of your house for. Leaks which occur once a heavy rain, for example, suggest that there is something wrong with the waterproofing. Many basement flooring ideas take into account the different varieties of materials to be put into use for set up.
Images Related to How To Install Shower Drain In Basement Floor
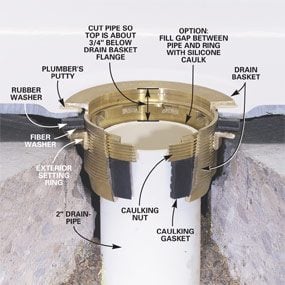
Shower drain flush with concrete floor- help! – Ceramic Tile

How to Install Shower Drain Pipe Part 1
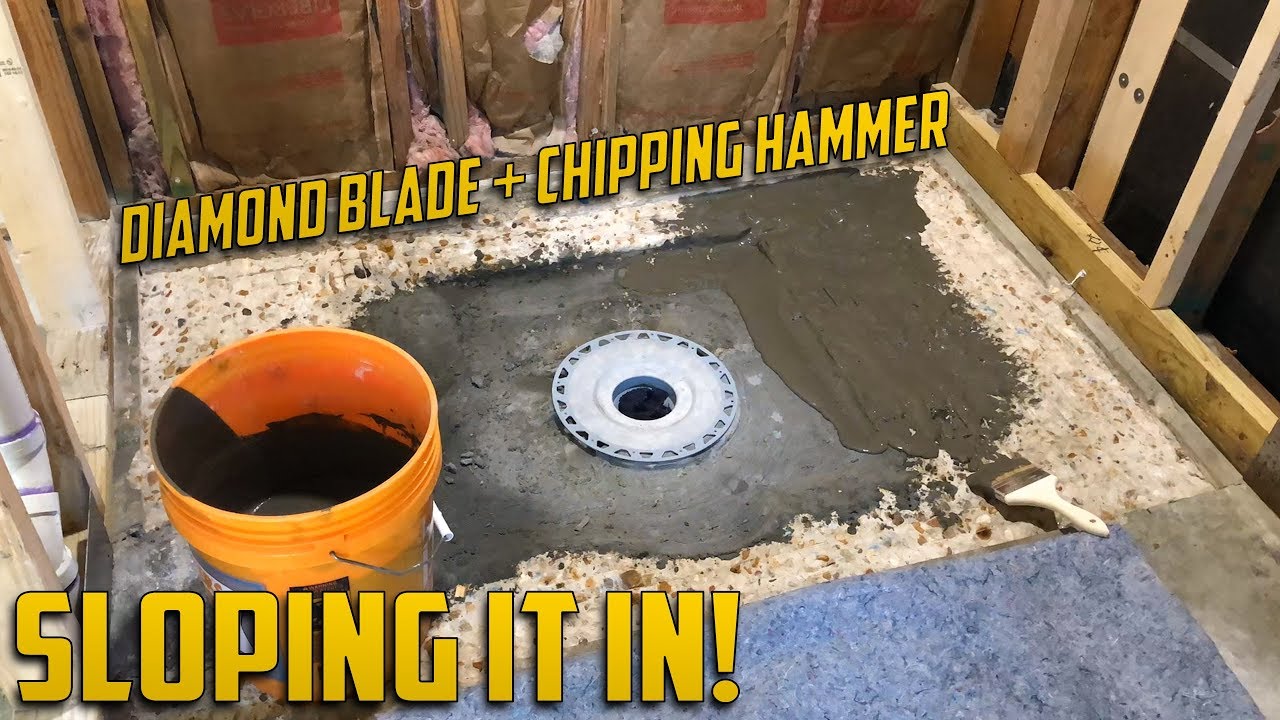
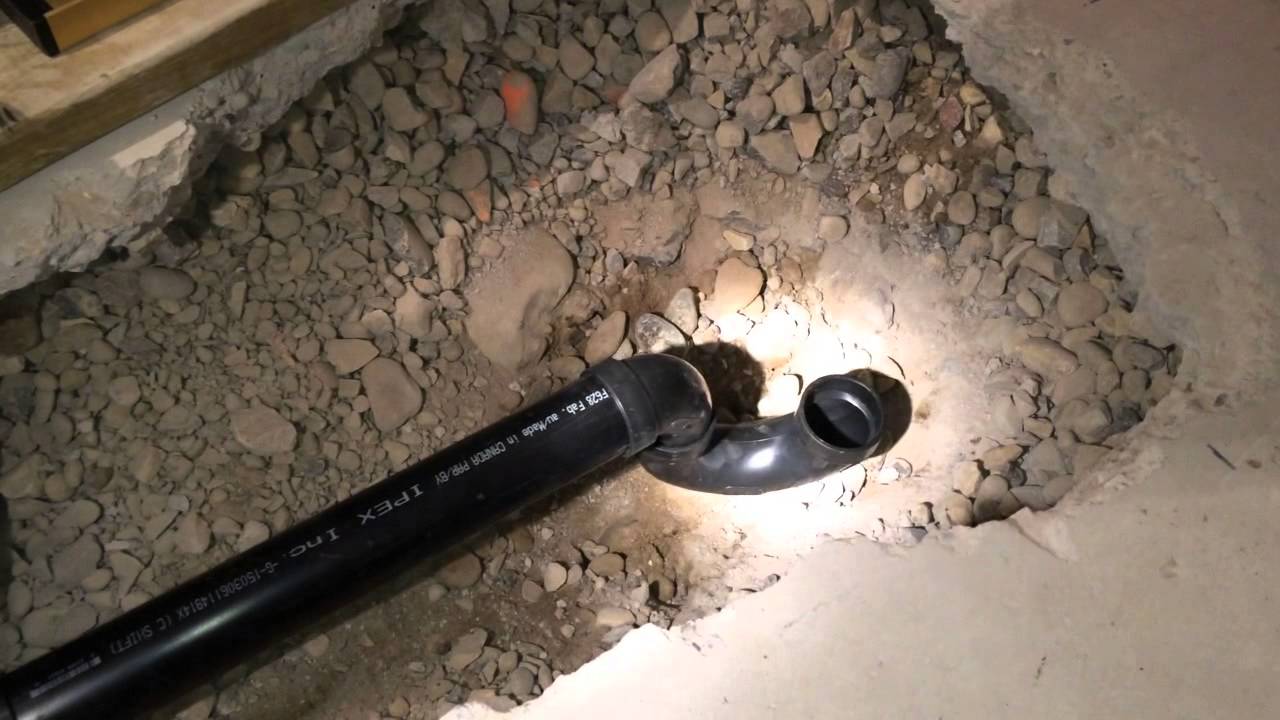
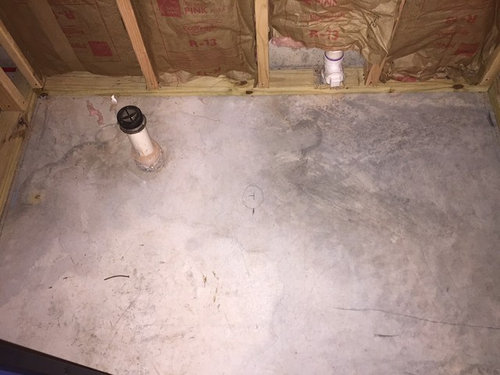
Basement Bathroom Shower Drain Installation in Concrete Slab

Basement Floor Drain as Shower Drain? Terry Love Plumbing Advice
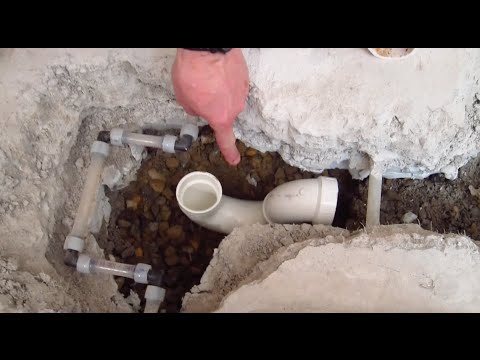
Plumbing Tips: Filling in Shower Drain Pipe Floor Boxout DIY
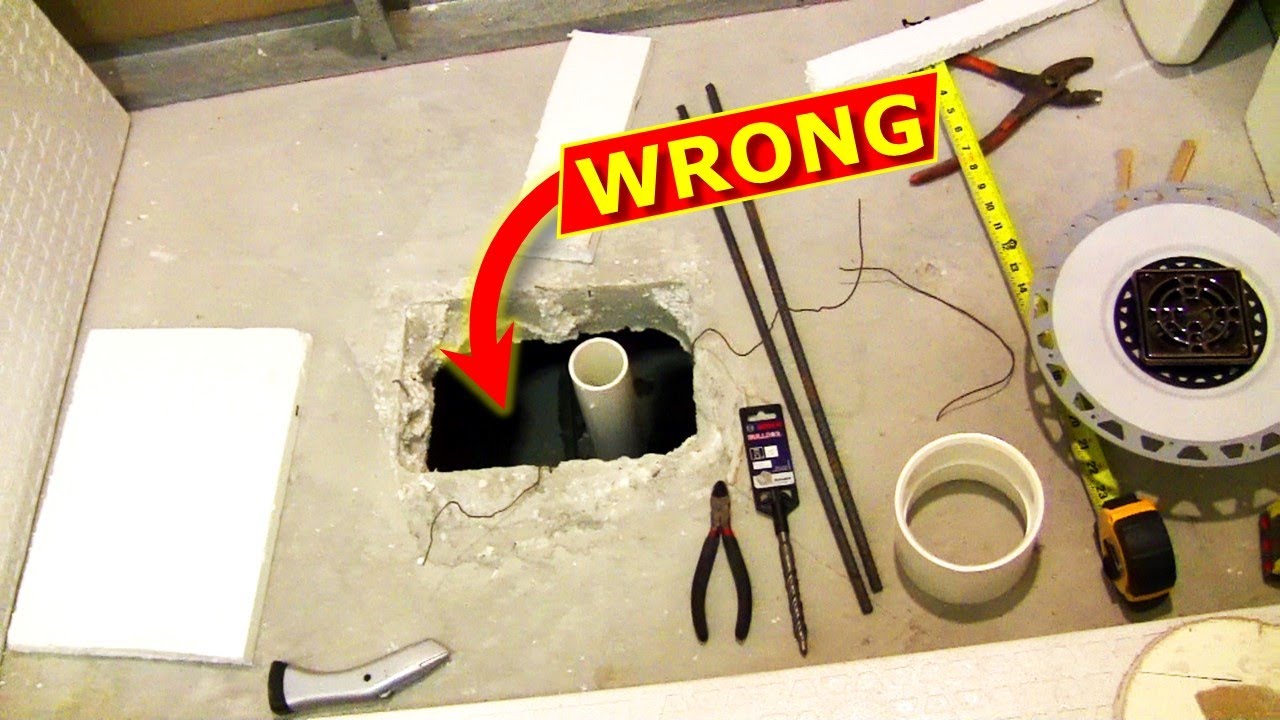
shower drain concrete slab issue – DoItYourself.com Community Forums

How to Install a Fiberglass Base Over Concrete (DIY) Family Handyman

Moving a shower/bath drain in basement concrete
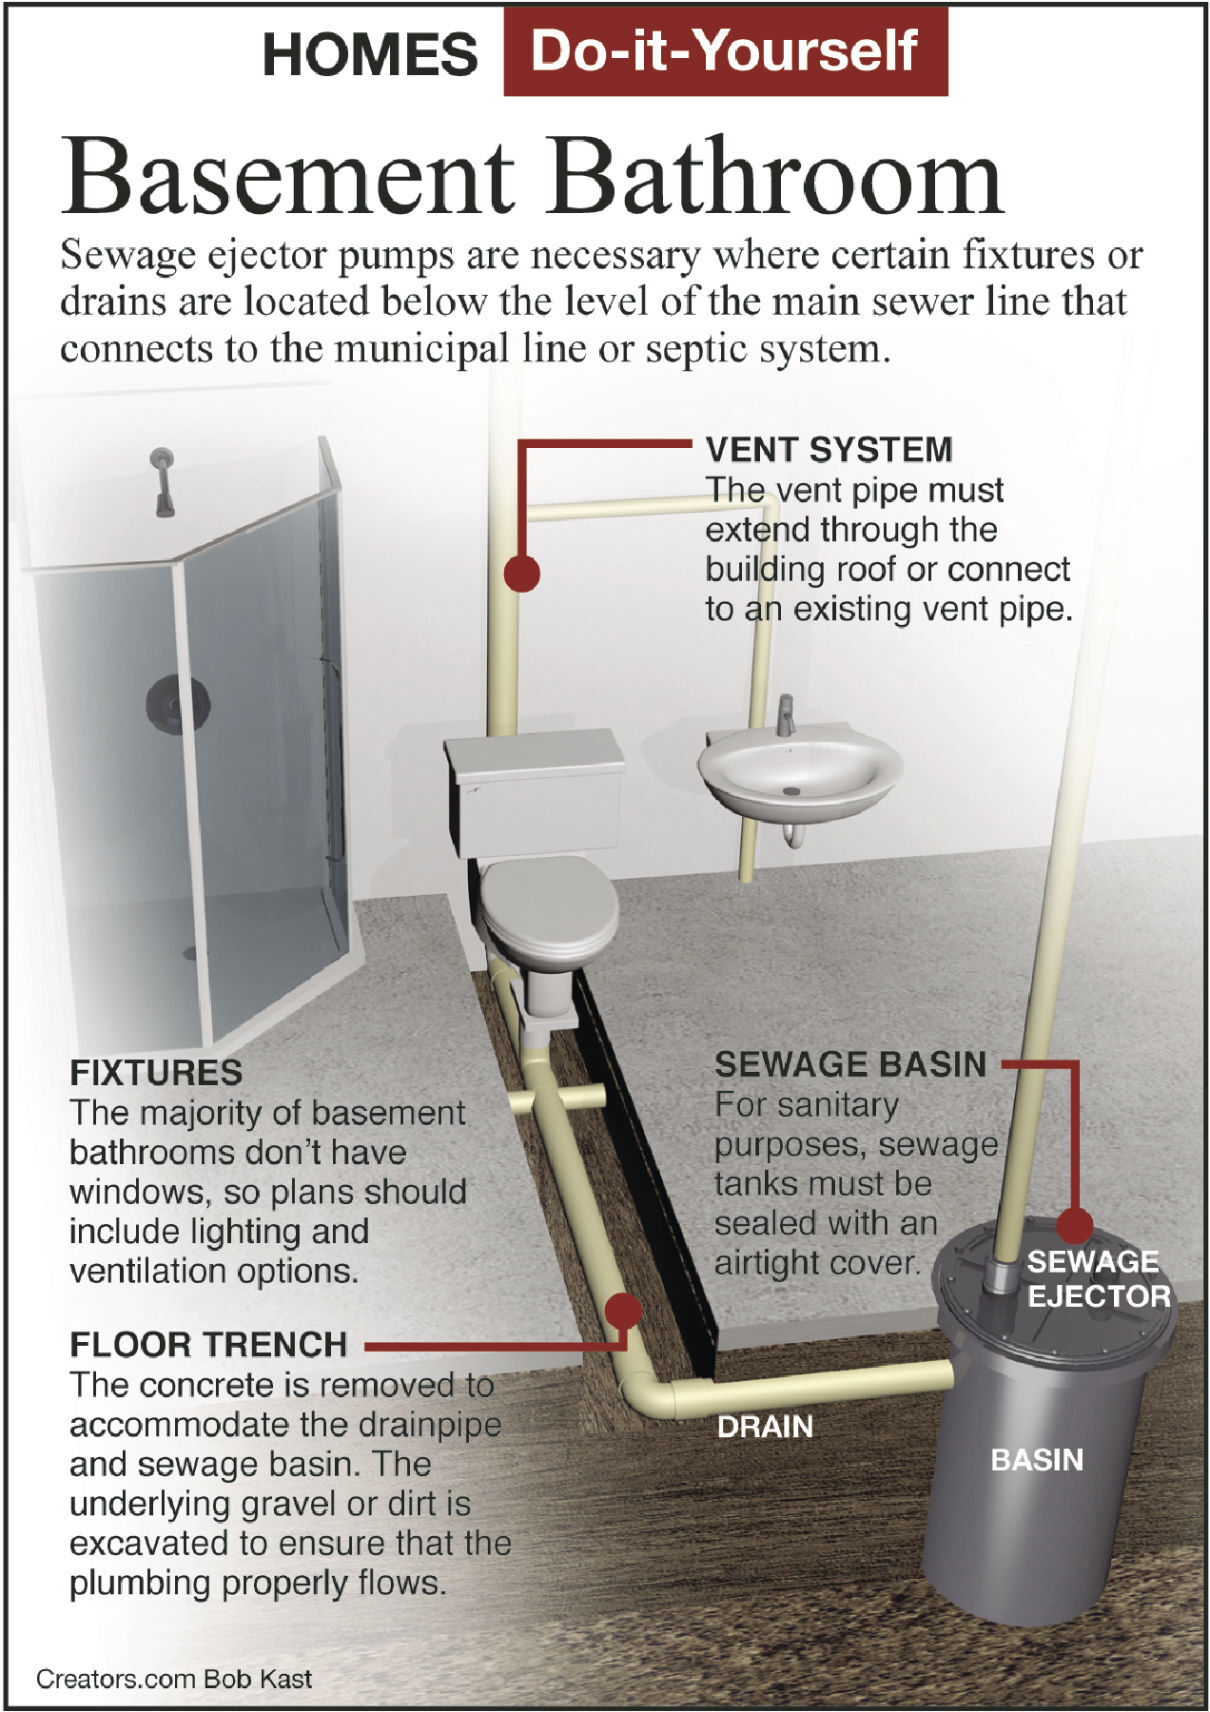
How to install a new bathroom on a concrete slab or in a basement
How to level a concrete floor with self-leveling concrete

Adding Shower drain in Basement Terry Love Plumbing Advice
Solution for this offset shower drain?
Related articles:
- Stained Concrete Basement Floor
- Finishing Basement Floor
- Refinish Concrete Basement Floor
- Best Flooring For Basement
- Basement Gym Flooring Ideas
- Laminate Flooring In Basement
- Basement Concrete Floor Sweating
- Basement Floor Finishing Ideas
- Painting Unfinished Basement Floor
- Unique Basement Flooring
Installing a shower drain in a basement floor can be a daunting task, but with the right tools and knowledge, it can be done efficiently. In this comprehensive guide, we will walk you through the step-by-step process of how to install a shower drain in a basement floor.
### Planning and Preparation
Before starting the installation process, it is crucial to plan and prepare for the project. Make sure to gather all the necessary tools and materials, including a shower drain kit, plumber’s putty, PVC primer and cement, a hacksaw, measuring tape, level, and screwdriver. Additionally, ensure that you have access to the plumbing lines in your basement floor and that the area is clear of any obstructions.
### Step 1: Locate the Drain
The first step in installing a shower drain in a basement floor is to locate the position where you want to place the drain. It is essential to consider factors such as proximity to existing plumbing lines and the slope of the floor for proper drainage. Once you have determined the location, mark it with a pencil or chalk.
### FAQ: How do I determine the correct slope for my shower drain in the basement floor?
To ensure proper drainage, the slope of the floor should be at least 1/4 inch per foot leading towards the drain. You can use a level to check the slope of your basement floor before installing the shower drain.
### Step 2: Cut an Opening
Using a hacksaw or reciprocating saw, carefully cut out an opening in the basement floor where you marked the location of the drain. Make sure to measure accurately and cut precisely to fit the size of your shower drain. Remove any debris or excess material from the opening.
### FAQ: What is the standard size for a shower drain in a basement floor?
The standard size for a shower drain in a basement floor is usually 2 inches in diameter. However, it is essential to check with local building codes and regulations for specific requirements in your area.
### Step 3: Install Drain Base
Next, assemble the components of your shower drain kit according to the manufacturer’s instructions. Place the rubber gasket over the opening in the basement floor, followed by the drain base. Secure the drain base in place using screws or bolts provided with your kit.
### FAQ: Do I need to use plumber’s putty when installing a shower drain in a basement floor?
Yes, it is recommended to use plumber’s putty around the edges of the drain base before securing it in place. This will help create a watertight seal and prevent any leaks.
### Step 4: Connect Drain Pipe
Once the drain base is securely in place, connect the drain pipe to the bottom of the base using PVC primer and cement. Make sure to follow all safety guidelines when working with these materials and allow sufficient time for them to dry before proceeding.
### FAQ: Can I use alternative materials for connecting the drain pipe?
While PVC primer and cement are commonly used for connecting PVC pipes, you can also use silicone caulk or rubber couplings as alternatives. However, make sure that these materials are compatible with your specific plumbing setup.
### Step 5: Test Drainage
After connecting the drain pipe, test the drainage system by pouring water into the shower drain. Check for any leaks or issues with water flow and make any necessary adjustments as needed. Once you are satisfied with the drainage system’s performance, proceed with finishing touches such as tiling around the Shower drain.
### FAQ: How can I test the drainage system for my shower drain in the basement floor?
To test the drainage system, simply pour water into the shower drain and observe how quickly and efficiently it drains. Check for any leaks or standing water around the drain area. If you notice any issues, troubleshoot and make necessary adjustments to ensure proper drainage.
By following these steps and guidelines, you can successfully install a shower drain in your basement floor with proper slope and drainage. Remember to always consult local building codes and regulations, as well as manufacturer instructions, to ensure a safe and effective installation. If you have any further questions or concerns, it is recommended to consult with a professional plumber for assistance. Proper installation of a shower drain in a basement floor is essential for preventing water damage and ensuring the longevity of your plumbing system.
### Step 6: Finishing Touches
Once the drainage system is tested and working properly, you can proceed with finishing touches such as tiling around the shower drain. Make sure to use waterproof materials and sealants to prevent water damage and mold growth. Additionally, consider installing a shower pan or liner to further protect your basement floor from moisture.
### FAQ: Do I need to install a shower pan or liner in my basement floor?
While not always required, installing a shower pan or liner can provide an extra layer of protection against water damage. It is especially recommended if your basement floor is prone to moisture or if you want to ensure long-term durability for your shower drain installation.
### Step 7: Maintenance
Regular maintenance is key to ensuring the longevity and efficiency of your shower drain in the basement floor. Keep the drain clean from debris and hair buildup, and periodically check for any leaks or issues with drainage. If you notice any problems, address them promptly to prevent further damage.
### FAQ: How often should I clean and maintain my shower drain in the basement floor?
It is recommended to clean and maintain your shower drain at least once a month to prevent clogs and ensure proper drainage. You can use a commercial drain cleaner or a mixture of baking soda and vinegar to keep the drain clear and free-flowing.
By following these steps and guidelines for installing a shower drain in the basement floor, you can create a functional and efficient drainage system for your bathroom. Remember to consult with professionals if needed and always prioritize safety and compliance with building codes. Enjoy your new shower space in the basement!