Lighter wood colors are ideal for formal living rooms and dining rooms, while darker colors are good for kitchens and family rooms. From household to unusual hardwoods, the variety of antique woods reclaimed from generations of long ago delivers endless beauty as well as charm which has had over 500 years to create. The colour of the fire wood you select will be contingent on the interior design of yours and private preferences.
Images Related to How To Install Flush Mount Wood Floor Vents
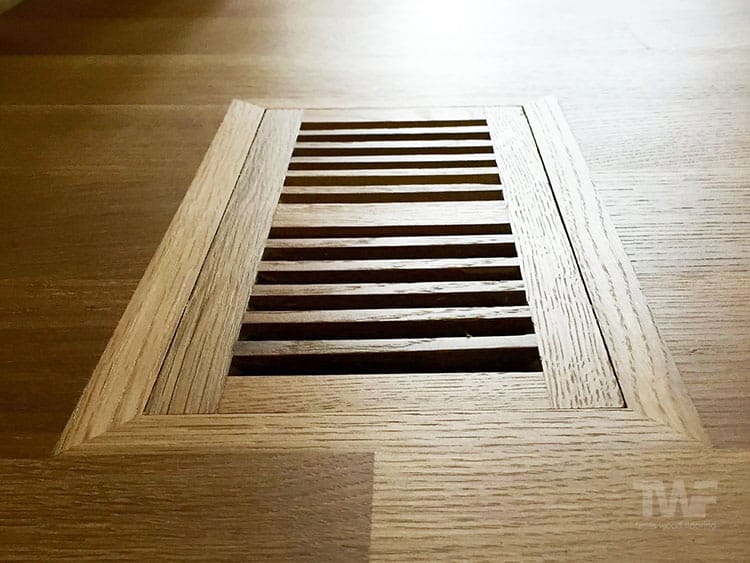
How To Install Flush Mount Wood Floor Vents

The most important detail to keep in mind is, the time that you saved and therefore are able to doing something fun with the family and friends that are important to you. As time wore on, other flooring was developed and gradually started to diminish the frequency of traditional wood flooring. Some say renewable flooring actually helps create a safer and healthier building. In comparison to engineered flooring,typically the setting up of solid wood floors definitely should not be attempted by non-professionals.
How to install a flush mount vent into an existing floor.

or perhaps you can get an area of the floor where you can visualize the advantage, perhaps taking up a doorstep threshold, air vent or perhaps a tiny little bit of scotia or skirting board. Wood floors may in addition be classified according to the form of the flooring material used. Reclaimed woods ordinarily require more labor as well as craftsmanship.
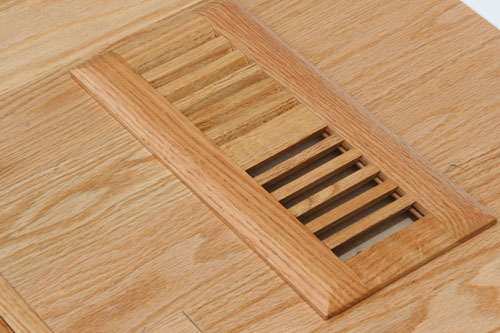
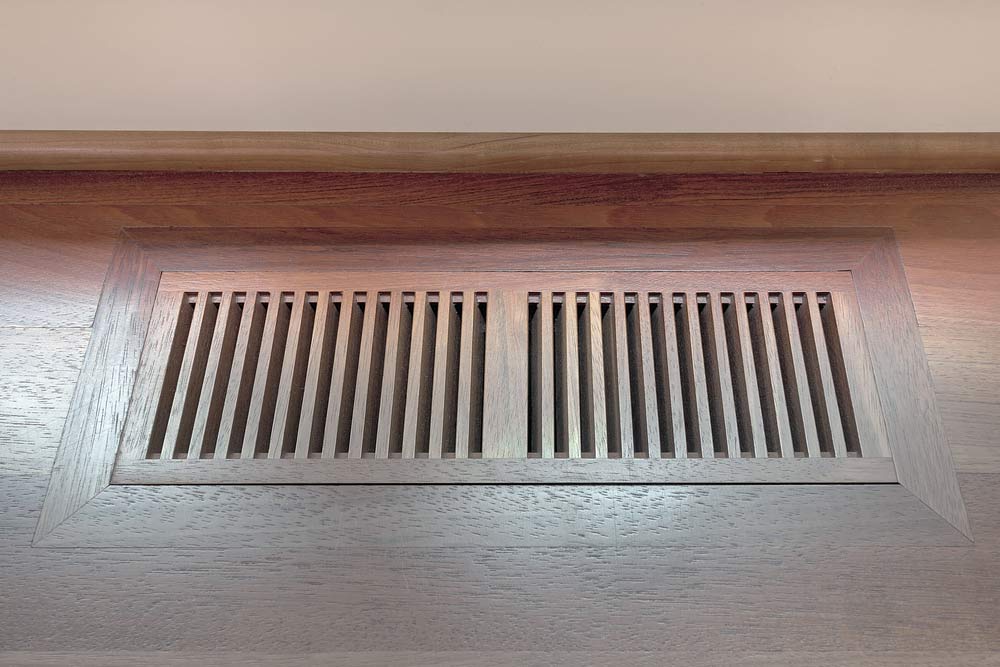
Beautiful Hardwood Floor Heating Vents
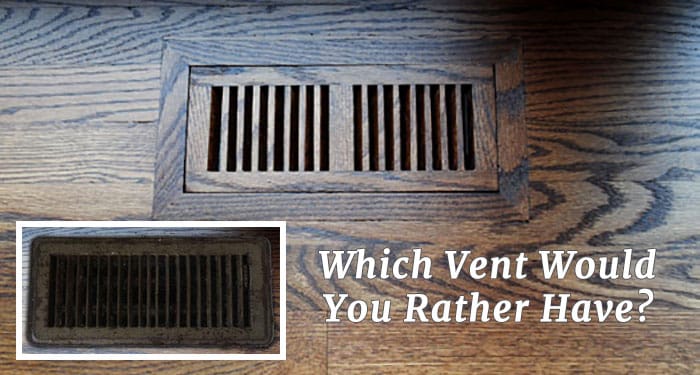
Drop-In vs. Flush-Mount – Let the Venting Begin SVB Wood Floors
How to Install Wood Floor Vent ?

Flush Mount Wood Vents – Maple High Output Vent Covers

Beautiful Hardwood Floor Heating Vents
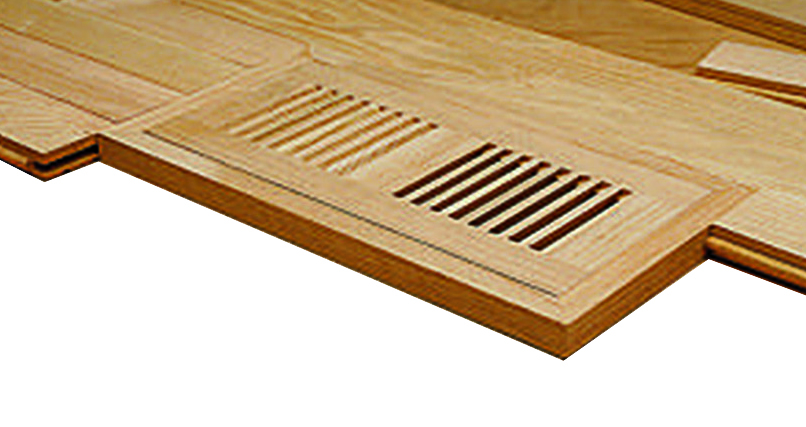
How to install Legacy Flush Mount wood floor registers: During floor installation

Flush Mount Wood Grille
How to install a flush mount vent in a hardwood floor City Floor

Drop-In vs. Flush-Mount – Let the Venting Begin SVB Wood Floors
Solid Wood Floor Vents (Standard Pre-Set Sizes) BUY NOW

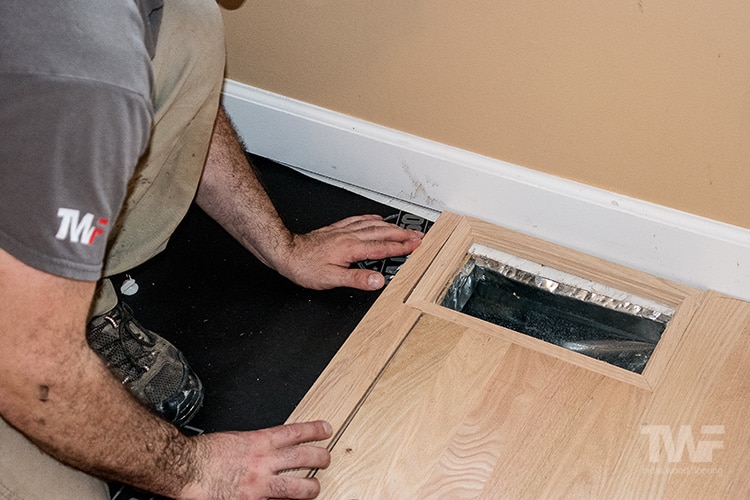
Accents of Distinction – Flush Mount Vent Install – Existing Floor

Beautiful Hardwood Floor Heating Vents
Related articles:
- Natural Wood Floor Stain
- Oak Wood Flooring
- Birch Wood Flooring Reviews
- Wood Floor Damage Repair
- Dove Grey Wood Flooring
- Engineered Wood Floor Bathroom
- What Is Composite Wood Flooring
- Wood Floor Covering Options
- Black Solid Wood Flooring
- Best Wood Floor Filler
Flush mount wood floor vents are a great way to add a modern and sleek look to your home while also providing ventilation and airflow. Installing these vents may seem like a daunting task, but with the right tools and a bit of patience, anyone can do it! Read on to learn the step-by-step process of installing flush mount wood floor vents.
Tools & Materials Needed
Before you begin, make sure you have all the tools and materials needed for the job. You will need:
• Flush mount wood floor vents
• Circular saw
• Drywall saw
• Measuring tape
• Cordless drill
• Drill bits
• Wood screws
• Construction adhesive
• Putty knife
• Vacuum cleaner
• Rags or paper towels
• Wood putty
• Sandpaper
• Paint brush
• Paint (optional)
Step 1: Preparing The Area & Measuring The Floor Vent Hole
The first step is to prepare the area and measure the floor vent hole. Start by vacuuming the area to remove any dirt or debris. Then, using a measuring tape, measure out the area where the flush mount wood floor vent will be installed. Make sure you measure twice to ensure accuracy. Be sure to leave enough space for the vent itself as well as any additional accessories, such as screws or adhesive. Mark the measurements with a pencil or marker.
Step 2: Cutting The Hole For The Vent
+Once you have measured out the area, you are ready to cut the hole for the vent. Using a circular saw, carefully cut along your marked lines and remove the excess wood. If you need to make any adjustments, use a drywall saw to shave off any extra material until it fits perfectly in the hole. Keep in mind that you want an even gap between the vent and the flooring so that it will sit flush when it is installed.
Step 3: Installing The Vent And Accessories
+After cutting out the hole, it’s time to install the vent and accessories. Begin by applying construction adhesive around the perimeter of the vent hole. Place your flush mount wood floor vent into the hole and press down firmly until it is secure. Make sure all sides are even before moving on to the next step. Next, pre-drill holes for any screws that will be used to secure the vent in place. Using wood screws and a cordless drill, attach the screws into place. Finally, add any additional accessories such as putty knifes or rags if needed.
Step 4: Finishing Touches & Clean Up
+Once all of your accessories are in place, it’s time to finish up your project! Apply wood putty over any exposed screws or nail holes using a putty knife. Sand down any rough edges and wipe away any excess putty with a damp rag or paper towel. If desired, paint your vent with a color of your choice using a small paint brush. Let dry completely before using your newly installed flush mount wood floor vent!
Final Thoughts Installing flush mount wood floor vents is not as difficult as it may seem! With just a few simple steps and some patience, anyone can add style and ventilation to their home in no time at all! From measuring out your area to adding finishing touches, make sure you follow each step carefully for best results.