Some hardwood varieties are available in natural red or yellowish, and you've got to watch out for these. With appropriate care as well as maintenance, the hardwood floors of ours will retain their beauty for a quite a while. The latter has the advantageous asset of possible price negotiations and usually offering free samples. Don't attempt some renovation work on the flooring of yours if you don't have the essential expertise and experience.
Here are Images about How To Float Hardwood Flooring On Concrete
How To Float Hardwood Flooring On Concrete
:no_upscale()/cdn.vox-cdn.com/uploads/chorus_asset/file/19493650/0405_flooring_illo.jpg)
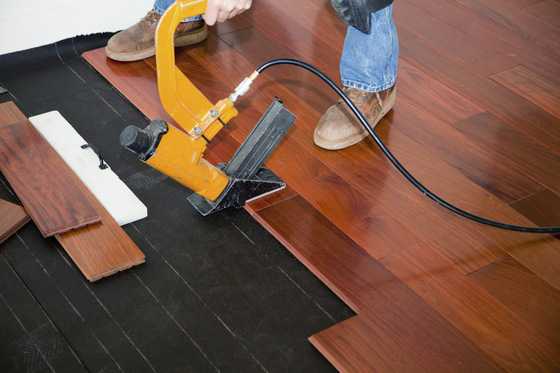
Before getting into the useful suggestions on hardwood flooring, it's only suitable to first explore the reason why you would wish to think about this flooring type in the very first spot. If you did a truly good job of installing your hardwood flooring using the glue down method, you won't have nearly as a lot of creaky floor syndrome as you'd with other methods of installation.
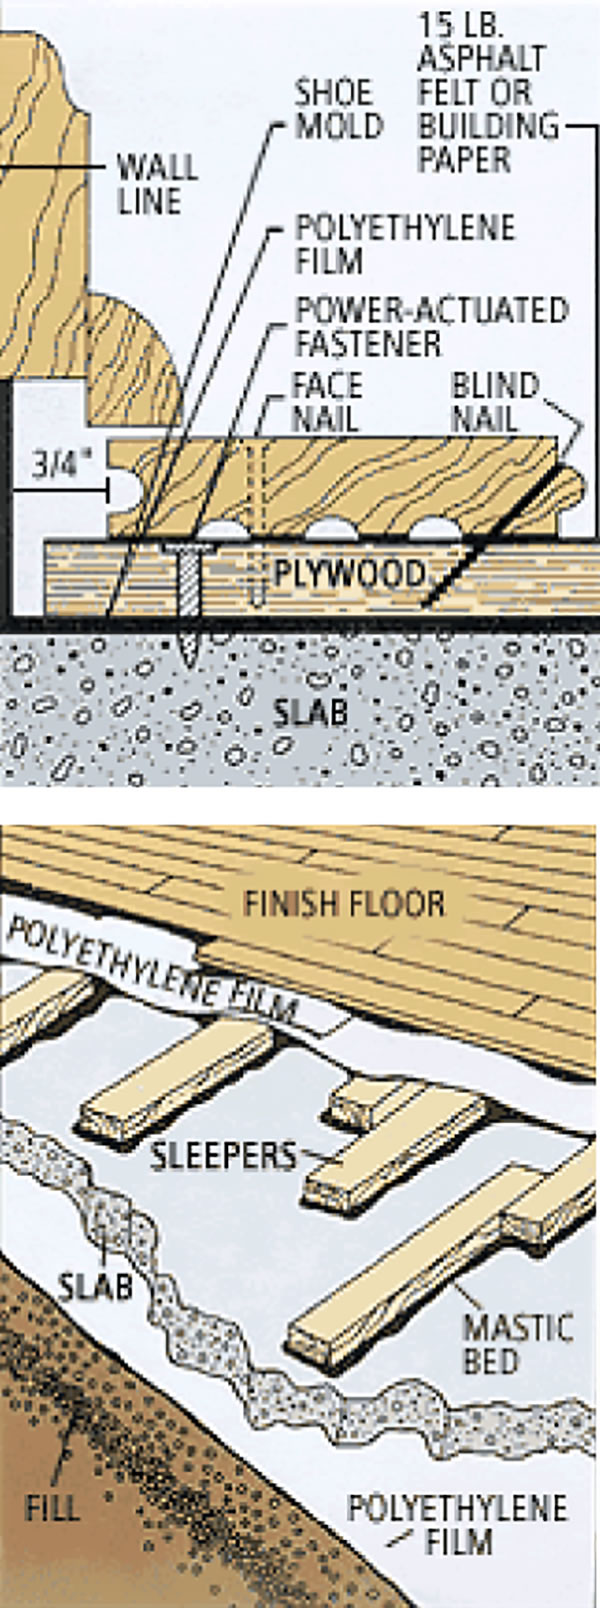
Installing a Hardwood Floor Over a Concrete Slab – American
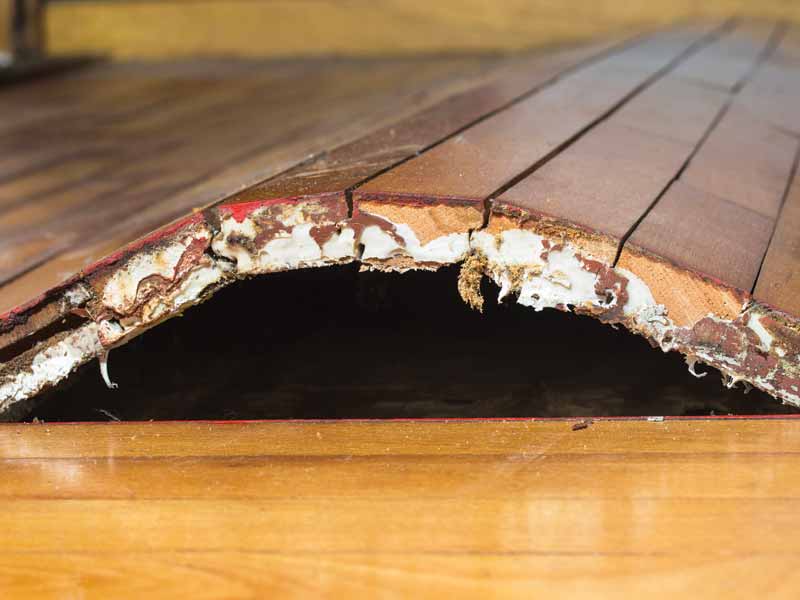
Oriental walnut hardwood typically comes stained in three styles. The loose-fitting flooring is not attached to something and can be move, bubbly, and creaky around. But harm is coming to the hardwood floors whether it's out of the dog or maybe the person occupants. Vacuum carefully and pick up every bit of fine dust as well as grit with tacking cloths.
Images Related to How To Float Hardwood Flooring On Concrete
Floating Wood Floor: Install One in 8 Steps – This Old House
/cdn.vox-cdn.com/uploads/chorus_asset/file/19493784/howto_tilefloor_04.jpg)
Fitting Hardwood Floor To Concrete – Wood and Beyond Blog

How to Install a Hardwood Floating Floor

How To Install A Floating Hardwood Floor
Installing a Floating Wood Floor
Tile Floor Over Concrete Slab Laying hardwood floors, Floating

Can I Install Hardwood Floors On A Slab Floors By The Shore

How to Install a Wood Subfloor Over Concrete Olde Wood Ltd.
Floating Floor vs. Nail Down Slaughterbeck Floors, Inc.
How to install hardwood floors on concrete: the detailed instructions
hardwood floors over concrete floors DIY
Getting it right: Wood flooring over a concrete subfloor – Page 2
Related articles:
- Hardwood Floor Finish Brands
- Hand Scraped Hardwood Flooring
- Home Hardwood Floor
- Hardwood Floor Deep Cleaner
- Engineered Hardwood Floor
- Cherry Hardwood Flooring Reviews
- Hardwood Floor Cleaning And Refinishing
- Wide Plank Pine Hardwood Flooring
- Hardwood Flooring Designs Photos
- Hardwood Floor Selection Guide
How to Float Hardwood Flooring on Concrete
If you have a concrete subfloor and dream of the warm, inviting look of hardwood flooring, you may be wondering how to make it happen. While traditional hardwood flooring is typically installed by nailing or gluing it directly to a wooden subfloor, floating hardwood flooring offers a viable option for concrete subfloors. Floating hardwood floors are installed over an underlayment, with each plank interlocking with the others. This method not only provides a more straightforward installation process but also allows for expansion and contraction of the wood. In this article, we will guide you through the steps of floating hardwood flooring on concrete, answer frequently asked questions, and provide valuable tips to ensure a successful installation.
1. Preparation:
Before beginning any flooring project, thorough preparation is essential. Here’s what you need to do:
a) Clean the Concrete Subfloor: Start by removing any debris or loose particles from the concrete subfloor. Sweep or vacuum the area thoroughly to ensure a clean surface.
b) Check for Moisture: Concrete can retain moisture, which could damage your hardwood flooring over time. Conduct a moisture test by taping a plastic sheet onto the concrete floor and leaving it for 24-48 hours. If condensation appears on the underside of the plastic or if the concrete darkens, it indicates high moisture levels. In such cases, address the moisture issue before proceeding with the installation.
c) Level the Subfloor: Uneven concrete can cause problems when installing floating hardwood floors. Use a leveling compound to even out any low spots or imperfections in the subfloor. Follow the manufacturer’s instructions for mixing and applying the compound accurately.
d) Acclimate the Wood: Allow your hardwood planks to acclimate to the room’s temperature and humidity for at least 72 hours before installation. This step ensures that the wood adjusts to its new environment and minimizes potential issues like warping or buckling in the future.
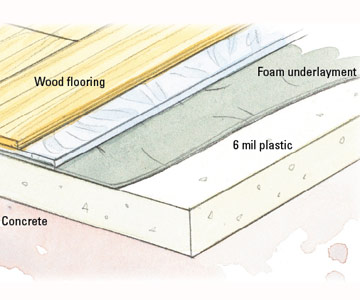
2. Install the Underlayment:
The underlayment is a crucial component of floating hardwood flooring on concrete. It acts as a moisture barrier, provides cushioning, and helps reduce noise transmission. Follow these steps to install the underlayment:
a) Roll Out the Underlayment: Start by unrolling the underlayment parallel to the longest wall in the room. Allow it to extend up the wall by a few inches to provide a seamless transition under baseboards or trim.
b) Trim Excess Underlayment: Use a utility knife to trim any excess underlayment along the edges of the room.
c) Tape Seams: If your underlayment comes in separate sheets, overlap the edges by a few inches and use moisture-resistant tape to secure them together. This prevents any moisture from seeping through the seams and reaching your hardwood flooring.
d) Inspect for Smoothness: Once installed, inspect the underlayment for any bumps or wrinkles. Smooth out any imperfections before proceeding with the hardwood installation.
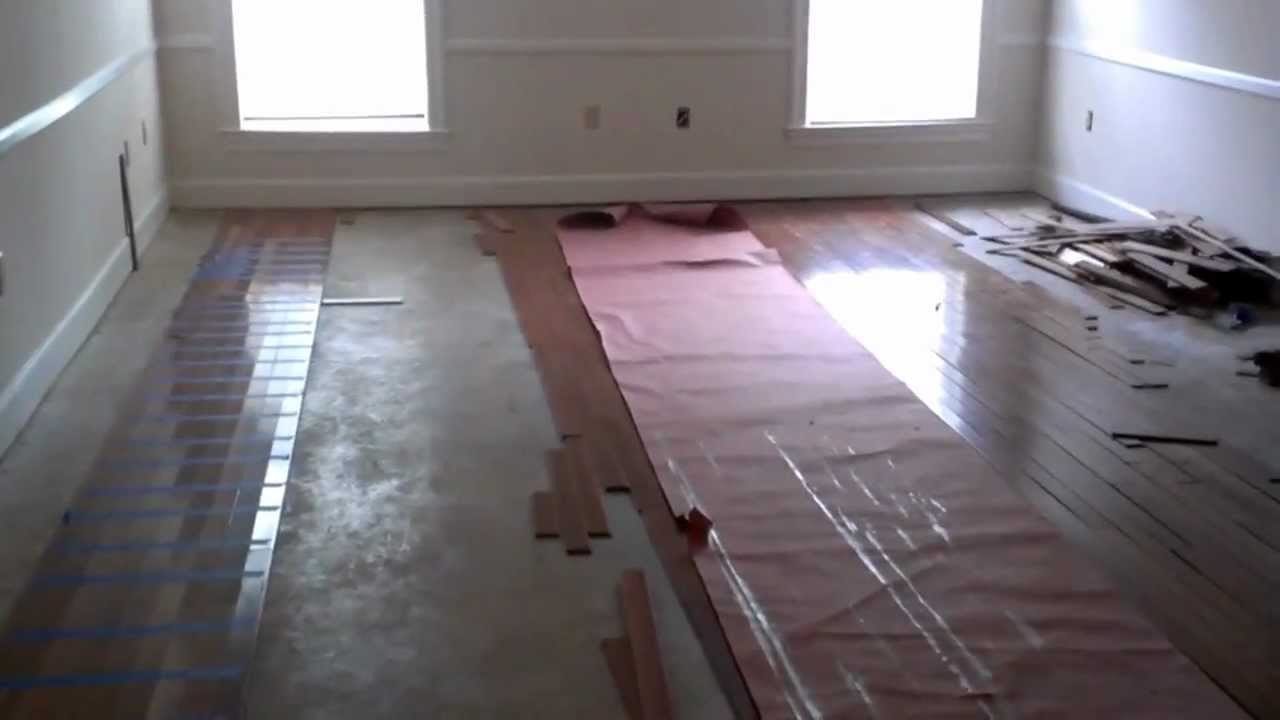
3. Lay Out and Install the Hardwood Flooring:
Now that you have prepared the subfloor and installed the underlayment, it’s time to lay out and install your hardwood flooring. Follow these steps for a successful installation:
a) Choose Your Starting Point: Begin by determining your starting point based on the room’s layout and aesthetics. It’s generally recommended to start against a straight wall, as it provides better alignment for subsequent rows.
b) Measure and Cut Planks: Measure And cut your planks to fit the room, leaving a 1/2 inch gap around the edges for expansion. Use a saw or flooring cutter to make accurate cuts.
c) Install the First Row: Place the first plank against the starting wall, with the tongue side facing the wall. Use spacers to maintain the 1/2 inch gap along the wall. Secure the plank by inserting the tongue into the groove of the previous row and tapping it with a mallet or hammer and block.
d) Continue Installing Rows: Lay subsequent rows following the manufacturer’s instructions for joining planks together. Use a tapping block and hammer to ensure tight, secure connections between planks.
e) Trim Planks as Needed: Measure and cut planks to fit around obstacles like doorways or vents. Use a jigsaw or coping saw for more intricate cuts.
f) Leave Expansion Gaps: Remember to leave a 1/2 inch expansion gap at all walls and transitions. This allows for natural movement of the wood as it expands and contracts with changes in temperature and humidity.
g) Install Baseboards or Trim: Once all planks are installed, install baseboards or trim to cover the expansion gaps and provide a finished look.
4. Finishing Touches:
a) Clean Up: Remove any debris or dust from the installation area using a broom or vacuum cleaner.
b) Install Transition Pieces: If necessary, install transition pieces to bridge any height differences between rooms or between hardwood flooring and other types of flooring.
c) Apply Finishing Products: Apply any desired finishing products, such as stain or sealant, following the manufacturer’s instructions. This step helps protect the hardwood and enhances its appearance.
d) Allow Time for Drying: Allow the finishing products to dry completely before walking on or placing furniture on the newly installed hardwood flooring.
e) Enjoy Your New Hardwood Flooring: Once the floor is fully dried and cured, you can enjoy your beautiful new hardwood flooring! Regularly maintain and care for it to ensure its longevity and beauty. Some additional tips for installing hardwood flooring:
– Acclimate the planks to the room’s temperature and humidity for at least 48 hours before installation.
– Use a moisture barrier or underlayment to protect the wood from moisture and provide cushioning.
– Use a tapping block and hammer to ensure tight connections between planks without damaging the wood.
– Check for levelness and make any necessary adjustments before installing the flooring.
– Take breaks and rest your knees and back to prevent strain or injury during the installation process.
– Follow the manufacturer’s instructions for cleaning and maintenance to keep your hardwood flooring looking its best. Installing hardwood flooring can be a rewarding DIY project. Here are the steps to follow:
1. Prepare the Installation Area:
a) Remove any existing flooring or carpeting.
b) Ensure the subfloor is clean, dry, and level. Repair any cracks or uneven areas.
c) Install a moisture barrier or underlayment if recommended by the manufacturer.
2. Gather Tools and Materials:
a) Measure the installation area to determine the amount of hardwood flooring needed.
b) Purchase the necessary tools, including a tape measure, saw, tapping block, hammer, jigsaw or coping saw, and safety equipment such as goggles and knee pads.
3. Install the Hardwood Flooring:
a) Start with the first row: Lay down the first row of planks, ensuring they are parallel to the longest wall in the room. Leave a 1/2 inch expansion gap at all walls.
b) Use spacers to maintain consistent spacing between planks.
c) Attach planks to the subfloor using nails or staples, following manufacturer’s instructions.
d) Continue Installing Rows: Lay subsequent rows following manufacturer’s instructions for joining planks together. Use a tapping block and hammer to ensure tight connections between planks.
e) Trim Planks as Needed: Measure and cut planks to fit around obstacles like doorways or vents. Use a jigsaw or coping saw for more intricate cuts.
f) Leave Expansion Gaps: Remember to leave a 1/2 inch expansion gap at all walls and transitions.
g) Install Baseboards or Trim: Once all planks are installed, install baseboards or trim to cover expansion gaps and provide a finished look.
4. Finishing Touches:
a) Clean Up: Remove any debris or dust from the installation area using a broom or vacuum cleaner.
b) Install Transition Pieces: If necessary, install transition pieces to bridge any height differences between rooms or flooring types.
c) Apply Finishing Products: Apply any desired finishing products, such as stain or sealant, following the manufacturer’s instructions.
d) Allow Time for Drying: Allow finishing products to dry completely before walking on or placing furniture on the flooring.
e) Enjoy Your New Hardwood Flooring: Once the floor is fully dried and cured, you can enjoy your beautiful new hardwood flooring!
Remember to acclimate the planks, use a moisture barrier, check for levelness, take breaks to prevent strain, and follow cleaning and maintenance instructions for long-lasting beauty.