This's vital for you to have the ability to calculate precisely how many tiles you will need. In the the usual days, tiles were merely used in rooms with a great deal of tumble, rough, traffic, and moisture. There is great freedom of the use of mosaic tiles and majority of people which hire artists to design their house opt to work with these as their medium.
Images Related to How Do You Install Tile Flooring
How Do You Install Tile Flooring
Tiles are easy to clean to remove several damaging allergens. Together with the creativity and creativity, you can set up a floors layout that's special to your house and provide the rooms of your house an excellent personality, your personality. The tile flooring will be the right choice for the breathing room of yours. The next step is wiping the linoleum flooring until it seems to be clean.
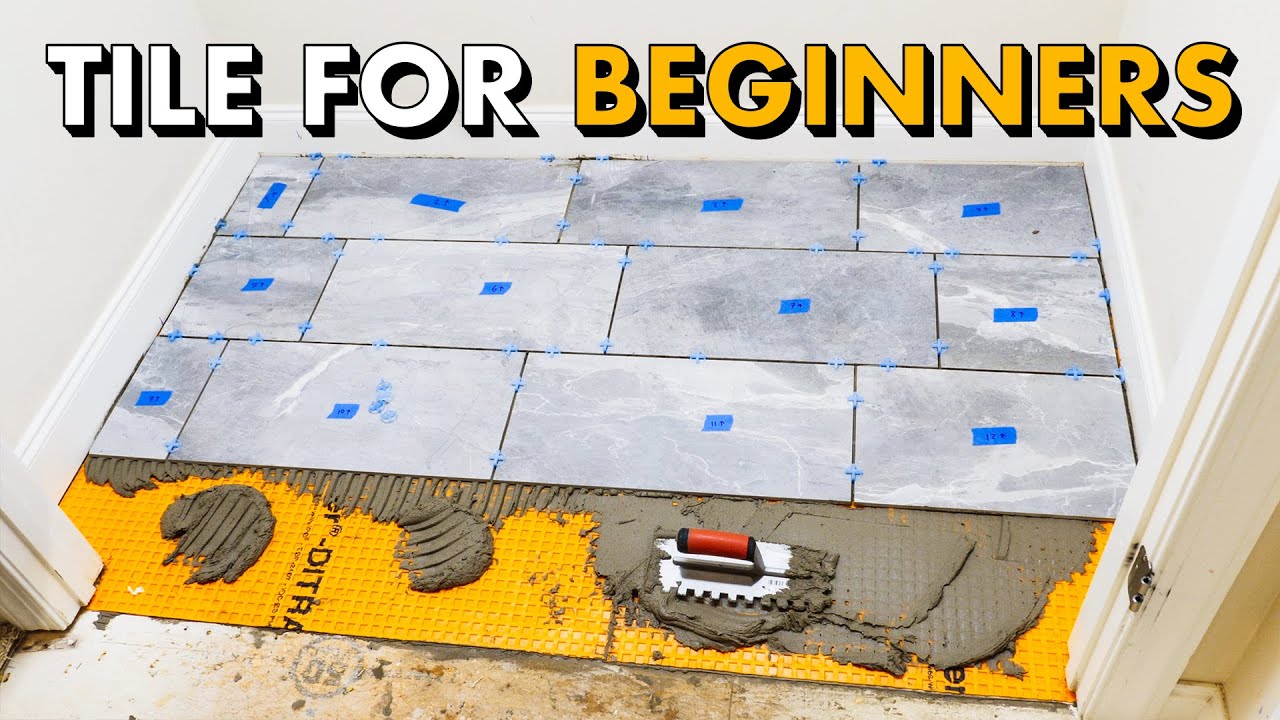
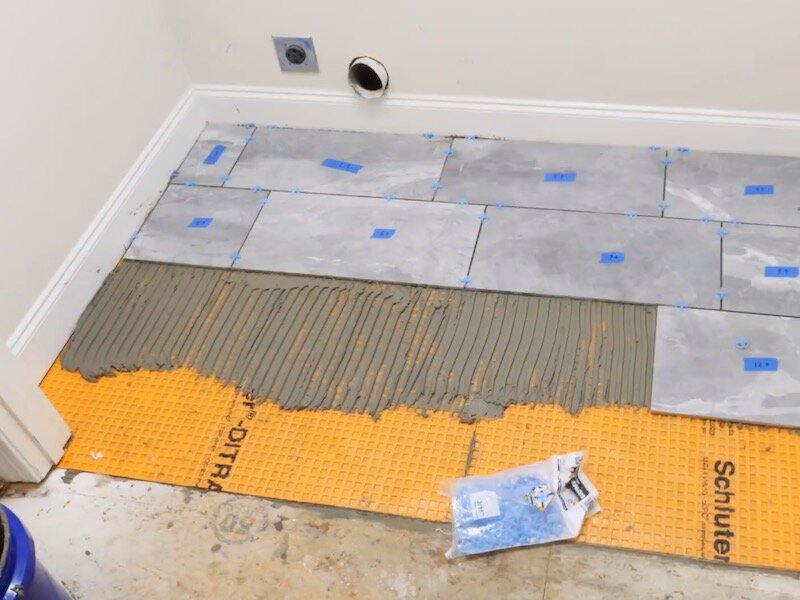
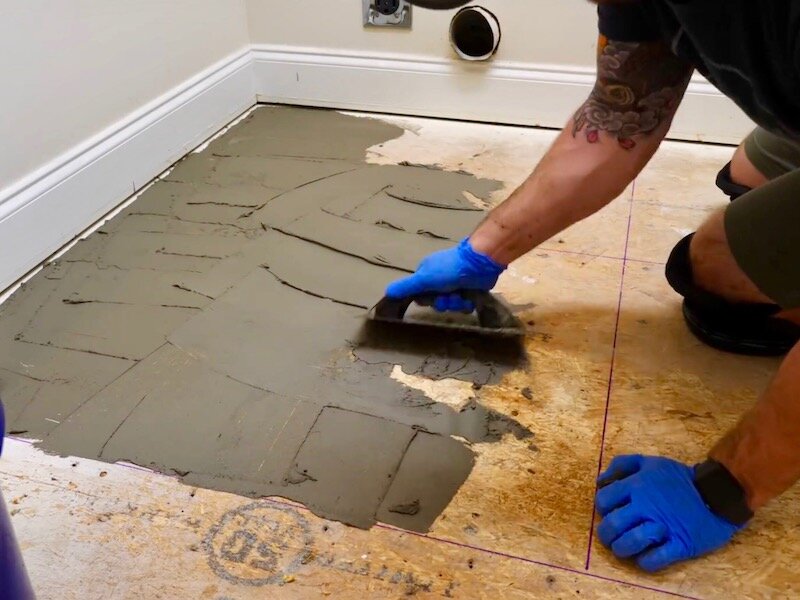
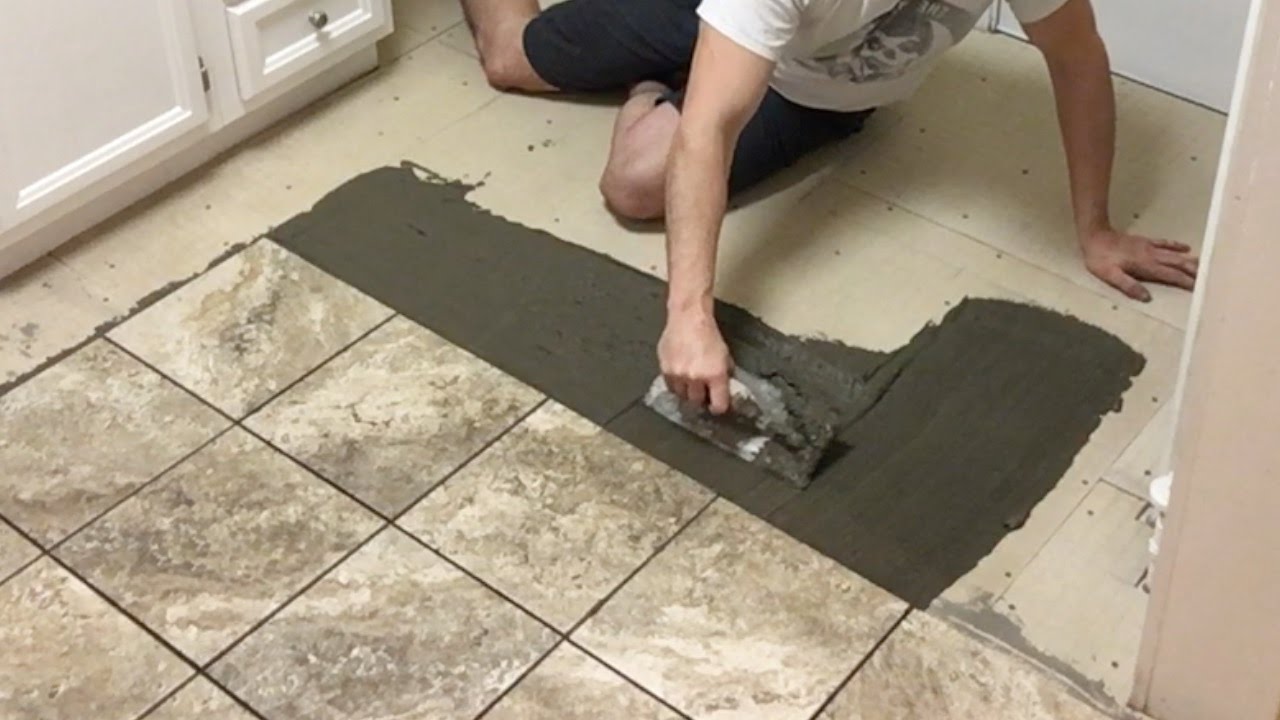
Installing Tile Floor for the First Time // How To Lay Tile Floor
Linoleum tile floors seldom scratch and this could be an enormous plus. Mix the solution properly and try soaking a piece of cloth throughout it. Run your damp mop over the floor when a week and you will have a clean floor. Owners should be designed with the very best hard tile floor products. You are able to choose these tiles possibly for the bedroom of yours or perhaps the living rooms of yours, kitchen area and even bathroom.
How to Install Ceramic Tile Flooring in 9 Steps – This Old House
:no_upscale()/cdn.vox-cdn.com/uploads/chorus_asset/file/19496947/color_gutters_illo_web_1.jpg)
How to Tile a Bathroom Floor Installing tile floor, How to lay

Installing Tile Floor for the First Time // How To Lay Tile Floor
What to Expect During Your Tile Flooring Installation

How to Install Ceramic Tile Flooring in 9 Steps – This Old House
:no_upscale()/cdn.vox-cdn.com/uploads/chorus_asset/file/19496978/howto_tile_01.jpg)
How to Prepare a Vinyl Floor for Ceramic Tile
/can-you-tile-over-vinyl-floor-1822596_FINAL_NEW-b4003c12b3ce48b382e80c57fb340b03.png)
How To Install Tile Flooring
Can You Lay Tile Directly Over a Plywood Subfloor? – Todayu0027s Homeowner
How to Install a Tile Floor
How to Lay Tile: DIY Floor Tile Installation Loweu0027s
How to Install Ceramic Tile Flooring in 9 Steps – This Old House
/cdn.vox-cdn.com/uploads/chorus_asset/file/19497110/howto_tile_07.jpg)
Subfloors and Underlayment for Ceramic Tile Floors
/best-subfloors-to-use-for-laying-tile-1822586-hero-efcfac9422ab457da5d2cbc7f7361df7.jpg)
Related articles:
- Vintage Bathroom Floor Tile Patterns
- Bathroom Floor Tile DIY
- Limestone Bathroom Floor Tiles
- Bathroom Floor Porcelain Tile
- Concrete Bathroom Floor Ideas
- White Bathroom Ceramic Tiles
- Bathroom Floor Baseboard
- Rustic Bathroom Flooring Ideas
- Bathroom Flooring Options
- Bamboo Bathroom Flooring Ideas
How Do You Install Tile Flooring
Tile flooring is a popular choice for many homeowners due to its durability, versatility, and aesthetic appeal. Whether you’re looking to upgrade your kitchen, bathroom, or any other room in your home, installing tile flooring can be a rewarding and relatively straightforward DIY project. In this article, we will provide you with a step-by-step guide on how to install tile flooring, along with some helpful tips and frequently asked questions.
Preparation: Gathering the Materials and Tools
Before you begin the installation process, it’s essential to gather all the necessary materials and tools. Here’s a list of what you’ll need:
1. Tiles: Choose the type and design of tiles that best suit your space. Ceramic, porcelain, and natural stone tiles are some popular options.
2. Tile adhesive: This is used to secure the tiles to the floor. Make sure to select an adhesive suitable for your specific tile type.
3. Notched trowel: A notched trowel is used to spread the adhesive evenly on the floor.
4. Tile spacers: These small plastic pieces help maintain consistent grout lines between tiles.
5. Grout: Grout fills in the gaps between tiles and provides stability and moisture resistance.
6. Grout float: A grout float is used to apply grout evenly across the tiled surface.
7. Sponge or cloth: This is used for cleaning excess grout off the tiles during installation.
8. Level: A level ensures that your floor is even and properly aligned.
9. Measuring tape: You’ll need a measuring tape to determine the dimensions of your space accurately.
10. Safety equipment: Wear safety goggles and gloves when working with tile adhesive or grout to protect yourself from potential hazards.
Once you have all the necessary materials and tools ready, it’s time to move on to the next step.
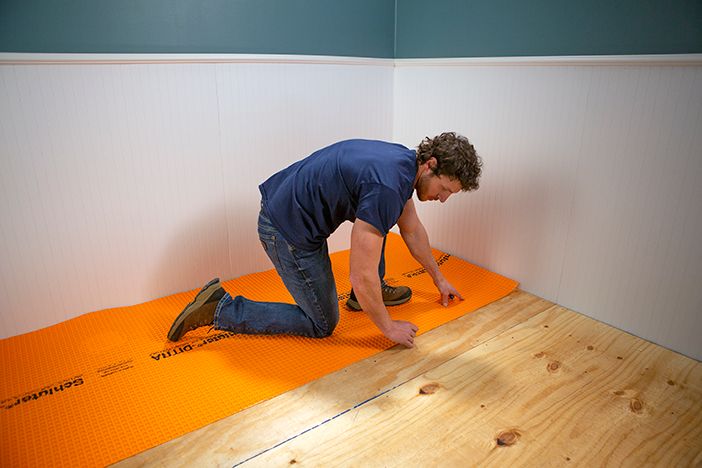
Step 1: Prepare the Subfloor
Before installing tile flooring, it’s crucial to prepare the subfloor properly. Ensure that the subfloor is clean, dry, and free from any debris or imperfections. If you are installing tile on a concrete subfloor, make sure it is fully cured and does not have any cracks or moisture issues. For wood subfloors, check for any loose boards or squeaks and fix them before proceeding.
FAQ: Can I install tile directly over an existing floor?
Answer: In some cases, yes. However, it’s essential to evaluate the condition of the existing floor before deciding. If the current floor is uneven, damaged, or moisture-prone, it’s best to remove it and start with a clean slate.
Step 2: Plan the Layout
Planning the layout of your tile flooring is crucial for achieving a professional-looking result. Start by finding the center point of your room. Measure and mark this point on the floor. From there, create a grid using chalk lines or laser levels to divide the space into equal-sized sections.
FAQ: How do I determine the size of each tile section?
Answer: The size of each tile section depends on various factors, including the tile size, room dimensions, and personal preference. It’s recommended to avoid having cut tiles along prominent edges or in highly visible areas.
Step 3: Apply Tile Adhesive
Once you have planned the layout, you can begin applying tile adhesive to secure the tiles to the subfloor. Start at one corner of your room and use a notched trowel to spread The adhesive evenly on the floor. Work in small sections, applying the adhesive in a thin layer. Make sure to follow the manufacturer’s instructions for mixing and applying the adhesive.
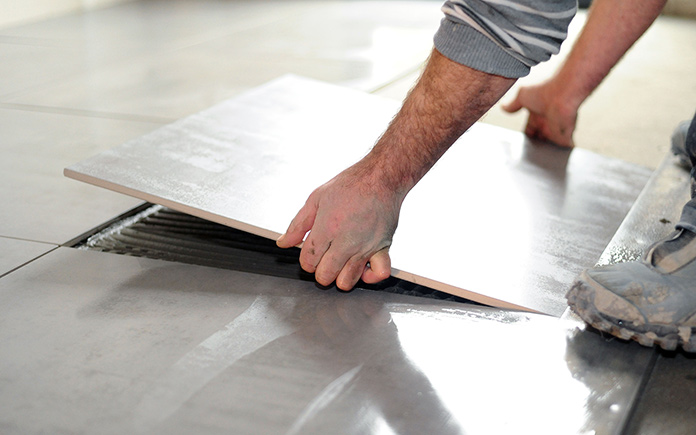
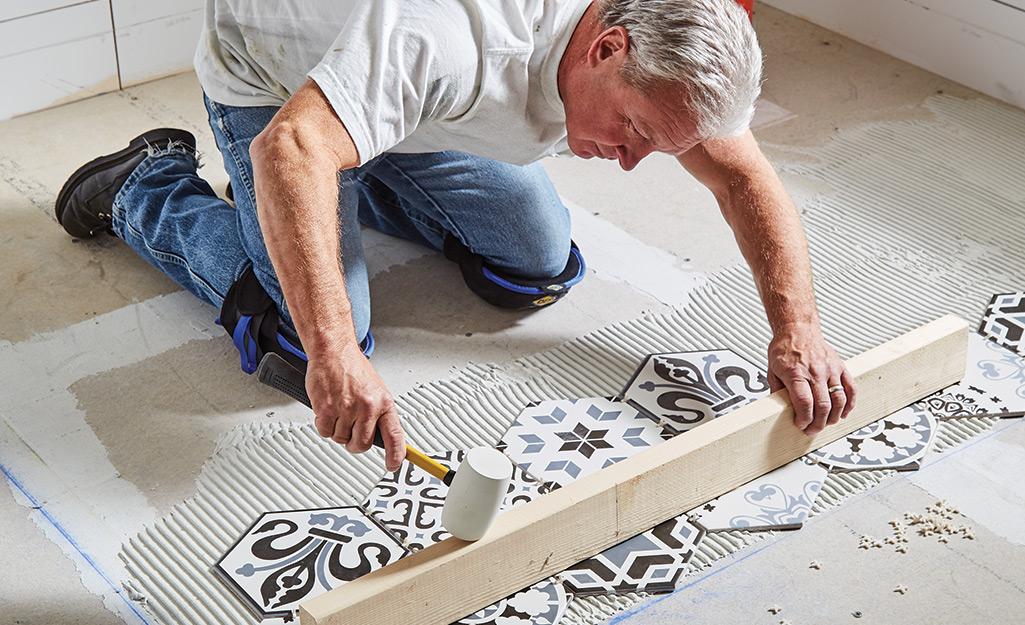
Step 4: Place Tiles and Use Tile Spacers
After applying the adhesive, start placing the tiles on the floor according to your planned layout. Press each tile firmly into the adhesive, making sure it is level and aligned with the surrounding tiles. As you go, use tile spacers to maintain consistent grout lines between tiles. Adjust the position of the tiles as needed before the adhesive sets.
Step 5: Allow Adhesive to Dry
Once all the tiles are in place, allow the adhesive to dry fully. The drying time will vary depending on the type of adhesive used, so refer to the manufacturer’s instructions for specific guidance. Avoid walking on or disturbing the tiles during this time to ensure they set properly.
Step 6: Apply Grout
After the adhesive has dried, it’s time to apply grout. Mix the grout according to the manufacturer’s instructions, ensuring it has a smooth consistency. Use a grout float to spread the grout over the tiled surface, pressing it into the gaps between tiles.
Step 7: Clean Excess Grout
After applying grout, use a damp sponge or cloth to clean off any excess grout from the surface of the tiles. Rinse out your sponge or cloth frequently to avoid smearing excess grout onto clean areas. Allow the grout to dry for a designated period before proceeding.
Step 8: Seal Grout (Optional)
To enhance durability and moisture resistance, you may choose to seal your grout after it has dried completely. Follow the manufacturer’s instructions for applying the grout sealer, and allow it to dry before using the tiled floor.
Step 9: Enjoy Your New Tile Floor
Once the grout is dry and any sealer has been applied, your tile floor is ready to be used and enjoyed. Regularly clean and maintain your tile floor to keep it looking its best for years to come. Regularly clean and maintain your tile floor to keep it looking its best for years to come. This may include sweeping or vacuuming regularly, mopping with a mild detergent and water, and avoiding harsh cleaning agents that can damage the tiles or grout. Additionally, be cautious when moving heavy furniture or objects across the floor to prevent scratching or cracking the tiles. By following these steps and properly caring for your tile floor, you can enjoy its beauty and durability for a long time. To summarize, the steps to install a tile floor are as follows:
1. Prepare the subfloor.
2. Plan the layout of the tiles.
3. Mix and apply adhesive according to manufacturer’s instructions.
4. Place tiles and use tile spacers for consistent grout lines.
5. Allow adhesive to dry fully before walking on tiles.
6. Apply grout using a grout float.
7. Clean excess grout from the surface of the tiles.
8. Optional: Seal the grout for enhanced durability and moisture resistance.
9. Enjoy your new tile floor by regularly cleaning and maintaining it.
By following these steps, you can successfully install a tile floor that is both visually appealing and long-lasting.