This particular flooring type is built in order that their inner core is laid in opposite directions defining it as immune to atmospheric assaults which would usually cause it to enlarge or even shrink producing all kinds of issues. Best of all the, it's among the least expensive kinds of hardwood floors to set up. The strong hardwoods can be easy to clean.
Here are Images about Hardwood Flooring On Concrete Surface
Hardwood Flooring On Concrete Surface:
Due to this, Asian walnut hardwood is usually used as a substitute since it's relatively far more cost-effective compared to its cousin. To evaluate if a hardwood floor has lightweight aluminum oxide in the finish in other words the sample in the microwave of yours and if it sparks, it can indeed have lightweight aluminum oxide within the finish. And exactly how to better look after it:
Fitting Hardwood Floor To Concrete – Wood and Beyond Blog

As time continues on, hardwood floors may call for a small amount of help to look their best, particularly in case they're laid in regions with heavy traffic and high demands. The downside to unfinished flooring is there's usually a significant mess from sanding the flooring along with fumes as a result of the stain as well as urethane coatings:
Images Related to Hardwood Flooring On Concrete Surface
Can I Install Hardwood Floors On A Slab Floors By The Shore

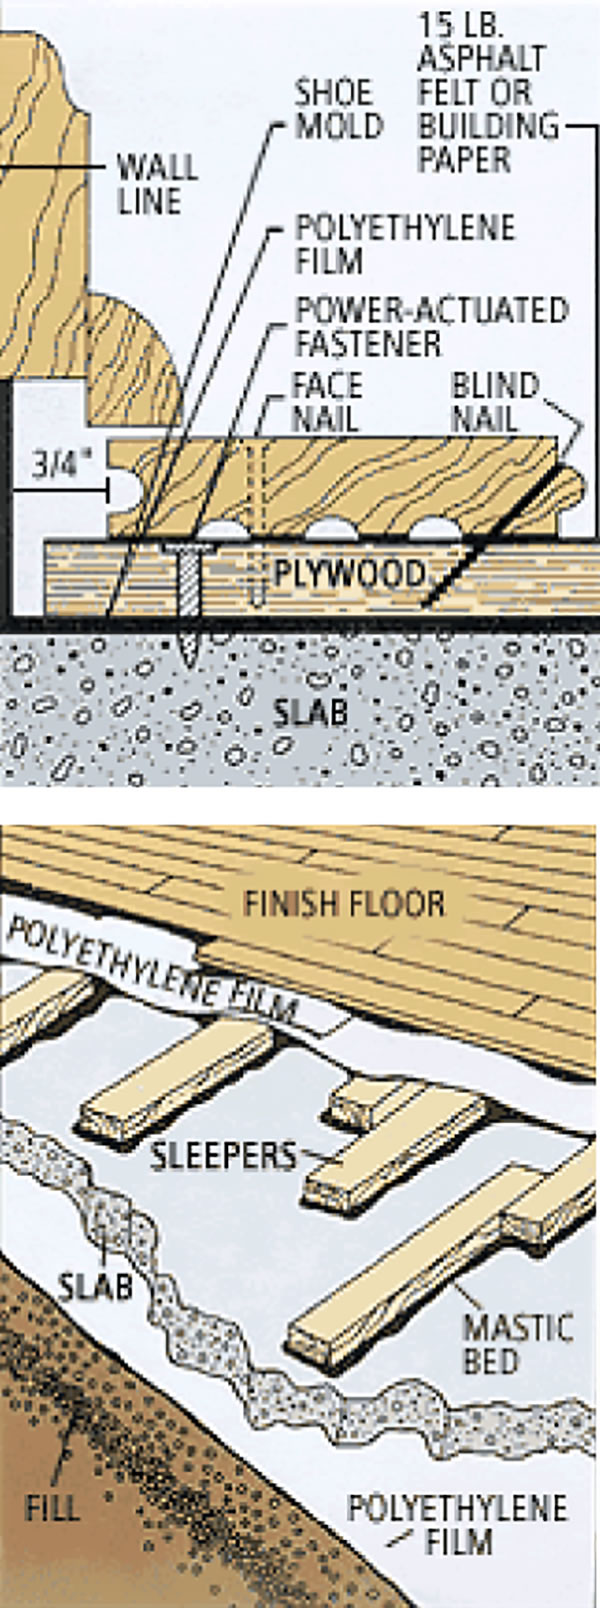
How to install solid hardwood flooring over concre – Got

How To Install A Workshop Wood Floor

Qu0026A: Insulated Wood Floor Over Concrete JLC Online

Getting it right: Wood flooring over a concrete subfloor – Page 2
Installing Hardwood Floors over Concrete

Prepping Concrete Slabs for Hardwood Floor Installation City

Tile Floor Over Concrete Slab Laying hardwood floors, Floating

Guide: How to Install Hardwoods on a Concrete Subfloor
Floating Wood Floor: Install One in 8 Steps – This Old House
:no_upscale()/cdn.vox-cdn.com/uploads/chorus_asset/file/19493650/0405_flooring_illo.jpg)
Installation of Wooden Flooring over Concrete Slab – The Constructor

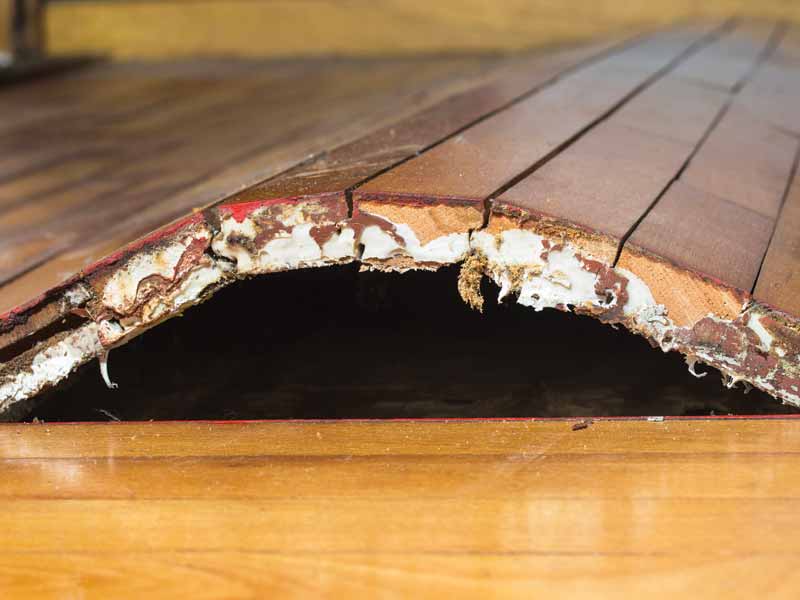
Should You Install Flooring on Damp Concrete? Concrete

Related articles:
- Hardwood Floor Finish Brands
- Hand Scraped Hardwood Flooring
- Home Hardwood Floor
- Hardwood Floor Deep Cleaner
- Engineered Hardwood Floor
- Cherry Hardwood Flooring Reviews
- Hardwood Floor Cleaning And Refinishing
- Wide Plank Pine Hardwood Flooring
- Hardwood Flooring Designs Photos
- Hardwood Floor Selection Guide
Hardwood flooring is a timeless and elegant choice for any space, but when it comes to installing hardwood flooring on concrete surfaces, it requires a bit more knowledge and experience. In this comprehensive guide, we’ll take a deep dive into the process of installing hardwood flooring on concrete, from preparation all the way through to installation.
Subfloor Preparation
The first step in the process of installing hardwood flooring on concrete is preparing the subfloor. Before you begin, make sure the concrete surface is clean and free of any debris or dirt. Use a broom or vacuum to remove any dust or dirt and then use a damp cloth to wipe away any remaining particles.
Once you’ve cleaned the surface, check the surface for any cracks or damage that may need to be repaired before you continue. Use a crack-filler compound to fill in any cracks and use a concrete patching compound to fill in any other damaged areas.
You should also check your concrete surface for moisture levels. The ideal moisture level for hardwood flooring is between 6-9 percent. Use a moisture meter to test your concrete surface and if the levels are above 9 percent, you’ll need to install a moisture barrier before continuing with the installation process.
Installing Underlayment
Once your subfloor is prepared, you can begin installing the underlayment. Underlayment helps absorb sound and provides cushioning for your hardwood flooring. It also helps protect against moisture damage, so it’s important to make sure it’s installed properly.
Start by unrolling the underlayment across the surface of the concrete and use a utility knife to cut off any excess material along the edges of the walls. Once you’ve cut off any excess material, you can use nails or staples to secure the underlayment to the concrete surface. Make sure you’re using nails or staples that are specifically designed for hardwood floors and make sure they are spaced approximately 6-8 inches apart.
Installing Hardwood Flooring
Once you’ve installed the underlayment, you can begin installing your hardwood flooring planks. Start by laying out your planks in their finished positions before nailing them down. Make sure your planks are straight and even before you hammer them into place.
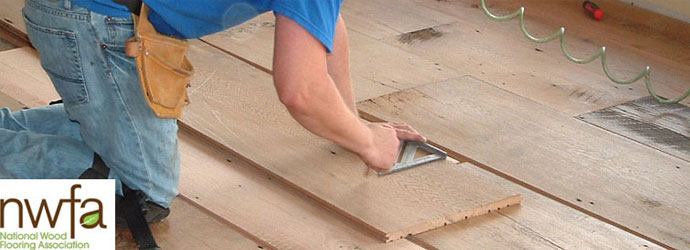
When nailing down your hardwood planks, make sure you’re using nails that are specifically designed for hardwood floors and make sure they are spaced approximately 6-8 inches apart. If you’re using a glue-down method, make sure you apply an even layer of adhesive over the entire concrete surface before laying down your planks.
Finishing Touches
Once all of your planks have been installed, you can start adding finishing touches like baseboards and trim pieces. Be sure to caulk along the edges of any trim pieces or baseboards to ensure an airtight seal. You should also sand down any rough edges or areas where two planks meet and finish by applying two coats of sealer over your entire hardwood flooring surface.
Frequently Asked Questions
Q: What type of nails should I use when installing hardwood flooring on concrete?
A: You should use nails that are specifically designed for hardwood floors and make sure they are spaced approximately 6-8 inches apart.
Q: How do I know if my concrete surface has high moisture levels?
A: You can use a moisture meter to check your concrete surface for moisture levels. The ideal moisture level for hardwood flooring is between 6-9 percent.
Q: Is there anything else I need to do after I install my hardwood flooring?
A: After all of your planks have been installed, be sure to caulk along the edges of any trim pieces or baseboards to ensure an airtight seal and sand down any rough edges or areas where two planks meet. Finally, apply two coats of sealer over your entire