When you're installing hardwood flooring using the glue down technique, you can rest assured you are using a strategy that has been time tested. Cost for engineered hardwood flooring is founded on the thickness of the substrate or maybe tiers of plywood information that comprises the overall composition and the decision of the completed best level.
Here are Images about Glue Down Engineered Hardwood Flooring On Concrete
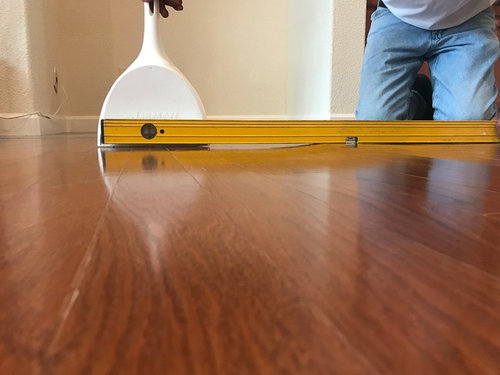
Glue Down Engineered Hardwood Flooring On Concrete

During the finishing process, engineered hardwood is actually cured with a UV illumination. It is vitally important to note that not all engineered items have the identical kind of installation specifications. Incomplete hardwoods are actually a bit inexpensive to invest in and it will take quick sanding, optional staining, and sealing after installation, which will demand you a minimum of 48 hours for your sealant to dry out.
Fitting Hardwood Floor To Concrete – Wood and Beyond Blog

Oak hardwood flooring is actually preferred over laminate flooring by most of men and women due to the environmental helpful characteristics of its, you are able to very easily install them and also you only have to invest once because oak flooring is investment for lifetime. Moisture content is a very important element when installing hardwood flooring.
Images Related to Glue Down Engineered Hardwood Flooring On Concrete
Glue down engineered hardwood on concrete
Installing Engineered Hardwood on Concrete – Twenty u0026 Oak

How to Install an Engineered Hardwood Floor
Glue Wood Flooring to a Concrete Slab – Fine Homebuilding

How do I glue wooden flooring over concrete? – The Wood Flo

How to Install DIY glue-down engineered hardwood flooring
How to Install Engineered Hardwood u2013 Glue Down Method – YouTube

Glue down engineered hardwood on concrete
Tims Hardwood Floors

Which Method Should I Use to Install My Engineered Wood Floor

Glue Wood Flooring to a Concrete Slab – Fine Homebuilding

Engineered Hardwood Flooring Installation: Tips and Common

Related articles:
- Hardwood Floor Finish Brands
- Hand Scraped Hardwood Flooring
- Home Hardwood Floor
- Hardwood Floor Deep Cleaner
- Engineered Hardwood Floor
- Cherry Hardwood Flooring Reviews
- Hardwood Floor Cleaning And Refinishing
- Wide Plank Pine Hardwood Flooring
- Hardwood Flooring Designs Photos
- Hardwood Floor Selection Guide
Glue Down Engineered Hardwood Flooring On Concrete: A Comprehensive Guide
Introduction:
Engineered hardwood flooring has gained immense popularity in recent years. Its durability, versatility, and aesthetic appeal have made it a preferred choice for homeowners and commercial spaces alike. One of the most common installation methods for engineered hardwood flooring on concrete is the glue-down method. In this article, we will delve into the process of installing glue-down engineered hardwood flooring on concrete, discussing each step in detail.
1. Preparing the Concrete Surface:
Before beginning the installation process, it is crucial to ensure that the concrete surface is clean, dry, and level. Any debris or dirt on the surface can interfere with the adhesion of the glue and compromise the longevity of your hardwood flooring. Start by thoroughly cleaning the concrete surface using a broom or vacuum cleaner to remove any loose dirt or debris. Next, inspect the surface for any cracks or unevenness. If there are any cracks, fill them with a suitable concrete filler and level any uneven areas using a self-leveling compound.
FAQs:
Q1: Can I install glue-down engineered hardwood flooring on a damp concrete subfloor?
A1: No, it is essential to ensure that the concrete subfloor is completely dry before installing glue-down engineered hardwood flooring. Moisture can cause adhesive failure and lead to various issues such as warping or cupping of the floorboards.
Q2: How long should I wait after filling cracks before installing the hardwood flooring?
A2: The drying time for concrete fillers can vary depending on factors such as humidity levels and product instructions. It is recommended to follow the specific instructions provided by the manufacturer of the concrete filler you are using. Generally, it is advisable to allow at least 24 hours for the filler to dry completely before proceeding with the installation.
2. Acclimating the Engineered Hardwood Flooring:
Acclimation refers to allowing the engineered hardwood flooring to adjust to the environment in which it will be installed. This step is crucial to prevent potential issues such as expansion or contraction of the floorboards after installation. Prior to installation, it is recommended to acclimate the flooring by storing it in the room where it will be installed for a minimum of 48 hours. This allows the wood to adjust to the temperature and humidity conditions of the space.
FAQs:
Q1: Can I skip the acclimation process for engineered hardwood flooring?
A1: Acclimating the flooring is highly recommended to minimize the risk of issues such as gaps or buckling post-installation. Skipping this step can compromise the long-term stability and performance of your hardwood flooring.
Q2: How should I store the engineered hardwood flooring during acclimation?
A2: The flooring should be stored in its packaging, with each box opened and stacked flat on a clean and dry surface. Avoid placing heavy objects on top of the boxes, as this can cause unnecessary pressure on the floorboards.
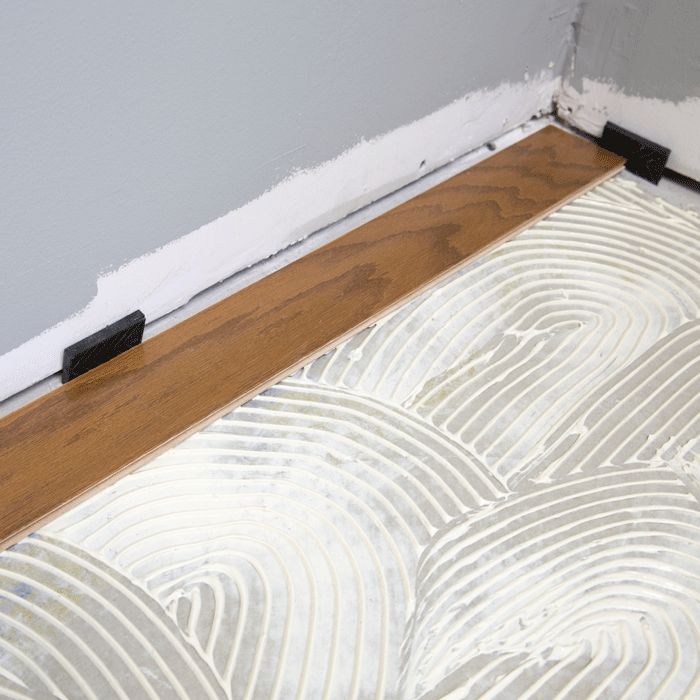
3. Applying Adhesive:
Once you have prepared the concrete surface and allowed the engineered hardwood flooring to acclimate, it’s time to apply adhesive. It is crucial to choose a high-quality adhesive specifically designed for hardwood flooring installation on concrete surfaces. Follow the manufacturer’s instructions regarding coverage rates and open time.
Start by applying a thin layer of adhesive directly onto the concrete surface using a trowel or notched spreader. Work in small sections, ensuring that the adhesive is evenly spread across the area where you will place each floorboard . Avoid applying too much adhesive, as it can squeeze up between the floorboards and cause issues with installation. Allow the adhesive to set for the recommended open time before placing the floorboards on top.
FAQs:
Q1: Can I use any type of adhesive for installing engineered hardwood flooring on concrete?
A1: It is important to choose an adhesive specifically designed for hardwood flooring installation on concrete surfaces. Using the wrong type of adhesive can lead to adhesion failure and potential damage to the floorboards.
Q2: How do I know if I have applied enough adhesive?
A2: It is recommended to follow the manufacturer’s instructions regarding coverage rates. Typically, you should apply enough adhesive to create a thin, even layer that fully covers the surface where each floorboard will be placed. However, avoid applying excessive amounts of adhesive, as this can cause issues with installation.
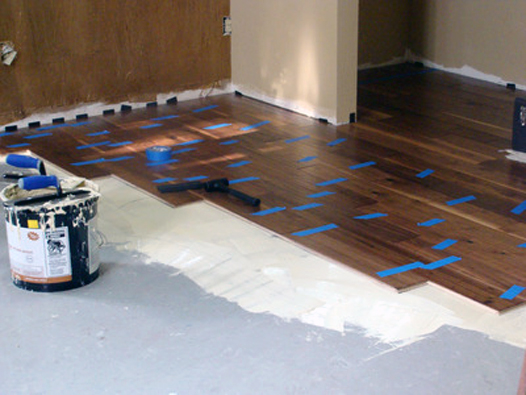
4. Installing the Engineered Hardwood Flooring:
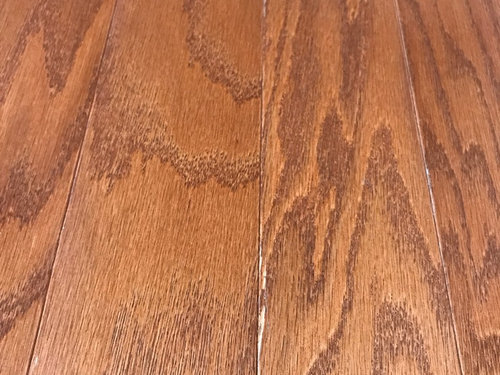
Once the adhesive has been applied, you can start installing the engineered hardwood flooring. Begin by placing the first floorboard in one corner of the room, ensuring that it is snug against the wall or baseboard. Use a rubber mallet or tapping block to gently tap the floorboard into place, ensuring a tight fit.
Continue installing the remaining floorboards, using a spacer between each board to allow for expansion. Ensure that each board is properly aligned and securely attached to the adhesive. Use a pry bar or tapping block as needed to ensure a tight fit.
FAQs:
Q1: Do I need to leave an expansion gap when installing engineered hardwood flooring on concrete?
A1: Yes, it is important to leave an expansion gap when installing hardwood flooring on concrete. This allows the floorboards to expand and contract with changes in temperature and humidity, preventing issues such as buckling or warping.
Q2: How do I ensure that each floorboard is securely attached to the adhesive?
A2: Use a rubber mallet or tapping block to gently tap each floorboard into place, ensuring a tight fit. You can also use a pry bar or tapping block as needed to ensure that the floorboards are securely attached to the adhesive and properly aligned. This will help prevent any gaps or movement in the flooring once it is installed. Overall, the instructions for installing engineered hardwood flooring on concrete are as follows:
1. Prepare the concrete surface by cleaning it thoroughly and ensuring it is dry and level.
2. Apply a moisture barrier or underlayment if necessary.
3. Use a trowel to apply the adhesive across the area where each floorboard will be placed, being careful not to apply too much.
4. Allow the adhesive to set for the recommended open time.
5. Begin installing the floorboards by placing the first one snug against the wall or baseboard.
6. Use a rubber mallet or tapping block to gently tap each floorboard into place, ensuring a tight fit.
7. Continue installing the remaining floorboards, using spacers between each board for expansion.
8. Use a pry bar or tapping block as needed to ensure a secure attachment and alignment of each floorboard.
9. Leave an expansion gap around the perimeter of the room to allow for movement of the floorboards.
It is important to follow manufacturer’s instructions and guidelines throughout the installation process to ensure a successful and durable result.