The fact however is that the epoxy garage floor solution requires no more knowledge than what's necessary to pain a wall structure. Floor mats are great to go after installing them on the floor. Rubber garage flooring or perhaps an epoxy coating is durable. The personal tastes of yours will be respected because you are able to individualize the strategy you coat the floor of yours. Garage flooring doesn't have to be old fashioned.
Here are Images about Garage Floor Tiles Ceramic
Garage Floor Tiles Ceramic
/garage-with-rolling-gate-interior--3d-illustration-1169555109-291cf546d58946b29ed4bbbf71065696.jpg)
If you're going to be executing clothes in the garage, there could be a lot of moments of jogging in there with bare feet. Latex is the simplest to apply, requiring just a clean floor, generally without the need for etching. That might give you probably the least amount of waste if you get the floor of yours. Some flooring are a lot easier to install than others.
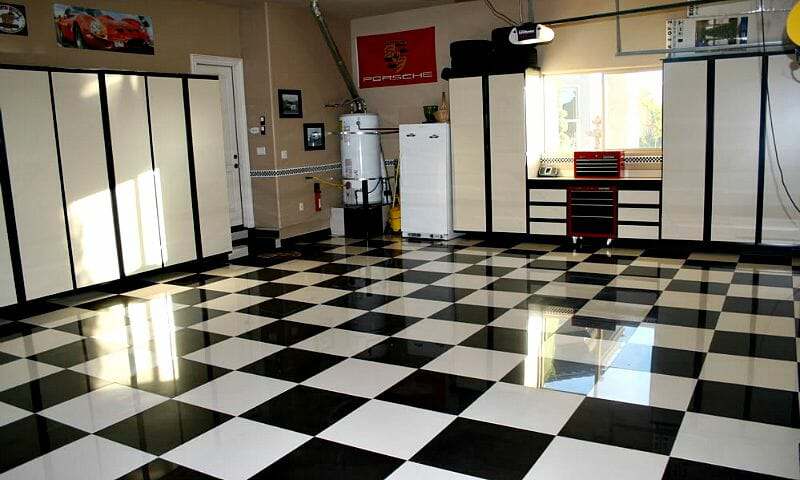
The Benefits of Porcelain Garage Floor Tile All Garage Floors
However, including the hardest to install flooring is going to be one of the easier issues you'll have to do when buying a house, and you will be avoiding costly and tough repairs down the street. All sorts of garage floor coverings will improve the appearance of your garage, increase the longevity of its and add to the value of the home of yours. This's since the rubber flooring has a low resistance to crude oil products.
Images Related to Garage Floor Tiles Ceramic
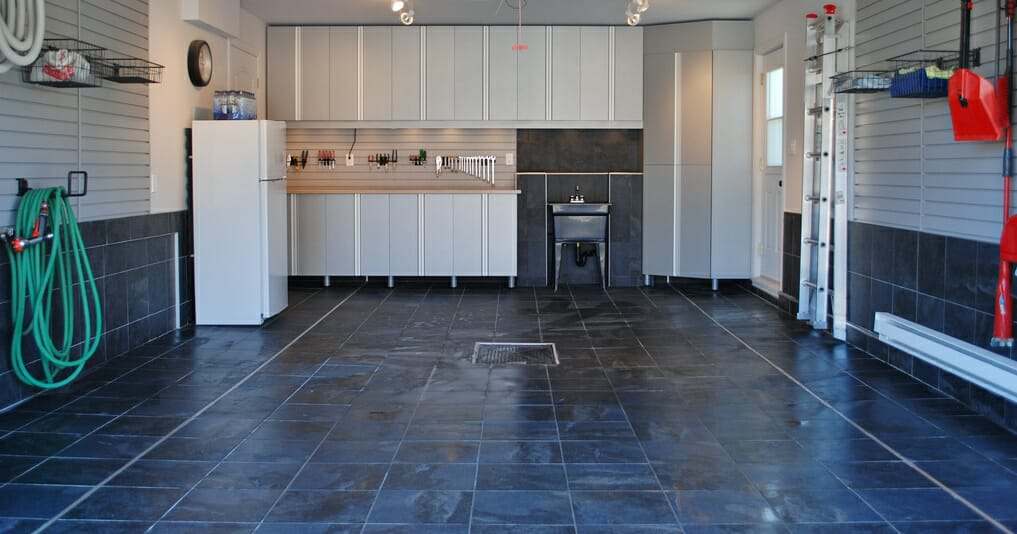
Choosing Garage Floor Tiles – Best Options to the Cheapest All
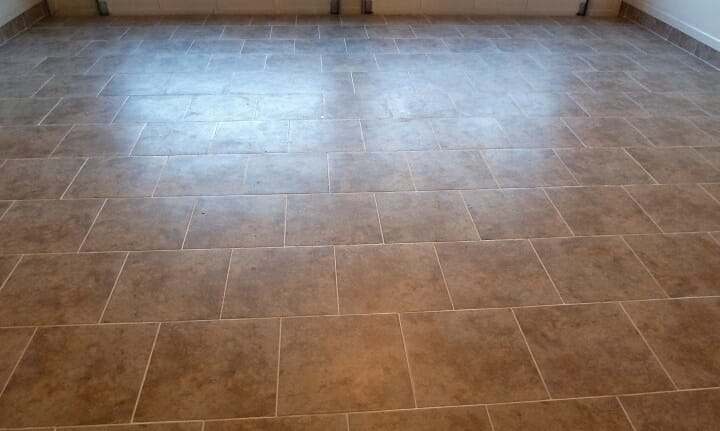
Our New White and Gray Porcelain Tile Garage Floor Installation

HEAVY DUTY T JOINT GARAGE TILES PER SQ FT

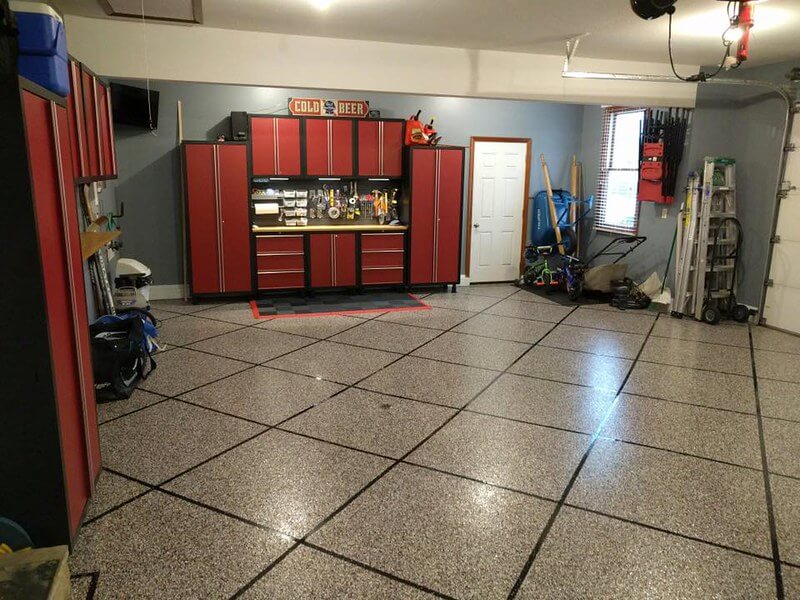
4 Types of Garage Floor Tiles: Which are the Best?
E-GARAGE Garage floor, Garage floors diy, Flooring

SUPER HEAVY DUTY HIDDEN SEAM GARAGE TILE PER SQ FT

The Benefits of Porcelain Garage Floor Tile All Garage Floors
Show me your ceramic/porcelain tiled floors. Good? Bad? Ugly

Garage Renovation Update

Can Ceramic Tile be Used for Garage Floors

Ceramic Or Porcelain Tiles For Garage Floor Garage floor tiles

Laying Porcelain tile for garage floor – Page 2 – 6SpeedOnline

Related articles:
- Interlocking Garage Floor Tiles
- Garage Floor Coatings
- Garage Floor Ideas
- Garage Floor Paint
- Garage Floor Rubber Covering
- Garage Floor Coating Paint
- Garage Floor Epoxy Ideas
- Best Garage Floor Material
- Black Epoxy Garage Floor Coating
- Garage Floor Slab Thickness
Garage Floor Tiles Ceramic: A Durable and Stylish Flooring Option
Introduction:
When it comes to choosing the perfect flooring for your garage, durability and style are two key factors to consider. Among the various options available, ceramic garage floor tiles stand out as a popular choice. These tiles not only offer exceptional durability but also add a touch of elegance to your space. In this article, we will delve into the world of garage floor tiles ceramic, exploring their benefits, installation process, maintenance tips, and more.
1. Understanding Ceramic Garage Floor Tiles:
Ceramic tiles are made from natural clay materials that are molded and fired at high temperatures, resulting in a durable and hard-wearing product. They come in various shapes, sizes, colors, and patterns, allowing homeowners to choose a style that suits their aesthetic preferences. These tiles are specifically designed to withstand heavy loads and resist stains, chemicals, and moisture commonly found in garages.
FAQs:
Q: Are ceramic garage floor tiles suitable for all types of garages?
A: Yes, ceramic floor tiles are suitable for both residential and commercial garages. They can withstand heavy vehicle traffic and provide a durable flooring solution.
Q: Can I install ceramic garage floor tiles myself?
A: While it is possible to install ceramic tiles yourself if you have experience with tile installation, it is recommended to hire a professional for best results.
2. Benefits of Ceramic Garage Floor Tiles:
2.1 Durability:
One of the primary advantages of ceramic garage floor tiles is their exceptional durability. These tiles are designed to withstand heavy loads without cracking or chipping. They can easily handle the weight of vehicles, tools, equipment, and other items typically found in a garage.
2.2 Resistance to Stains:
Garages often encounter spills from oil, grease, chemicals, or other substances that can stain the flooring surface. However, ceramic garage floor tiles offer excellent stain resistance due to their non-porous nature. This makes cleaning up spills a breeze, ensuring that your garage floor looks pristine at all times.
2.3 Moisture Resistance:
Garages are prone to moisture-related issues such as water leaks or condensation. Ceramic tiles have a low water absorption rate, making them highly resistant to moisture damage. This characteristic prevents the growth of mold and mildew, which can be detrimental to both the appearance and structural integrity of the flooring.
FAQs:
Q: Can ceramic garage floor tiles be damaged by heavy objects?
A: While ceramic tiles are durable, dropping heavy objects with force can potentially cause cracks or chips. It is advisable to handle heavy items with care to avoid any damage to the floor.
Q: Are ceramic garage floor tiles suitable for areas with extreme temperature fluctuations?
A: Yes, ceramic tiles can withstand temperature variations without warping or cracking. They are an ideal choice for garages located in regions with hot summers or cold winters.
3. Installation Process:
3.1 Surface Preparation:
Before installing ceramic garage floor tiles, proper surface preparation is essential for optimal results. The existing flooring should be thoroughly cleaned and free from any debris, oil stains, or cracks. Any repairs required should be addressed before proceeding with the installation.
3.2 Tile Layout:
Determining the layout of the tiles is an important step in achieving an aesthetically pleasing and symmetrical look. It is recommended to start from the center of the garage and work towards the edges. Dry-laying the tiles beforehand allows you to make adjustments and ensure a precise Fit.
3.3 Adhesive Application:
Using a tile adhesive suitable for ceramic tiles, apply a thin layer to the prepared surface using a notched trowel. Work in small sections to prevent the adhesive from drying before tiles are placed.
3.4 Tile Installation:
Carefully place each tile onto the adhesive, pressing down firmly to ensure proper adhesion. Use plastic spacers to maintain consistent spacing between tiles for grout lines. Repeat this process until all tiles are installed.
3.5 Grouting:
After allowing the adhesive to dry according to manufacturer instructions, remove the plastic spacers and apply grout between the tiles using a grout float. Wipe away any excess grout with a damp sponge, and allow it to cure for the recommended time.
3.6 Sealing:
To enhance durability and stain resistance, consider applying a sealer specifically designed for ceramic tiles. Follow the manufacturer’s instructions for application and drying time.
In conclusion, ceramic garage floor tiles offer exceptional durability, stain resistance, and moisture resistance. While installation can be done by experienced DIYers, hiring a professional is recommended for best results. Proper surface preparation, tile layout planning, adhesive application, tile installation, grouting, and sealing are crucial steps in achieving a long-lasting and visually appealing ceramic garage floor. Additionally, it is important to handle the tiles with care during the installation process to avoid any damage. Using tools such as knee pads, tile cutters, and a rubber mallet can help ensure a smooth and successful installation. Following these steps and taking precautions will result in a beautiful and functional ceramic garage floor that can withstand extreme temperature fluctuations for years to come. Installing ceramic garage floor tiles requires proper surface preparation, tile layout planning, adhesive application, tile installation, grouting, and sealing. Here are the steps to follow for a successful installation:
3.1 Surface Preparation:
– Clean the existing flooring thoroughly, removing any debris, oil stains, or cracks.
– Address any necessary repairs before proceeding with the installation.
3.2 Tile Layout:
– Determine the layout of the tiles for an aesthetically pleasing and symmetrical look.
– Start from the center of the garage and work towards the edges.
– Dry-lay the tiles beforehand to make adjustments and ensure a precise fit.
3.3 Adhesive Application:
– Use a tile adhesive suitable for ceramic tiles.
– Apply a thin layer to the prepared surface using a notched trowel.
– Work in small sections to prevent the adhesive from drying before tiles are placed.
3.4 Tile Installation:
– Carefully place each tile onto the adhesive, pressing down firmly for proper adhesion.
– Use plastic spacers to maintain consistent spacing between tiles for grout lines.
– Repeat this process until all tiles are installed.
3.5 Grouting:
– Allow the adhesive to dry according to manufacturer instructions.
– Remove the plastic spacers and apply grout between the tiles using a grout float.
– Wipe away any excess grout with a damp sponge.
– Allow the grout to cure for the recommended time.
3.6 Sealing:
– Consider applying a sealer specifically designed for ceramic tiles to enhance durability and stain resistance.
– Follow the manufacturer’s instructions for application and drying time.
In conclusion, installing ceramic garage floor tiles can be done by experienced DIYers, but hiring a professional is recommended for best results. Taking proper precautions and following these steps will result in a beautiful and long-lasting ceramic garage floor that can withstand extreme temperature fluctuations.