In days gone by, concrete floors were principally used in factories, showrooms, schools and offices but on account of the consequences which may be attained using stains and dyes, it is starting to be more popular in modern houses. The fastest way to clean the concrete floor of yours with a vacuum which has been outfitted with a mind that is ideal for floorboards.
Here are Images about Fixing Holes In Concrete Floors
Fixing Holes In Concrete Floors

Hiring expert concreters or even concrete contractors may cost a bit though you are guaranteed of a much better result. Concrete floors are greatly advised through the American Lung Association for individuals with asthma and allergies. Every one of the above kinds of polished concrete floors could be completed in countless appearance & styles.
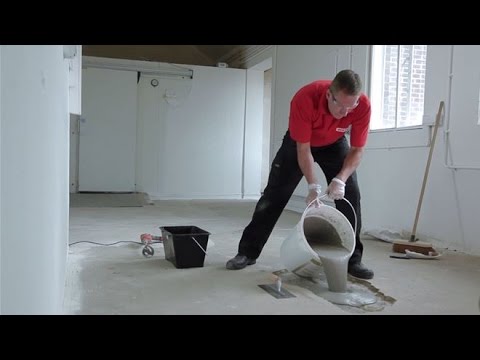
Concrete Floor Repair: Steps for Patching Concrete – This Old House
/cdn.vox-cdn.com/uploads/chorus_image/image/65895845/patch_floor_x.0.jpg)
Even if you might be ready to keep your floor war with radiant floor heating installed, if you don't have this alternative and concrete flooring is usually a bit of cold. Polished concrete floors, lengthy consigned to commercial spaces and done basements, are actually making well deserved inroads into residential houses.
Images Related to Fixing Holes In Concrete Floors
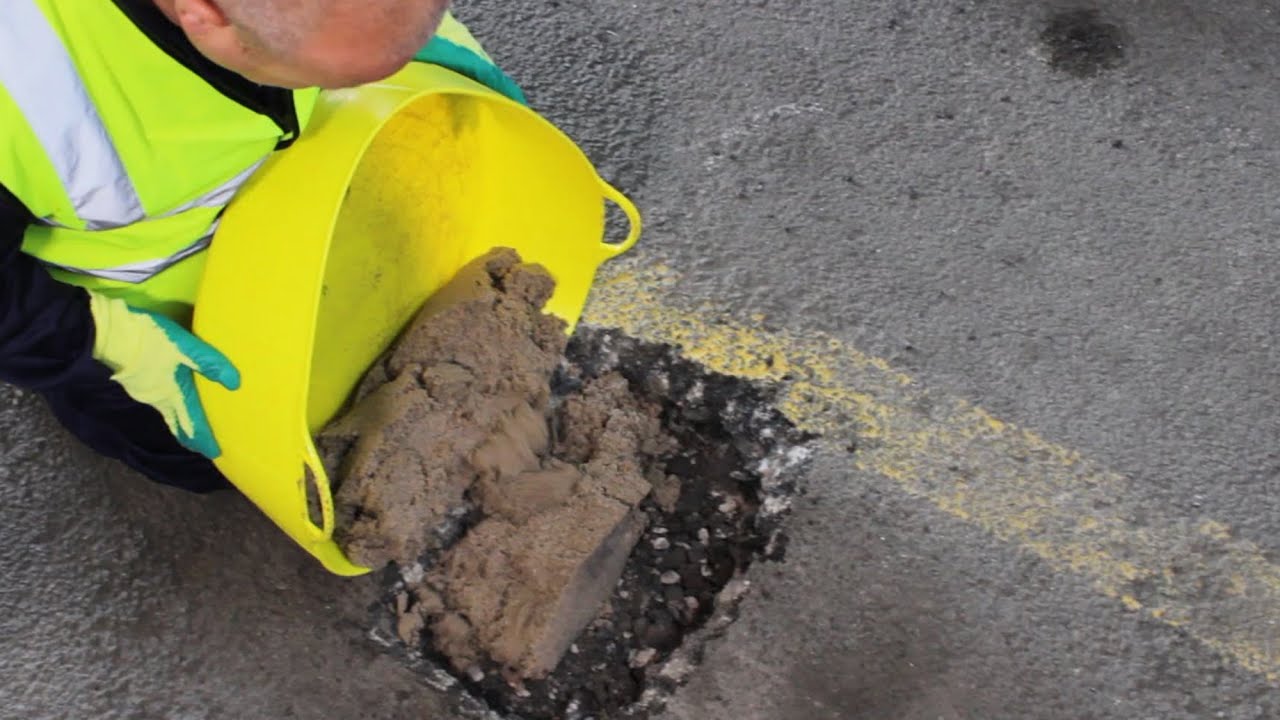
How to repair a hole in concrete with a pourable compound Watco
concrete – What cement product should I use to fix a hole in my

Watco Flowpatch – self levelling concrete patch repair

Concrete Floor Repair: Steps for Patching Concrete – This Old House
/cdn.vox-cdn.com/uploads/chorus_asset/file/19524957/patch_01.jpg)
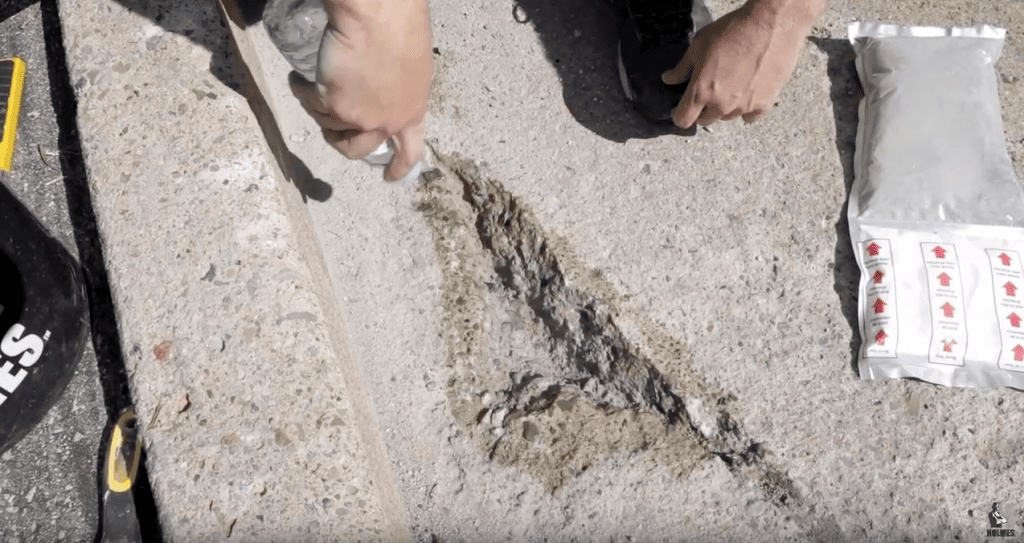
Repair a hole in a concrete floor Rizistal
How to Repair a Concrete Floor: 13 Steps (with Pictures) – wikiHow

Watco Flowpatch – self levelling concrete patch repair

Concrete Floor Repair: Steps for Patching Concrete – This Old House
/cdn.vox-cdn.com/uploads/chorus_asset/file/19524966/patch_02.jpg)
3 Ways to Patch Holes in a Concrete Floor : 5 Steps – Instructables

Concrete Floor Repair: Steps for Patching Concrete – This Old House
/cdn.vox-cdn.com/uploads/chorus_asset/file/19524984/patch_03.jpg)
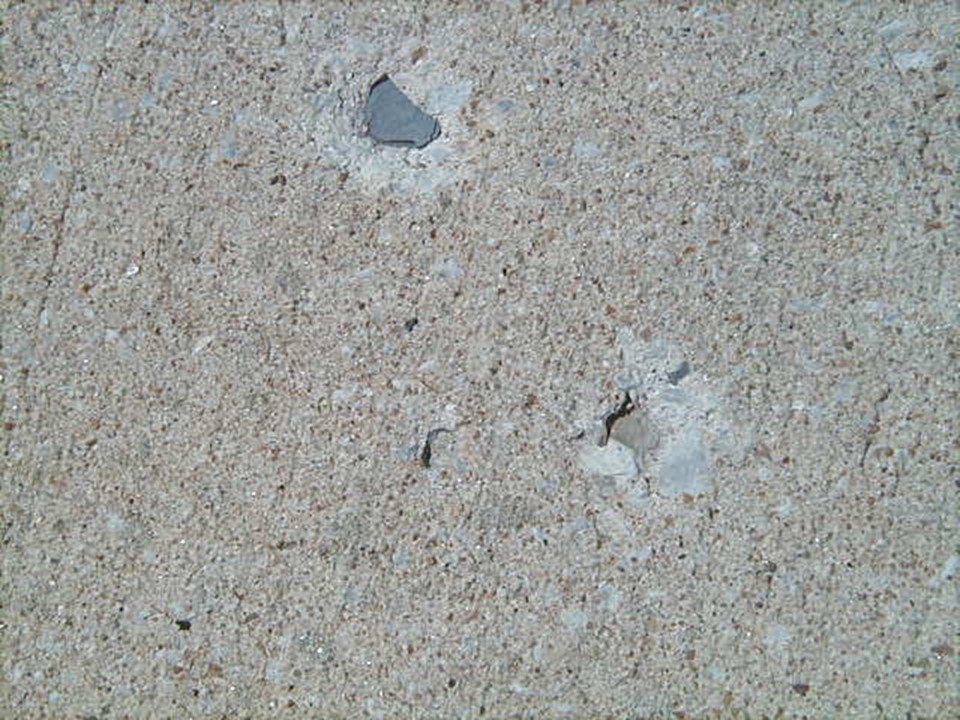
How to Repair Concrete Holes – Make It Right®
Holes in concrete driveway – Lignite or Shale Problem – SealGreen
Related articles:
- Stained Concrete Floors Design
- Decorative Concrete Floors
- Acid Stained Concrete Floors
- Polished Concrete Floor In Bathroom
- Concrete Floor Stain And Polish
- White Mold On Concrete Floor
- Polished Concrete Floor
- Polished Concrete Floor Cleaning
- Staining Concrete Floors Indoors Yourself
- Flooring Options For Concrete Floors
Fixing Holes in Concrete Floors: A Comprehensive Guide
Introduction:
Concrete floors are known for their durability and strength, but over time, they can develop holes due to various reasons such as heavy traffic, impact damage, or wear and tear. These holes not only compromise the integrity of the floor but also pose safety risks. However, with the right tools and techniques, fixing holes in concrete floors can be a manageable task. In this comprehensive guide, we will explore the step-by-step process of repairing these holes effectively.
I. Assessing the Damage:
Before embarking on any repair work, it is crucial to assess the extent of the damage. This will help determine the appropriate repair method and materials required for fixing the holes in your concrete floor. Some key factors to consider during this assessment are:
1. Size and Depth of Holes:
– Measure the diameter and depth of each hole accurately using a tape measure.
– Categorize them into small, medium, or large-sized holes based on their dimensions.
2. Underlying Causes:
– Identify the underlying causes that led to the formation of these holes.
– Common causes include heavy objects dropped on the floor, water seepage, or settlement issues.
3. Structural Integrity:
– Inspect the surrounding area for any signs of cracks or additional damage.
– Assess whether there are any underlying structural issues that need to be addressed simultaneously.
FAQs:
Q1: Can I fill small holes without assessing them?
A1: While filling small holes may seem like a quick fix, it is essential to assess them beforehand. Small holes can sometimes be indicative of deeper problems that require immediate attention.
Q2: What if I cannot determine the underlying cause?
A2: If you cannot identify the cause behind the formation of holes in your concrete floor, it is advisable to consult an expert who can conduct a thorough inspection and provide accurate insights.
II. Gathering the Necessary Tools and Materials:
Once you have assessed the damage, it is time to gather the tools and materials required for the repair process. Having everything on hand will ensure a smooth and efficient workflow. Here are some essential items you will need:
1. Safety Gear:
– Safety goggles, gloves, and a dust mask to protect yourself from any potential hazards.
2. Cleaning Tools:
– A broom or vacuum cleaner to remove loose debris and dirt from the holes.
– A wire brush or scraper to eliminate any loose or chipped concrete around the holes.
3. Repair Materials:
– A concrete patching compound suitable for your specific needs (e.g., vinyl-reinforced, epoxy-based, or polymer-modified).
– Bonding agent or primer to enhance the adhesion of the patching compound.
– Coarse sand or gravel for deep holes requiring additional support.
– Water for mixing the patching compound.
4. Application Tools:
– Trowel or putty knife for applying the patching compound.
– Concrete float or finishing trowel for achieving a smooth finish on larger repairs.
FAQs:
Q1: Can I use regular cement instead of a specialized patching compound?
A1: While regular cement may seem like a cost-effective alternative, it lacks the necessary bonding agents and may not provide optimal results. It is recommended to use a patching compound specifically designed for concrete repairs.
Q2: Do I always need a bonding agent?
A2: A bonding agent enhances The adhesion of the patching compound to the existing concrete surface, ensuring a stronger and more durable repair. It is highly recommended to use a bonding agent, especially for larger repairs or when working with older or more damaged concrete surfaces.
III. Preparing the Concrete Surface:
Before applying the patching compound, it is crucial to properly prepare the concrete surface for optimal adhesion and durability. Follow these steps:
1. Clean the Area:
– Use a broom or vacuum cleaner to remove loose debris and dirt from the holes.
– Use a wire brush or scraper to eliminate any loose or chipped concrete around the holes.
2. Wet the Area:
– Dampen the area surrounding the holes with water. This will prevent the existing concrete from absorbing moisture from the patching compound too quickly, ensuring proper hydration and curing.
3. Apply Bonding Agent:
– If using a bonding agent, apply it to the cleaned and dampened surface according to the manufacturer’s instructions. Use a brush or roller to ensure even coverage.
IV. Filling and Finishing the Holes:
Now that you have prepared the surface, it is time to fill and finish the holes. Follow these steps for a successful repair:
1. Mix the Patching Compound:
– Follow the manufacturer’s instructions to mix the patching compound with water in a clean container. Use a drill with a mixing paddle or a trowel for smaller quantities.
– Ensure that the mixture has a smooth consistency without any lumps.
2. Fill the Holes:
– Using a trowel or putty knife, apply the patching compound to each hole, slightly overfilling to account for shrinkage during curing.
– Press the compound firmly into the holes, ensuring full coverage and eliminating any air pockets.
3. Smooth the Surface:
– Use a concrete float or finishing trowel to smooth the surface of the repair, blending it with the surrounding concrete.
– Feather the edges to achieve a seamless transition between the repair and existing concrete.
4. Allow for Curing:
– Follow the manufacturer’s instructions regarding curing time. It is typically recommended to keep the repaired area moist by misting it with water or covering it with plastic for several days.
FAQs:
Q1: How long does it take for the patching compound to cure?
A1: The curing time can vary depending on factors such as temperature, humidity, and the specific patching compound used. It is best to refer to the manufacturer’s instructions for accurate curing times.
Q2: Can I walk on the repaired area immediately after filling the holes?
A2: It is recommended to avoid walking on the repaired area until the patching compound has fully cured. This can take anywhere from a few hours to several days, depending on the product and environmental conditions.
Q3: Can I apply the patching compound directly to the holes without preparing the surface?
A3: It is important to properly prepare the surface before applying the patching compound. This includes cleaning and dampening the area, as well as applying a bonding agent if necessary. Preparing the surface ensures proper adhesion and a successful repair.
Q4: What should I do if the patching compound starts to dry too quickly while I’m working?
A4: If the patching compound starts to dry too quickly, you can mist it with water or cover it with plastic to slow down the drying process. This will help ensure proper hydration and curing of the compound.