In terms of look and style, epoxy coated flooring is one of the best and fastest methods of giving that great "lift" to the look of the floors of yours. Flooring that produces moisture typically destroy the capacity of the epoxy to bond. You are going to reduce the life of your epoxy flooring in case you make the surface in which you decide to set up it improperly.
Here are Images about Epoxy Flooring Over Concrete
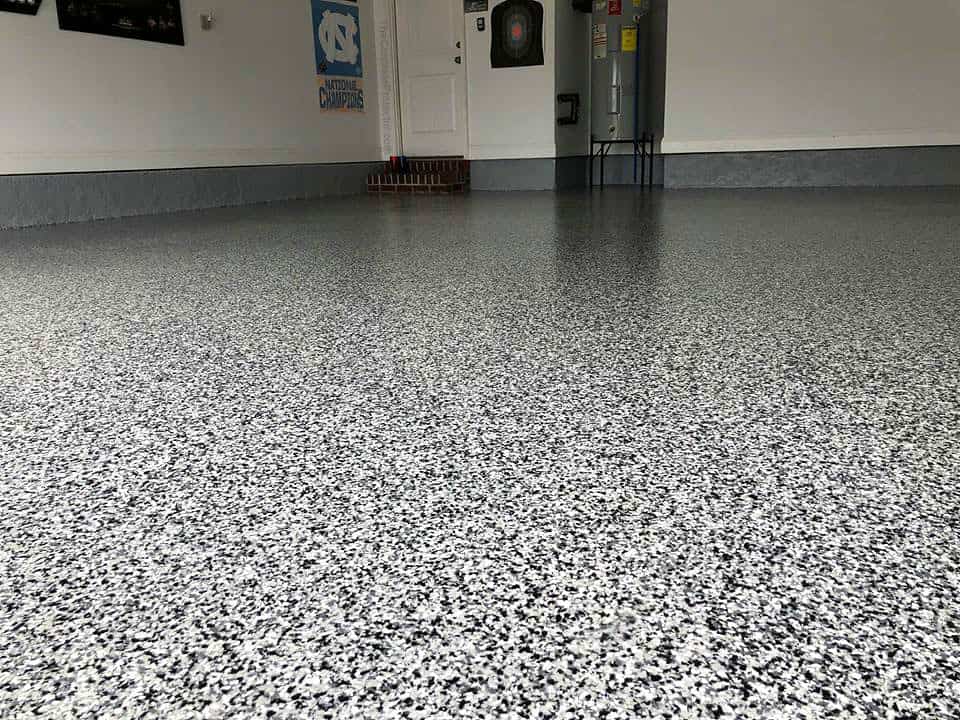
Epoxy Flooring Over Concrete

Epoxy floors are new-Gen economy methods you have to try during remodeling of the garage of yours any other floor. Cleanup is easy when using epoxy floor coatings, therefore you won't need to get worried about harm from accidents or spills. It's turned out to be very popular in the past several years because of it's durability and appeal.
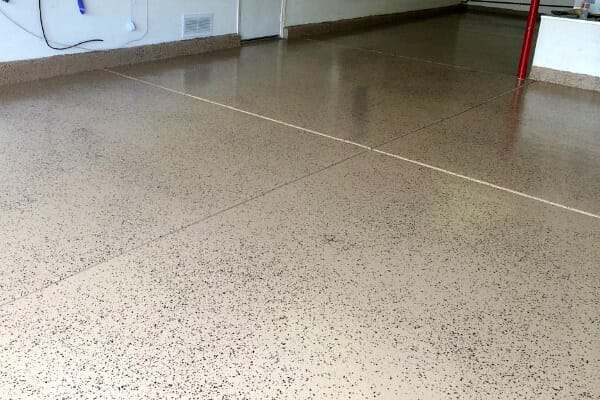
Epoxy Floor Installation Over Old Concrete
Instead of thinking about replacing an older concrete floor, far more men and women are turning to epoxy floor paint to make the floor seem to be and functionality better than it previously had in the past. In addition, they are able to be cleaned very easily and offer exceptional value for cash.
Images Related to Epoxy Flooring Over Concrete
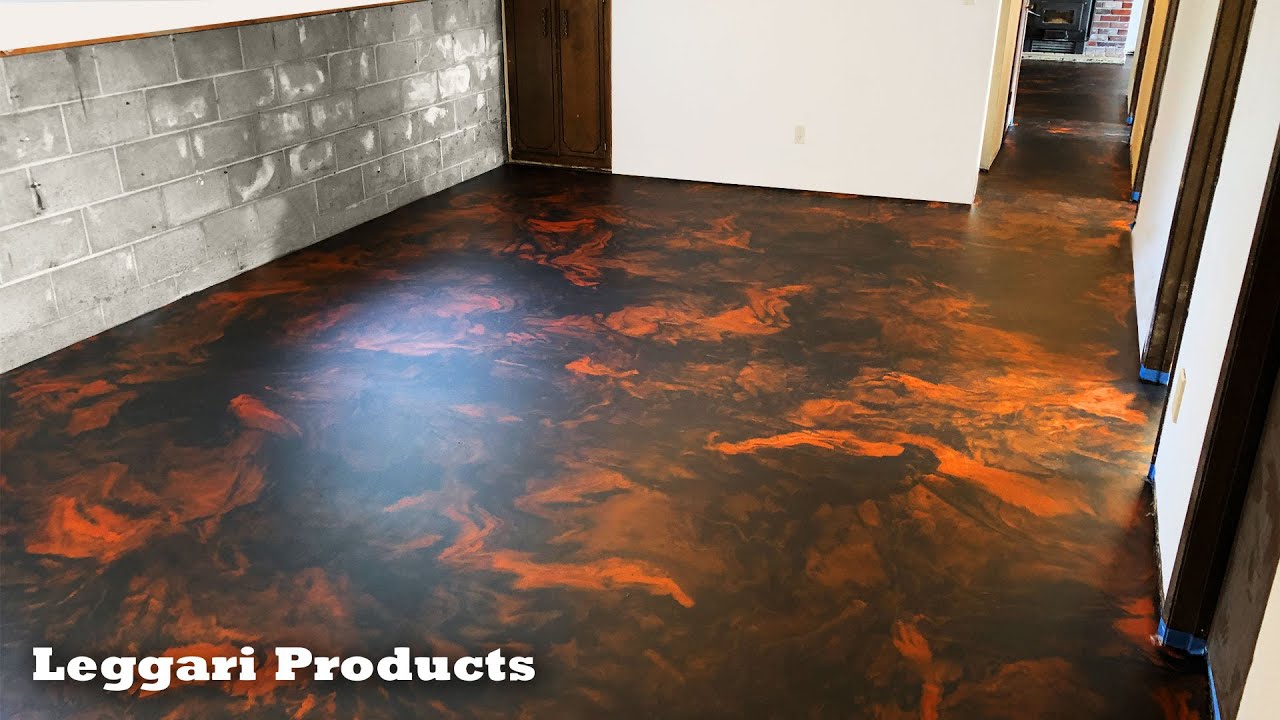
What is Metallic Epoxy Floor Coating? – Big Red Decorative Concrete

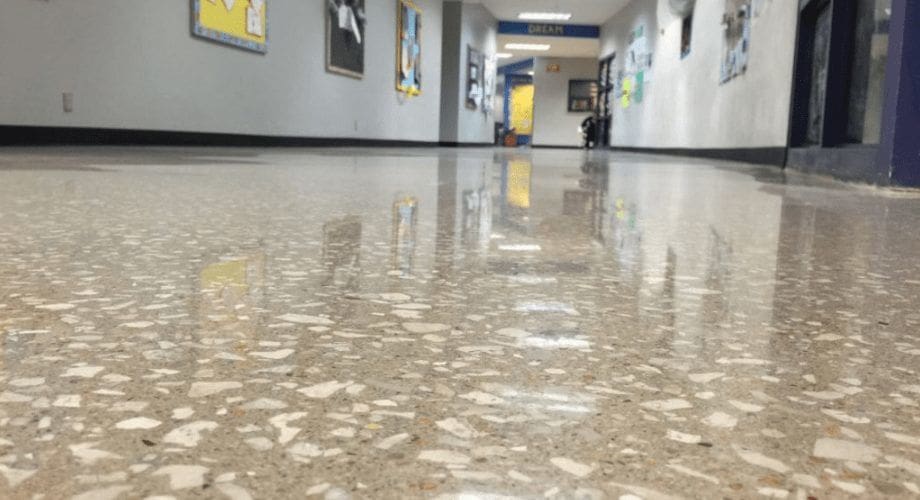
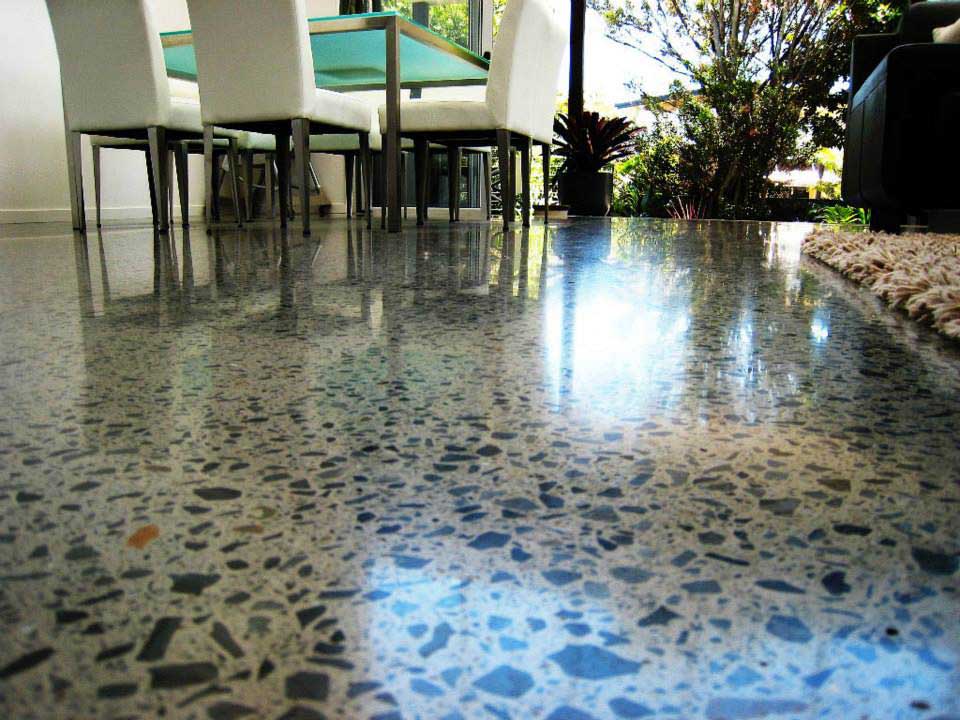
Polished Concrete vs. Epoxy Floor: Whatu0027s The Best Choice
Epoxy Flooring Buffalo, NY Niagara Falls, Amherst u0026 Lockport, NY

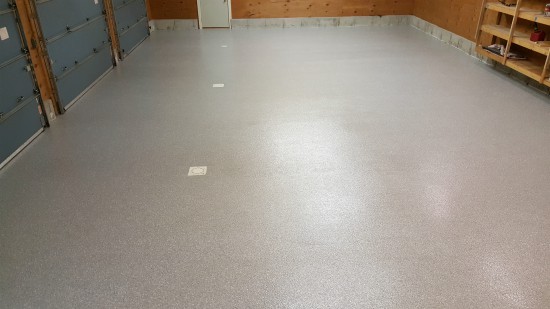
How Much Does It Cost To Coat Concrete Flooring With Epoxy

Chicagoland Epoxy Floor Coatings – Residential, Commercial

Concrete Floor Epoxy in Maine installed by Dayu0027s Concrete Floors, Inc.
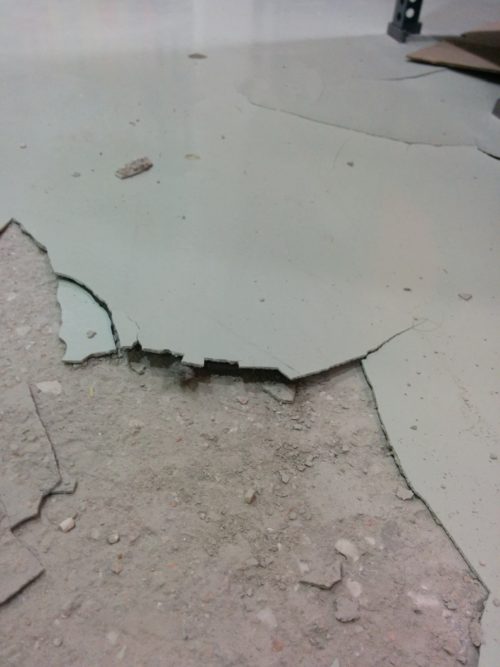
Applying epoxy on rough concrete – 3 useful tips
The Benefits of Epoxy Coating Your Concrete Surfaces
Polished concrete vs. epoxy floor: Whatu0027s the best choice?
Understanding the Pros and Cons of Epoxy Floors
Your Epoxy u0026 Floor Coating Questions Answered – FAQs – Florock

How to Recoat New Epoxy Over an Old Garage Floor Coating All
Related articles:
- Epoxy Flooring Living Room
- 3D Epoxy Flooring
- Epoxy Flooring Ideas
- Residential Epoxy Flooring
- Epoxy Flooring Waterproof
- Epoxy Floor Coating Tips
- Metallic Epoxy Floor Designs
- Epoxy Flooring Contractors
- Epoxy Floor Coating Material
- Epoxy Floor Coating With Flakes
Epoxy Flooring Over Concrete: Transforming Your Space with Durability and Style
Introduction:
Epoxy flooring over concrete has gained immense popularity in recent years as a durable and aesthetically pleasing solution for a wide range of spaces. Whether it’s your garage, basement, commercial establishment, or even an industrial facility, epoxy flooring offers numerous benefits that make it an excellent choice. In this article, we will delve into the details of epoxy flooring over concrete, exploring its advantages, installation process, maintenance requirements, and more.
I. Understanding Epoxy Flooring:
Epoxy flooring is a type of surface coating that consists of a combination of resins and hardeners. When these two components are mixed together, a chemical reaction occurs, resulting in a rigid plastic material known as epoxy. This material is then applied to concrete surfaces, forming a strong and seamless protective layer.
A. Benefits of Epoxy Flooring:
– Durability: Epoxy coatings are incredibly resilient and can withstand heavy foot traffic, impacts from dropped objects, and even chemical spills without showing signs of wear and tear.
– Enhanced Safety: Epoxy flooring can be customized to create slip-resistant surfaces, reducing the risk of accidents and injuries.
– Versatility: Available in a wide array of colors, patterns, and finishes, epoxy coatings offer endless design possibilities to match any aesthetic preference.
– Easy Maintenance: Epoxy flooring is low-maintenance and can be easily cleaned with regular sweeping or mopping. It also resists stains and does not require frequent resealing like other types of flooring.
– Cost-effective: When compared to other types of flooring such as tiles or hardwood, epoxy coatings are a cost-effective solution due to their long lifespan and minimal maintenance requirements.
B. Frequently Asked Questions about Epoxy Flooring:
Q1. Can epoxy flooring be installed on all types of concrete surfaces?
A1. Yes, epoxy coatings can be applied to most concrete surfaces, including old or damaged ones. However, it is important to ensure that the concrete is properly prepared before installation to achieve optimal adhesion and longevity.
Q2. How long does it take to install epoxy flooring?
A2. The installation time for epoxy flooring varies depending on the size of the area and the complexity of the project. On average, it can take anywhere from a few days to a week for the entire process, including surface preparation, application, and curing.
Q3. Is epoxy flooring suitable for high-traffic areas?
A3. Absolutely! Epoxy flooring is highly durable and can withstand heavy foot traffic without showing signs of wear and tear. It is commonly used in commercial spaces such as warehouses, showrooms, and retail stores.
II. Installation Process:
Installing epoxy flooring over concrete involves several crucial steps that ensure a successful and long-lasting application.
A. Surface Preparation:
Before applying epoxy coatings, proper surface preparation is essential to achieve optimal adhesion and durability.
1. Cleaning: The concrete surface must be thoroughly cleaned to remove any dirt, grease, or contaminants that may hinder the bond between the epoxy and the concrete. This can be done using a pressure washer or specialized cleaning solutions.
2. Repairing: Any cracks or damages in the concrete should be repaired using a patching compound or epoxy filler. This step ensures a smooth and even surface for the subsequent layers.
3. Grinding: To enhance adhesion, it is recommended to grind the concrete surface to remove any existing coatings or rough patches. Grinding also helps to open up the pores of the concrete, allowing the epoxy to penetrate and bond more effectively.
B. Priming:
After the surface has been properly prepared, a primer should be applied to further enhance adhesion and prevent any air bubbles from forming under the epoxy coating.
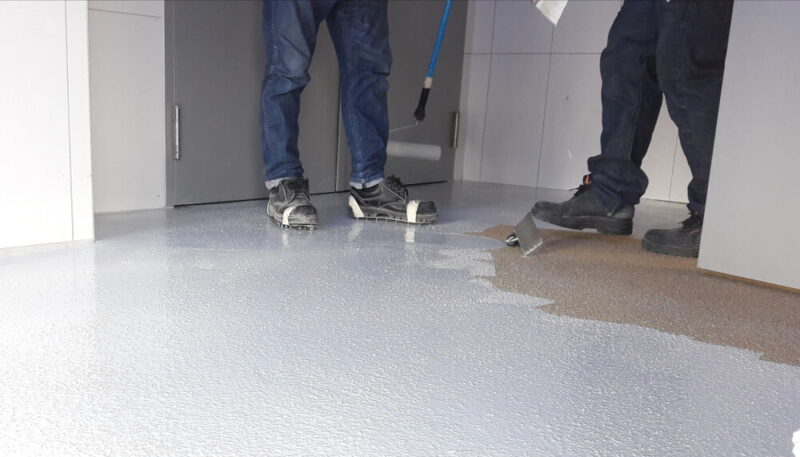
C. Applying Epoxy Coatings:
Once the primer has dried, the epoxy coatings can be applied. This is typically done in multiple layers, with each layer being allowed to cure before applying the next one. The number of layers will depend on the desired thickness and level of durability.
D. Optional Finishing Touches:
After the final layer of epoxy has cured, additional finishing touches can be added if desired. This may include adding color flakes or metallic pigments for a decorative effect, or applying a clear topcoat for added protection and shine.
E. Curing Time:
Once all layers and finishing touches have been applied, the epoxy coating needs time to cure. The curing time can vary depending on factors such as temperature and humidity, but it typically takes around 24-48 hours for the epoxy to fully harden and become ready for use.
III. Maintenance Tips:
To keep your epoxy flooring looking its best and prolong its lifespan, here are some maintenance tips to follow:
1. Regular Cleaning: Sweep or dust mop the floor regularly to remove dirt and debris. For deeper cleaning, use a mild detergent mixed with water and mop the floor gently.
2. Avoid Harsh Chemicals: Avoid using harsh chemicals or abrasive cleaners on the epoxy surface, as they can damage or dull the finish. Stick to mild cleaners that are safe for use on epoxy flooring.
3. Promptly Clean Spills: Clean up any spills or stains as soon as possible to prevent them from seeping into the epoxy and causing discoloration or damage. Use a soft cloth or mop to blot and clean the affected area.
4. Protect Heavy Furniture: Place felt pads or furniture glides under heavy furniture legs to prevent them from scratching or indenting the epoxy surface.
5. Avoid Excessive Heat: While epoxy flooring is heat-resistant, prolonged exposure to high temperatures can cause it to soften or warp. Use caution when placing hot objects on the floor and consider using protective mats or coasters.
By following these maintenance tips, you can ensure that your epoxy flooring remains in top condition for years to come. Here are some additional tips that can be applied to further enhance adhesion and prevent air bubbles from forming under the epoxy coating:
1. Proper Surface Preparation: Before applying the primer, it is important to thoroughly clean and prepare the surface. This may involve removing any existing coatings, repairing cracks or imperfections, and ensuring the surface is free of dust, grease, and debris.
2. Use a Primer with High Adhesion Properties: Choose a primer specifically designed for epoxy coatings that has high adhesive properties. This will help improve the bond between the substrate and the epoxy coating, reducing the chances of delamination or bubbling.
3. Apply the Primer and Epoxy Coatings in Thin Layers: Applying thin layers of primer and epoxy coatings ensures better adhesion and minimizes the risk of air bubbles. It is recommended to follow the manufacturer’s instructions regarding the application thickness for each layer.
4. Use a Roller or Squeegee to Apply Epoxy Coatings: Using a roller or squeegee helps to evenly distribute and spread the epoxy coating, reducing the chances of trapped air pockets. Ensure proper technique when applying to avoid creating air bubbles.
5. Eliminate Air Bubbles: If air bubbles do form during application, they can be removed by using a heat gun or propane torch held several inches above the surface. Gently move the heat source in a sweeping motion to release trapped air bubbles.
6. Consider Using an Anti-Foaming Agent: Adding a small amount of an anti-foaming agent to the epoxy mixture can help reduce the formation of air bubbles during curing.
By following these additional tips, you can improve adhesion and minimize the formation of air bubbles under your epoxy coating, resulting in a smoother and more durable finish.