You ought to try to avoid a page layout that is going to result in you having to cut more than fifty % away from the level of your end-of-row boards, as well as less than 400mm off from the breadth of your boards. In the event the sub flooring is bumpy the laminate floor surfaces will have a bouncy feel. This gets rid of dust from sanding, toxins by completing, and holding out before the floor can be walked on.
Images Related to Engineered Wood Flooring Floating Installation
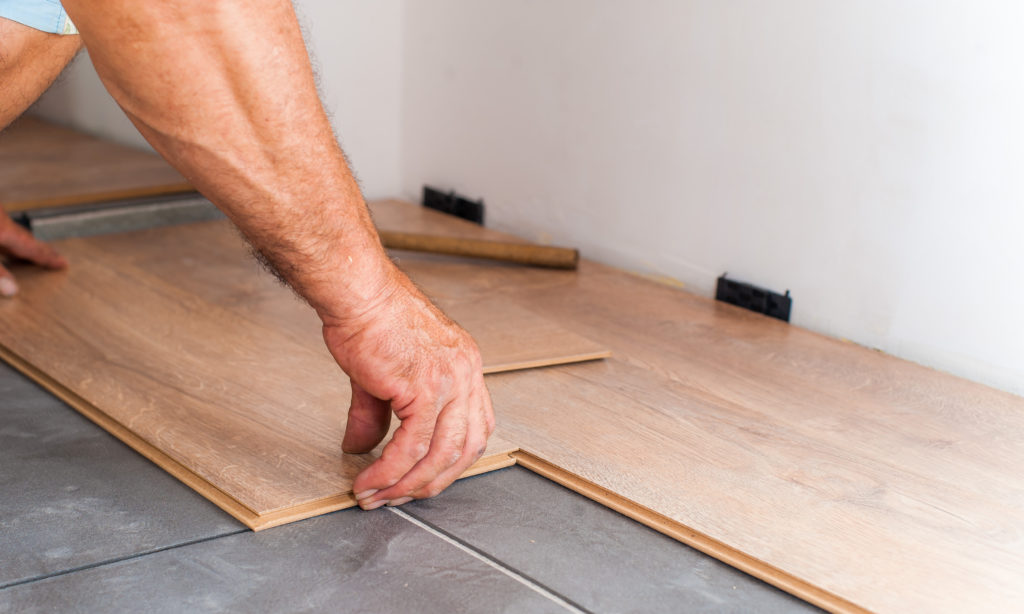
Engineered Wood Flooring Floating Installation
/cdn.vox-cdn.com/uploads/chorus_asset/file/19493784/howto_tilefloor_04.jpg)
There are four different styles which resemble the planks you'd ordinarily come across on real wood flooring. When Getting off the ground never fail to begin on the lengthiest squarest wall laying three rows together to give you a base, using wedges to give you the 10mm required expansion gap. You will find so many distinct choices for example oak, birch, maple, steamed beech, hornbeam, walnut, acacia, alder, cherry, elm, beech and also ash.
All About Floating Wood Floors
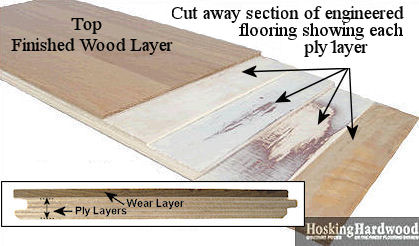
The crisscross layering of this type of material makes it a perfect option of floor situations requiring support for far more weight and force. Although the first out lay for Wood can be pricey, the long term value can often work out cheaper. If you just know that you need hardwood floors gracing the house of yours, read this quick and dirty guide to ensure that the mind of yours will not spin when you talk with your contractor.
How to Install an Engineered Hardwood Floating Floor with Finishing Tips
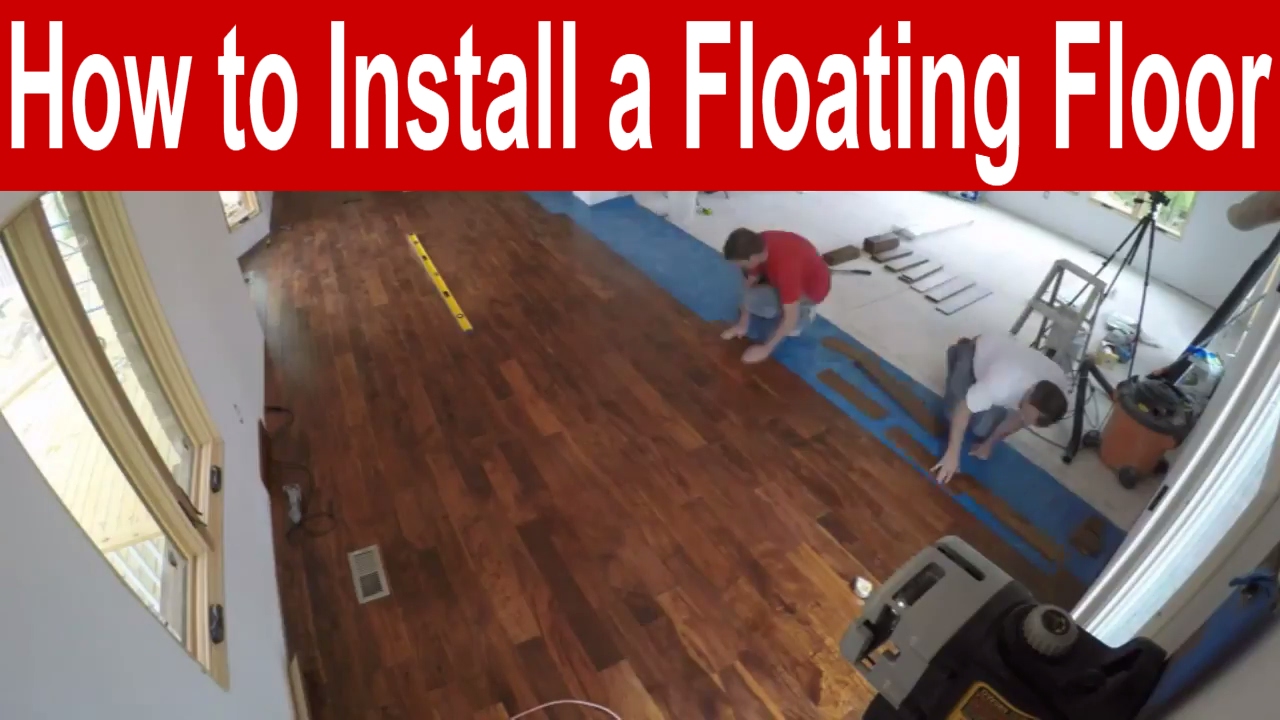
How to Install a Hardwood Floating Floor

Floating Floors Pros and Cons
/what-is-a-floating-floor-1821740-hero-00e6b7fe102e4fafa8ba3f926944bcb7.jpg)
Floating Vs. Glue-Down Wood Flooring: Installation, Pros and Cons

What is a Floating Floor: The Basics FlooringStores

Flooring Fixing Methods: Floating Floors Direct Wood Flooring Blog

How to Install a Floating Engineered-Wood Floor Engineered wood

What Is a Floating Floor – Pros and Cons » ESB Flooring
Floating Floor vs. Nail Down Slaughterbeck Floors, Inc.
Glueless Click Installation for Floating Hardwood Floors

All About Floating Wood Floors

Advantages u0026 Disadvantages of Floating Floors FlooringStores
Related articles:
- Black Walnut Wood Flooring
- Wood Flooring Designs
- Wood Flooring Options For Kitchens
- Contemporary Wood Flooring Ideas
- Dark Wood Floor Bedroom Ideas
- Real Wood Flooring For Kitchens
- Natural Wood Floor Stain
- Oak Wood Flooring
- Birch Wood Flooring Reviews
- Wood Floor Damage Repair
Engineered Wood Flooring Floating Installation
Introduction:
Engineered wood flooring is a popular choice for homeowners due to its durability, versatility, and aesthetic appeal. One of the most common methods of installing engineered wood flooring is the floating installation method. This article aims to provide a detailed guide on how to install engineered wood flooring using the floating method, along with FAQs to address any concerns or queries.
Sub-heading 1: Preparation
Before starting the installation process, it is crucial to prepare the subfloor properly. The subfloor should be clean, dry, and level. Any existing flooring should be removed, and any uneven areas should be leveled using a self-leveling compound. It is also essential to acclimate the engineered wood flooring by allowing it to adjust to the room’s temperature and humidity for at least 48 hours.
FAQ 1: Can I install engineered wood flooring over existing tile flooring?
Yes, it is possible to install engineered wood flooring over existing tile flooring. However, certain factors need to be considered. The tile surface should be even and in good condition without any loose or cracked tiles. Additionally, the height of the new engineered wood floor needs to be taken into account as it may affect door clearances.
Sub-heading 2: Underlayment
Underlayment plays a vital role in floating installations as it provides cushioning, moisture protection, and sound absorption. There are various types of underlayment available, including foam, cork, and rubber. It is essential to choose an underlayment suitable for your specific needs and follow the manufacturer’s instructions during installation.
FAQ 2: Is underlayment necessary for engineered wood flooring?
While underlayment is not always mandatory for engineered wood flooring installations, it is highly recommended. Underlayment helps reduce noise transmission between floors, provides additional comfort underfoot, and acts as a moisture barrier.
Sub-heading 3: Installing the First Row
To begin the installation, start by laying out the first row of engineered wood flooring. It is essential to leave a 1/2-inch expansion gap between the flooring and the walls to allow for natural expansion and contraction. Use spacers to maintain this gap consistently along all sides.
FAQ 3: Do I need to leave an expansion gap if the room is small?
Yes, even in small rooms, it is crucial to leave an expansion gap when installing engineered wood flooring. The flooring needs space to expand and contract with changes in temperature and humidity. Failing to allow for this movement can result in buckling or warping of the floorboards.
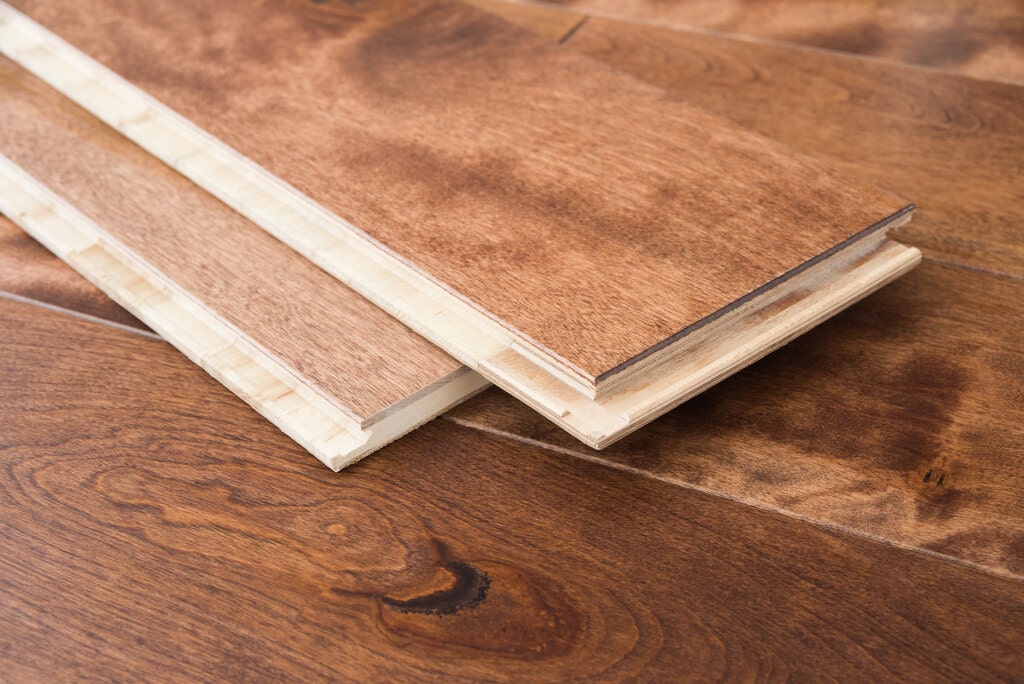
Sub-heading 4: Connecting the Boards
Once the first row is laid out, proceed with connecting the boards together. Most engineered wood flooring utilizes a tongue-and-groove system for easy installation. Apply a small amount of wood glue to the groove of one board and insert the tongue of the adjacent board into it. Use a tapping block and rubber mallet to ensure a tight fit.
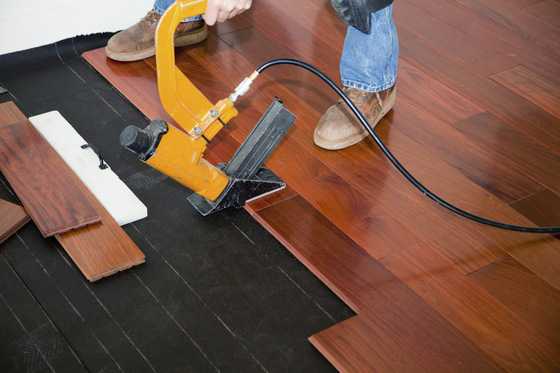
FAQ 4: Can I use nails or staples instead of glue for connecting the boards?
In floating installations, it is not necessary to use nails or staples to connect the boards. The weight of the floor, along with proper connection through the tongue-and-groove system, ensures stability and prevents movement.
Sub-heading 5: Continuing Installation
Continue installing subsequent rows by connecting each board using the same method described above. Stagger the end joints between rows by at least six inches to create a more natural and appealing look. Use a Pull bar and hammer to tap the boards together if needed.
FAQ 5: Can I install engineered wood flooring over existing carpet?
It is not recommended to install engineered wood flooring over existing carpet. Carpet can create an uneven surface and prevent proper installation of the flooring. It is best to remove the carpet and any padding before installing the new floor.
Sub-heading 6: Finishing Touches
After completing the installation, trim any excess underlayment or plastic sheeting along the edges of the room. Install baseboards or quarter round molding to cover the expansion gap and give the room a finished appearance. Clean the floor thoroughly to remove any dirt or debris before using it.
FAQ 6: How long does it take for engineered wood flooring to acclimate?
Engineered wood flooring should be acclimated to the room’s temperature and humidity for at least 48 hours before installation. This allows the flooring to adjust and minimize movement after installation.
By considering these factors and following proper installation techniques, you can successfully install engineered wood flooring in your home or space. Installing engineered wood flooring requires leaving an expansion gap, even in small rooms, to allow for the flooring to expand and contract with changes in temperature and humidity. This prevents buckling or warping of the floorboards.
When connecting the boards, most engineered wood flooring uses a tongue-and-groove system. Apply a small amount of wood glue to the groove of one board and insert the tongue of the adjacent board into it. Use a tapping block and rubber mallet to ensure a tight fit. Nails or staples are not necessary for floating installations.
Continue installing subsequent rows by connecting each board using the same method and stagger the end joints between rows by at least six inches for a more natural look. Use a pull bar and hammer if needed.
It is not recommended to install engineered wood flooring over existing carpet as it can create an uneven surface. It is best to remove the carpet and any padding before installation.
After completing the installation, trim excess underlayment or plastic sheeting along the edges of the room and install baseboards or quarter round molding to cover the expansion gap. Clean the floor thoroughly before use.
Engineered wood flooring should acclimate to the room’s temperature and humidity for at least 48 hours before installation to minimize movement after installation.
By following these guidelines, you can successfully install engineered wood flooring in your space. To summarize, here are the key points for installing engineered wood flooring:
1. Remove existing carpet and padding before installation.
2. Acclimate the flooring to the room’s temperature and humidity for at least 48 hours.
3. Leave an expansion gap around the perimeter of the room to allow for movement.
4. Use a tongue-and-groove system and wood glue for connecting the boards.
5. Stagger end joints between rows by at least six inches.
6. Trim excess underlayment or plastic sheeting and install baseboards or quarter round molding.
7. Clean the floor thoroughly before use.
Following these steps will help ensure a successful installation of engineered wood flooring in your space.