Several of the floors are less expensive to purchase and certain cheaper to put in. Is money the most significant concern? Have you been putting in the flooring yourself? Are tools as well as parts likely to impact the garage floor covering? Coating your garage floor with this epoxy material can help protect it via cracking, weathering, oil spills and various other kinds of moisture that may threaten to wear and length of using of the garage floor of yours.
Here are Images about DIY Garage Floor Leveling
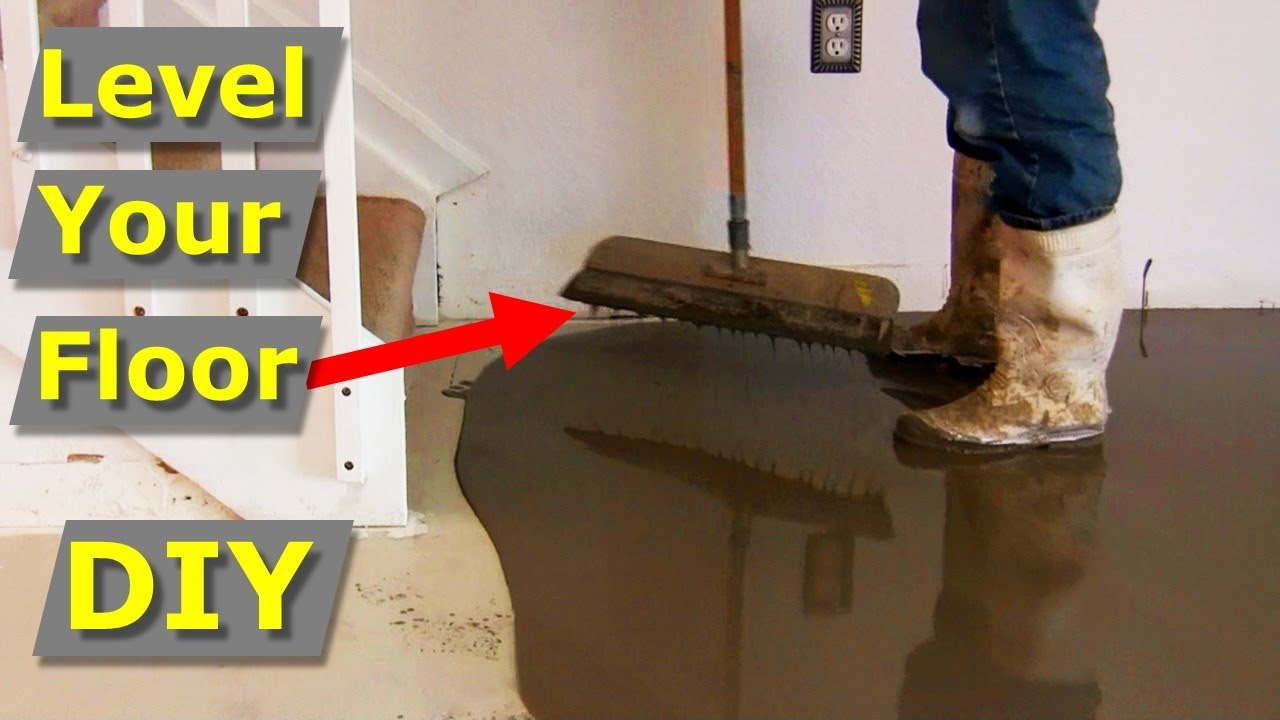
DIY Garage Floor Leveling
Although there are many different sorts of covering for the garage floor offered definitely the epoxy resin founded paints are the most popular of all. Roll out garage floor mats are a great accessory to buy as they actually do much more than defend the garage floor from the mud and debris brought directly into the garage by your truck or automobile. The correct calculations are important.
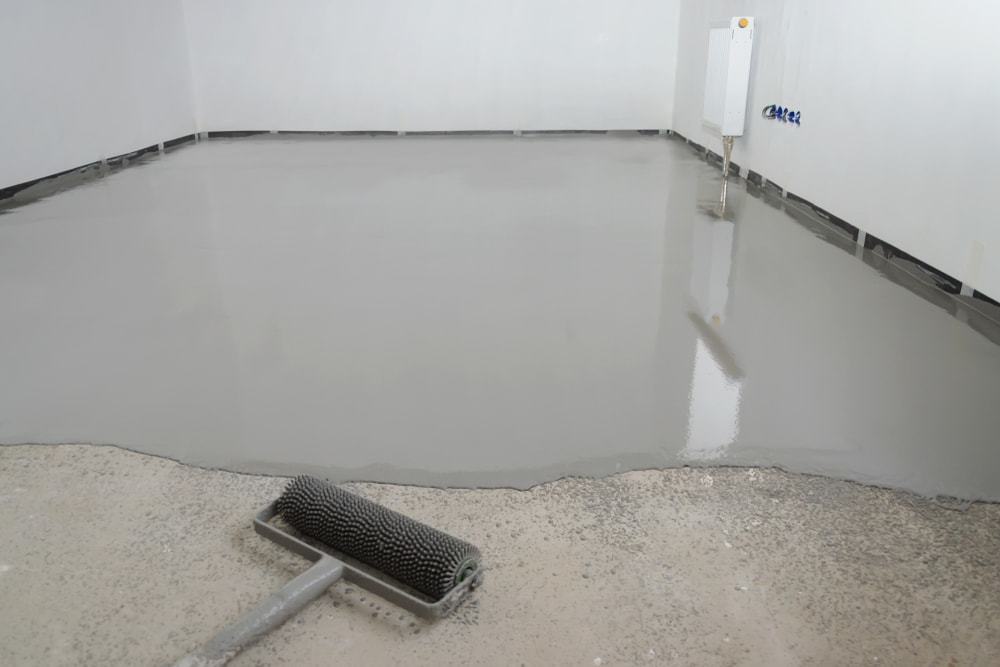
Self-Leveling Concrete Can Save Both Time and Money – Concrete Decor

For garage spaces with traffic that is low, about 18 hours is a good period of time to dry. Garage flooring is a superb investment into your house as well as work space. Epoxy is actually a liquid mixture of 2 things which functions as a sealant as well as protective finish. As for durability it's ideal to purchase the top floor you can afford.
Images Related to DIY Garage Floor Leveling
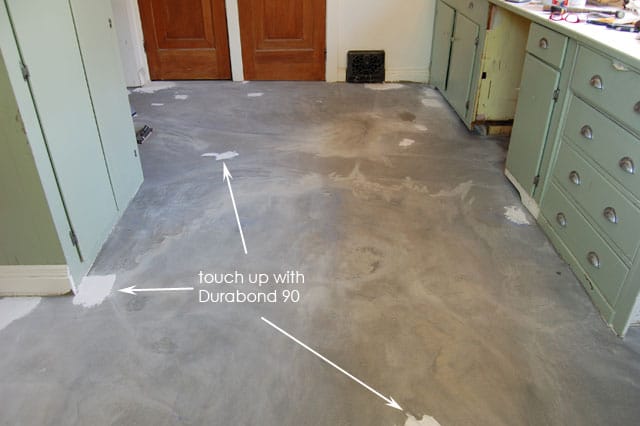
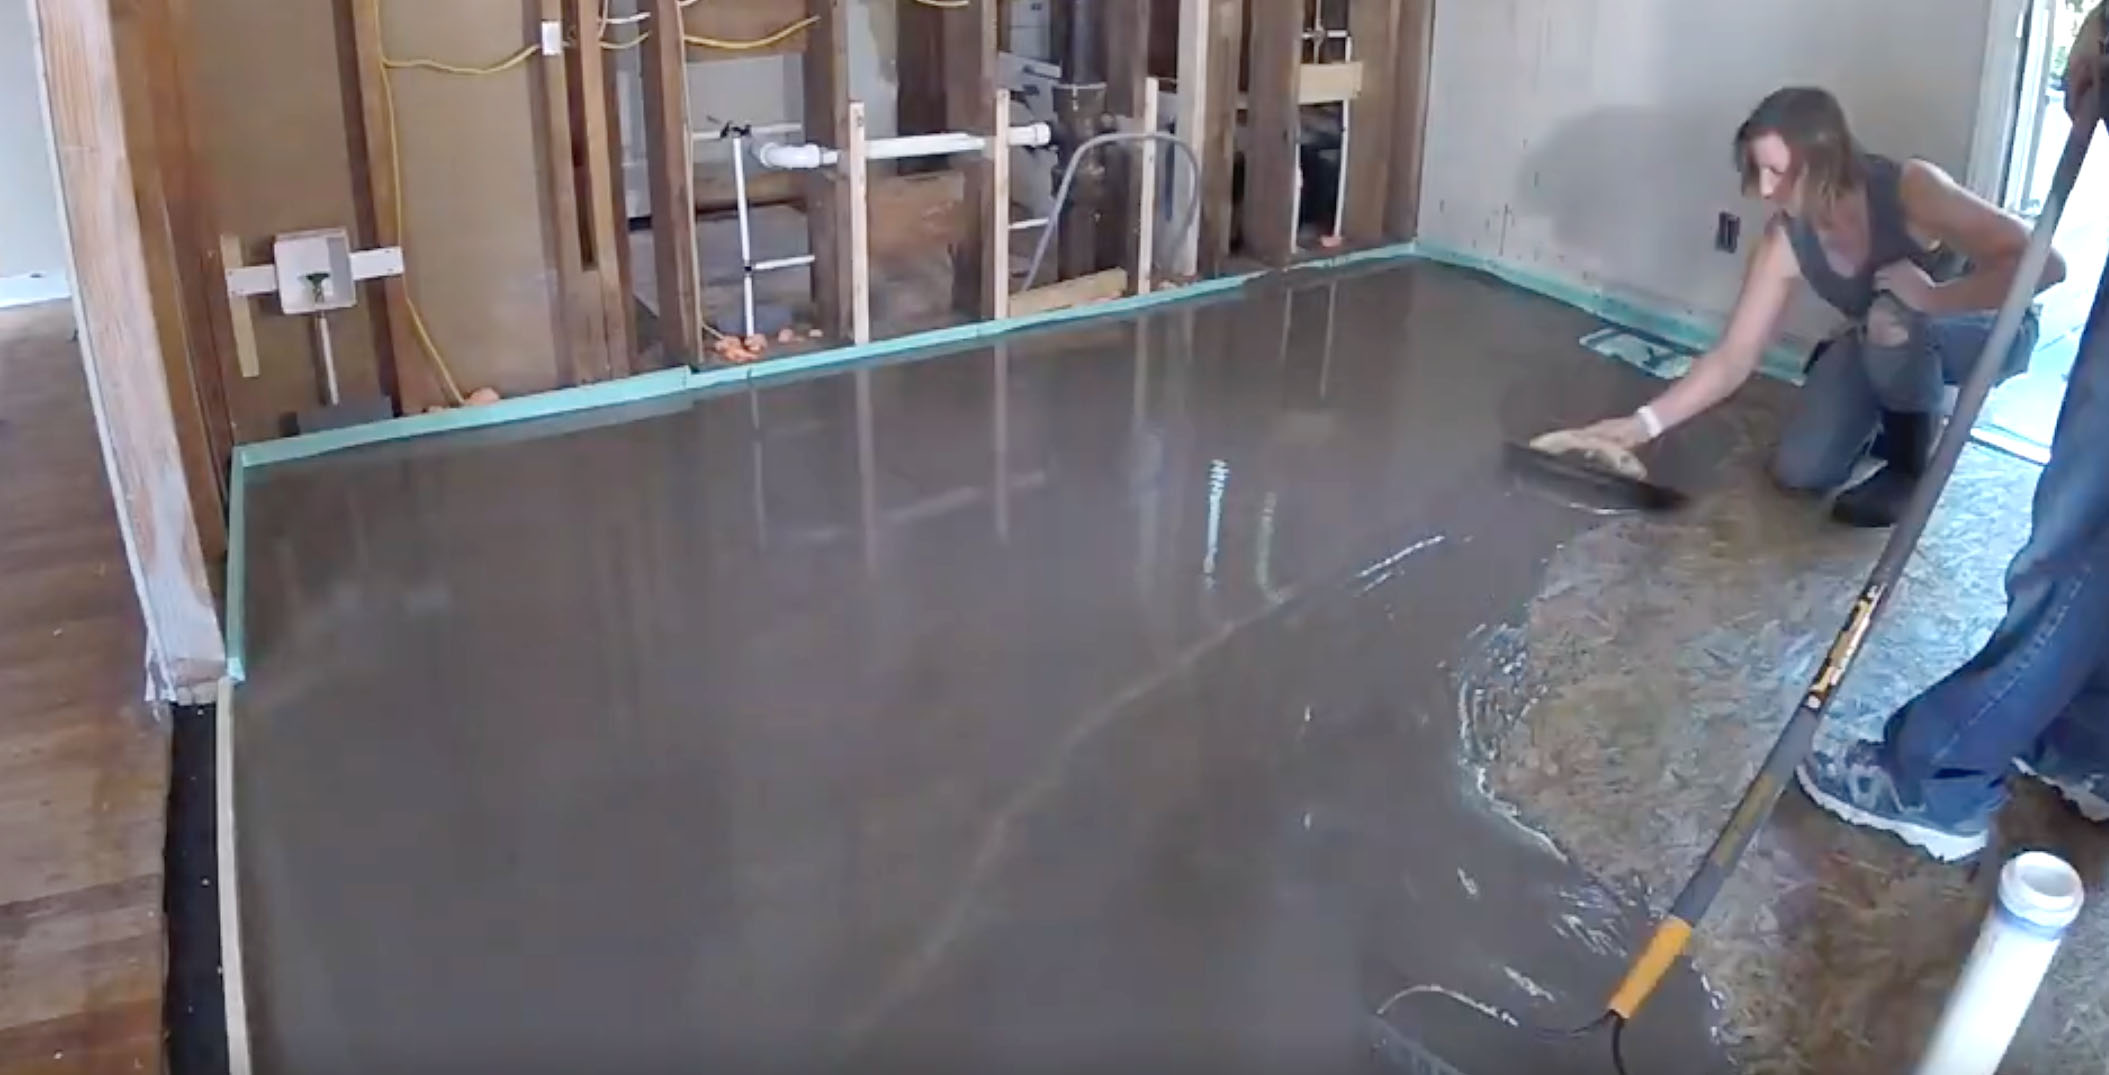
DIY self leveling concrete Honey Built Home

Do-It-Yourself Epoxy Floor Coating
How to pour self levelling cement yourself.
Tips u0026 Tricks to Self-Level a Floor at Millieu0027s Remodel – Pretty
How to Make a Floor Leveling with Concrete Self Leveling Compound MrYoucandoityourself
18 Tips for working with Self-Leveling Underlayment
How to Level a Floor – This Old House
/cdn.vox-cdn.com/uploads/chorus_image/image/69419339/iStock_1312655868.0.jpg)
Leveling and resurfacing garage floor (DIY project update) : r

Can Self Leveling Concrete Be Used as a Finished Floor?
How to pour self levelling cement yourself.
SikaLevel Self-Leveling Underlayment SIKA

😬 3 Things YOU NEED to know before! 😬 SELF LEVELING concrete! How to do it yourself or pay SOMEBODY
Related articles:
- Interlocking Garage Floor Tiles
- Garage Floor Coatings
- Garage Floor Ideas
- Garage Floor Paint
- Garage Floor Rubber Covering
- Garage Floor Coating Paint
- Garage Floor Epoxy Ideas
- Best Garage Floor Material
- Black Epoxy Garage Floor Coating
- Garage Floor Slab Thickness
DIY Garage Floor Leveling: A Comprehensive Guide to Achieving a Smooth and Even Surface
Introduction:
A garage floor that is uneven or has dips and bumps can not only be unsightly but also pose potential hazards. Whether you are planning to convert your garage into a workshop, a gym, or simply want to improve its aesthetic appeal, leveling the floor is an essential step. While hiring professionals for this task can be costly, with the right tools, materials, and knowledge, you can tackle the project yourself and achieve professional-grade results. In this comprehensive guide, we will take you through each step of the DIY garage floor leveling process, along with expert tips and frequently asked questions.
I. Assessing the Condition of Your Garage Floor:
Before diving into the leveling process, it is crucial to evaluate the condition of your garage floor thoroughly. This assessment will help you determine the severity of the unevenness and identify any underlying issues that may need attention. Here are some key points to consider during this initial phase:
1. Identifying Uneven Areas:
Walk around your garage and mark areas where you notice significant dips or bumps in the floor surface using chalk or tape. Pay attention to how these irregularities affect the overall balance of your garage.
2. Inspecting for Cracks or Damage:
Look for any cracks, chips, or other damage on the floor surface. These imperfections can impact the effectiveness of leveling techniques and may require additional repairs before proceeding.
3. Checking for Moisture Issues:
Assess whether moisture is seeping through your garage floor by placing plastic sheets on various areas overnight. If condensation forms on the underside of these sheets, it indicates a moisture problem that should be addressed prior to leveling.
FAQs:
Q1: How can I determine if my garage floor is level?
A1: To check if your garage floor is level, place a long spirit level across different sections of the floor surface. If the level indicates a slope or unevenness, it signifies the need for leveling.
Q2: Can I level a garage floor with extensive cracks?
A2: It is advisable to repair extensive cracks before attempting to level the floor. Ignoring these cracks can result in an unstable surface and compromise the effectiveness of leveling techniques.
II. Preparing for Garage Floor Leveling:
Once you have assessed the condition of your garage floor and addressed any underlying issues, it’s time to prepare for the leveling process. This involves gathering the necessary tools and materials, as well as taking certain precautions to ensure a smooth and successful project:
1. Tools and Materials:
– Concrete grinder or scarifier: Used to remove high spots and rough areas on the floor.
– Concrete patching compound: Necessary for filling in cracks, gaps, or low spots.
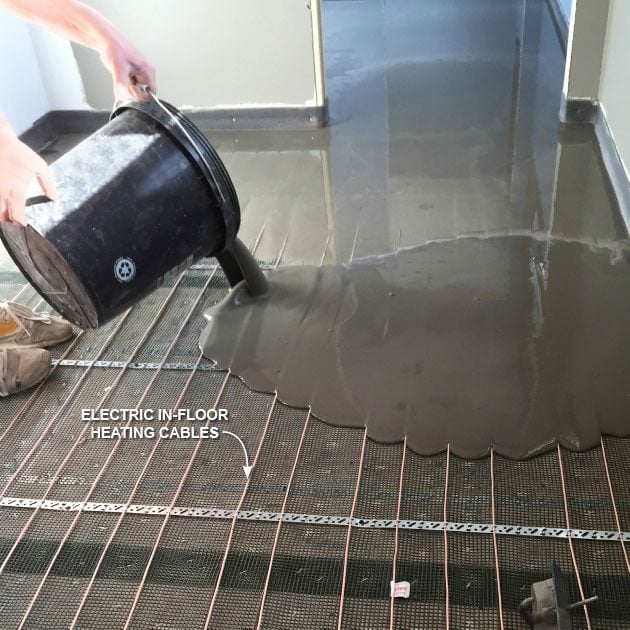
– Self-leveling compound: A key material that creates an even surface by flowing into dips and low areas.
– Trowels: Essential for spreading and smoothing concrete compounds.
– Safety equipment: Wear goggles, gloves, and a dust mask to protect yourself from concrete dust during the preparation phase.
2. Cleaning the Garage Floor:
Before applying any leveling compounds, it is crucial to thoroughly clean the garage floor. Remove all debris, oil stains, and loose particles using a broom, vacuum cleaner, or pressure washer. Ensure that the surface is completely dry before proceeding.
FAQs:
Q1: Can I level my garage floor without using a concrete grinder?
A1: While a concrete grinder helps achieve better results by removing High spots and rough areas, it is possible to level a garage floor without one. However, the process may be more time-consuming and require additional manual labor to ensure a smooth surface.
Q2: Do I need to remove all oil stains from my garage floor before leveling?
A2: It is recommended to remove as much oil stains as possible before leveling the floor. Oil can interfere with the adhesion of leveling compounds, so it’s best to clean the surface thoroughly. You can use a degreaser or detergent specifically designed for removing oil stains.
III. Leveling the Garage Floor:
Now that you have prepared the garage floor, it’s time to start the leveling process. Follow these steps to achieve an even and balanced surface:
1. Repairing Cracks and Gaps:
Use the concrete patching compound to fill in any cracks, gaps, or low spots on the floor. Follow the manufacturer’s instructions for mixing and applying the compound. Use a trowel to spread and smooth out the compound evenly.
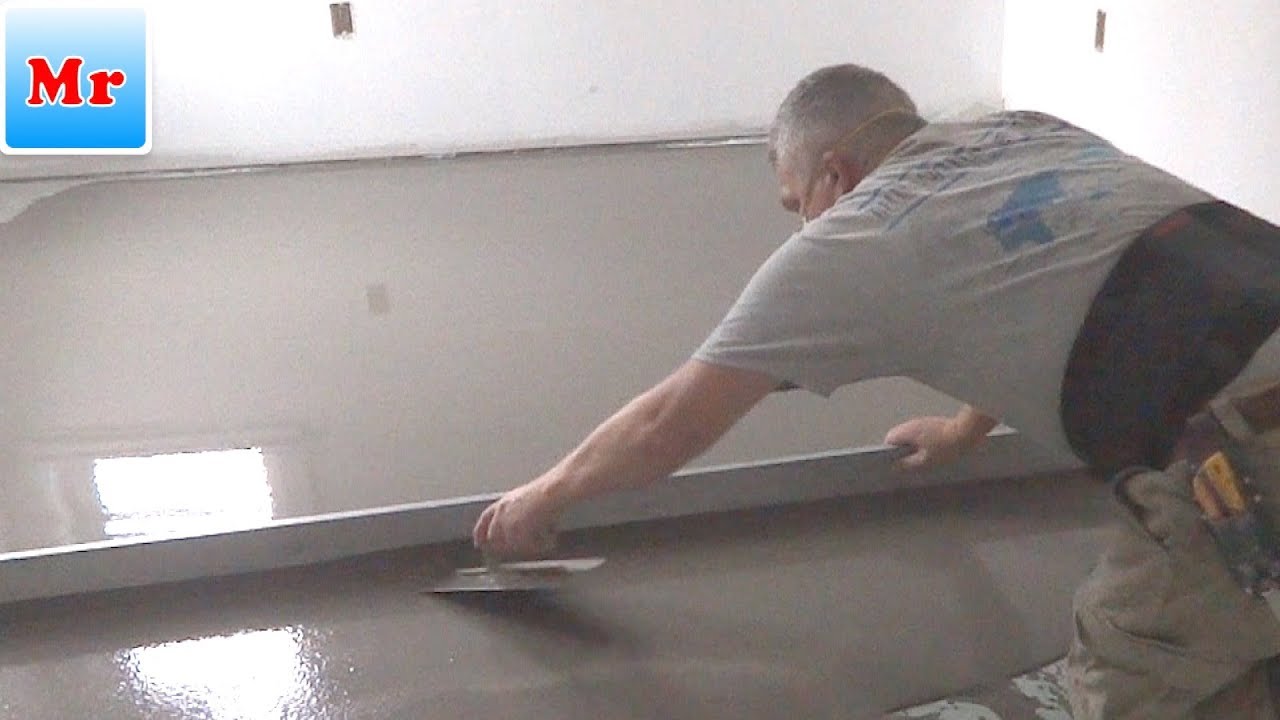
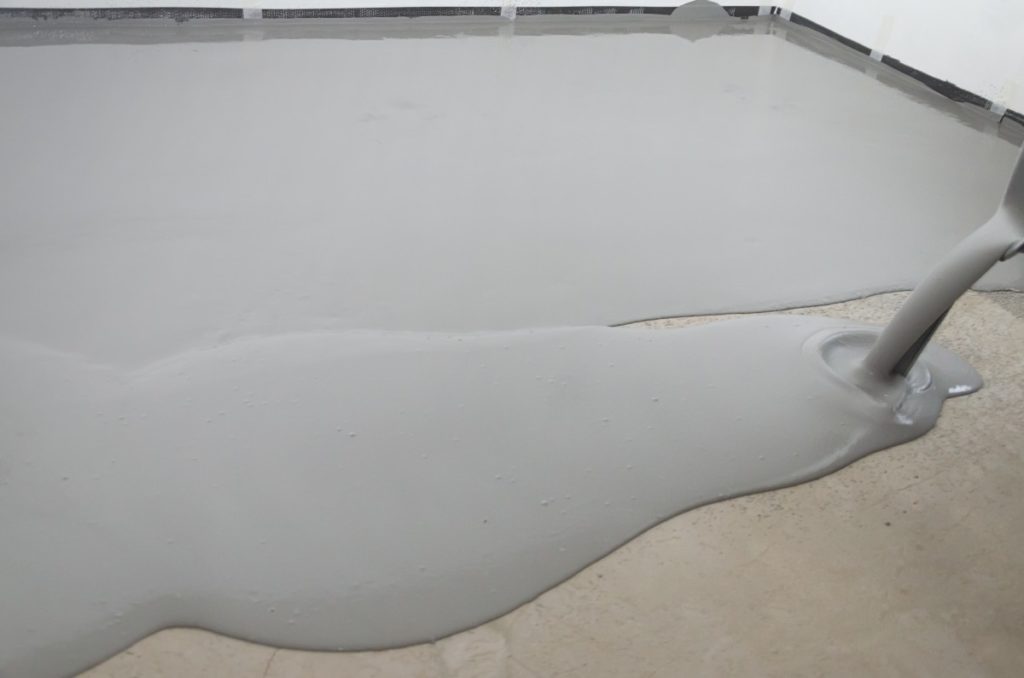
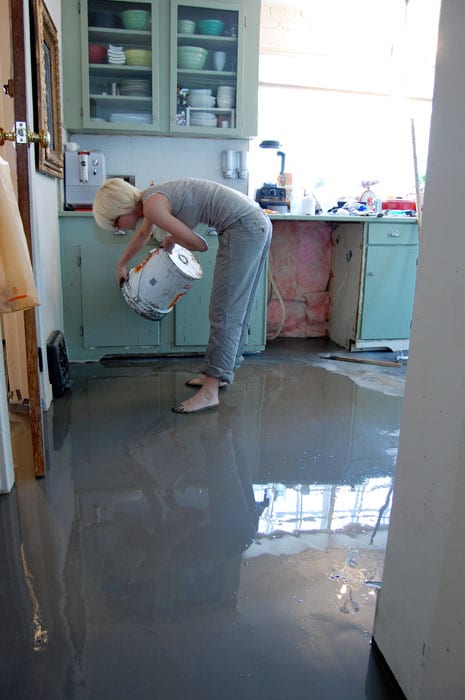
2. Applying Self-Leveling Compound:
Mix the self-leveling compound according to the manufacturer’s instructions. Pour it onto the floor in small sections, starting from one corner and working your way towards the exit. Use a trowel or squeegee to spread and smooth out the compound as quickly as possible before it begins to set.
3. Ensuring Even Coverage:
As you apply the self-leveling compound, pay attention to achieving even coverage across the entire garage floor. Use a spirit level or long straightedge to check for any unevenness or low spots. Adjust and add more compound as needed to achieve a level surface.
4. Allowing for Drying and Curing Time:
After applying the self-leveling compound, allow it to dry and cure according to the manufacturer’s instructions. This usually takes around 24-48 hours. Avoid walking or placing heavy objects on the floor during this time to ensure proper setting.
FAQs:
Q1: Can I apply multiple layers of self-leveling compound if needed?
A1: Yes, you can apply multiple layers of self-leveling compound if necessary to achieve a completely level surface. However, make sure to follow the manufacturer’s instructions regarding drying and curing times between each layer.
Q2: How long do I have to wait before using my garage after leveling the floor?
A2: It is generally recommended to wait at least 24-48 hours before using your garage after leveling the floor. This allows sufficient time for the self-leveling compound to dry and cure properly. However, always refer to the specific instructions provided by the manufacturer of the leveling compound you used. A3: Can I paint or apply a floor coating after leveling the garage floor? A3: Yes, you can paint or apply a floor coating after leveling the garage floor. However, it is important to wait until the self-leveling compound has fully dried and cured before doing so. This usually takes around 24-48 hours. Additionally, make sure to follow the specific instructions provided by the manufacturer of the paint or floor coating product for proper application and drying times.