Overall, the cellular structure of cork is incredibly dense. Cork floors are still extremely popular, similar to most flooring choices, they both have advantages and disadvantages connected with them. Cork is a natural, eco friendly flooring selection for people who are interested in a greener home or even that are dealing with allergies.
Here are Images about Cork Flooring Square Tiles
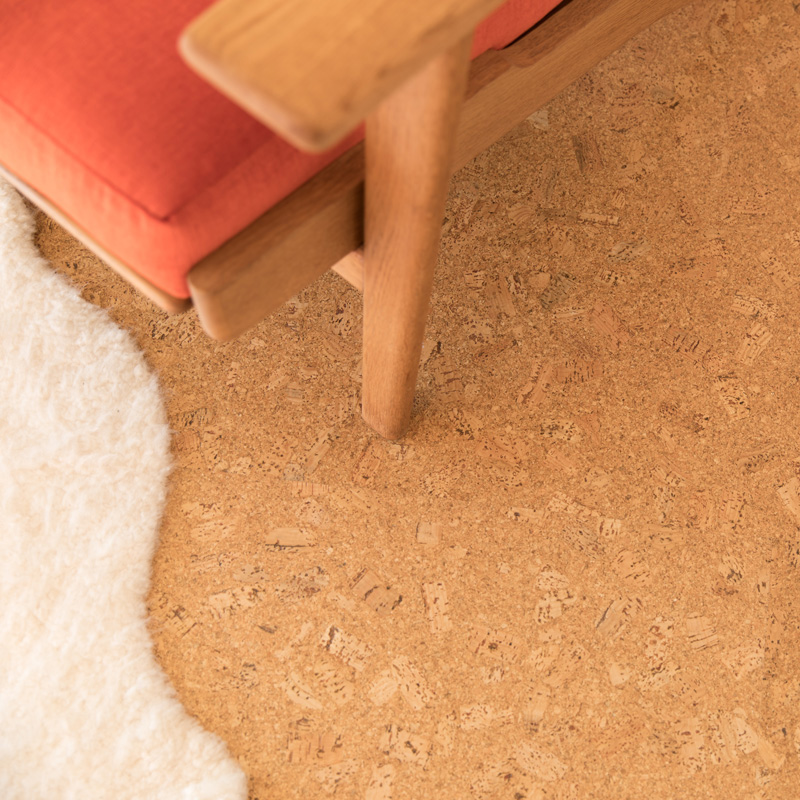
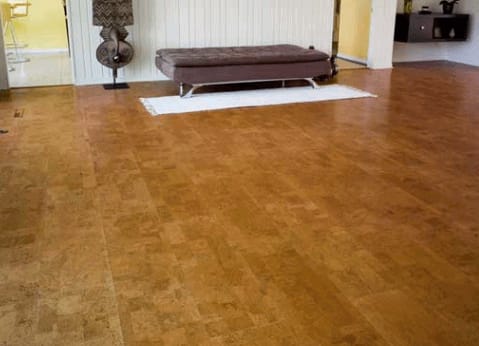
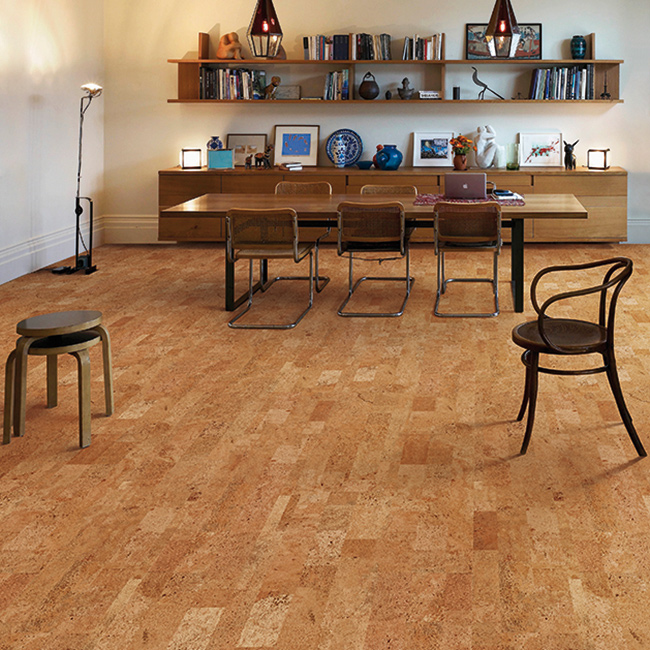
Cork Flooring Square Tiles
This chemical provides cork it's resistance to moisture, mold, mildew, bacteria and allergens. You can talk with the manufacturer for unfinished flooring which may be finished after it's installed or pre finished floors that are easier to maintain. The technique of harvesting bark coming from the cork oak tree does not harm the tree. This flooring type has experienced widespread commercial uses for numerous years.
Longleaf Lumber – Cork Flooring Cork Floor Tiles
Manufactures pick the bark every nine years after it matures. As you are able to see cork flooring is a good buy for your home. These glue-down cork based floors are made for both commercial and residential grade. This makes cork an eco-friendly flooring product because zero deforestation; unlike with many other flooring products. Commercial producers of cork content don't need to cut down trees and disturb the habitat.
Images Related to Cork Flooring Square Tiles
Cork Flooring Pros and Cons
/cork-flooring-pros-and-cons-1314688_hero_0032-9ed702033d384a5aad92329dc679a300.jpg)
Cork Flooring 101: Cost, Types, u0026 Installation – This Old House
/cdn.vox-cdn.com/uploads/chorus_asset/file/23088021/0421_NB_All_About_Cork_Floors_Cork_flooring_iStock_950010876.jpg)
Cork Flooring, a Natural Choice HGTV
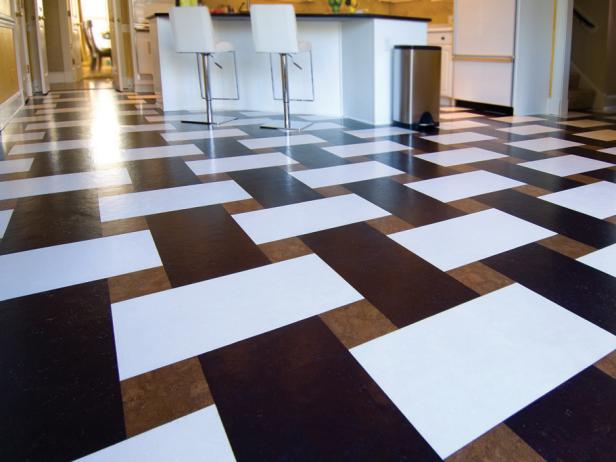
A Gallery of Cork Flooring Designs
/cork-flooring-in-unfurnished-new-home-647206431-58038ebf3df78cbc281836e6.jpg)
Globus Cork Eco-Friendly Flooring Brooklyn NY

Cork Floor Options – Trending Now – Bob Vila

Cork Flooring Pros and Cons
:max_bytes(150000):strip_icc()/cork-flooring-pros-and-cons-1314688_cleaning_0040-d62159c2ce18440a9f2f035e64a9ac25.jpg)
Duro Design Natural Cork Floor Tiles Eco-Building Products
Bespoke Cork Flooring Wicanders Flooring Puretree Cork
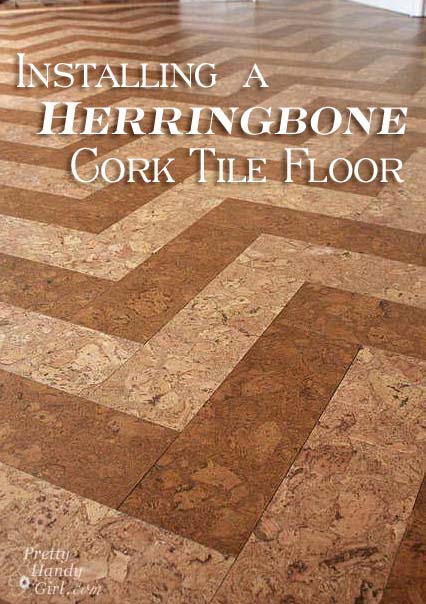
Installing Cork Tile Flooring in the Kitchen – Pretty Handy Girl
Cork Flooring: What Are the Pros u0026 Cons?

Cork Flooring: Pros, Cons and Alternatives – Home Stratosphere

Related articles:
- Vintage Cork Floor
- Cork Flooring For Bathroom
- How To Clean Cork Flooring
- Cork Flooring Laundry Room
- Cork Floor Tiles
- Underlayment For Cork Floor
- Laying Cork Flooring
- Floating Cork Flooring
- Disadvantages Of Cork Floors
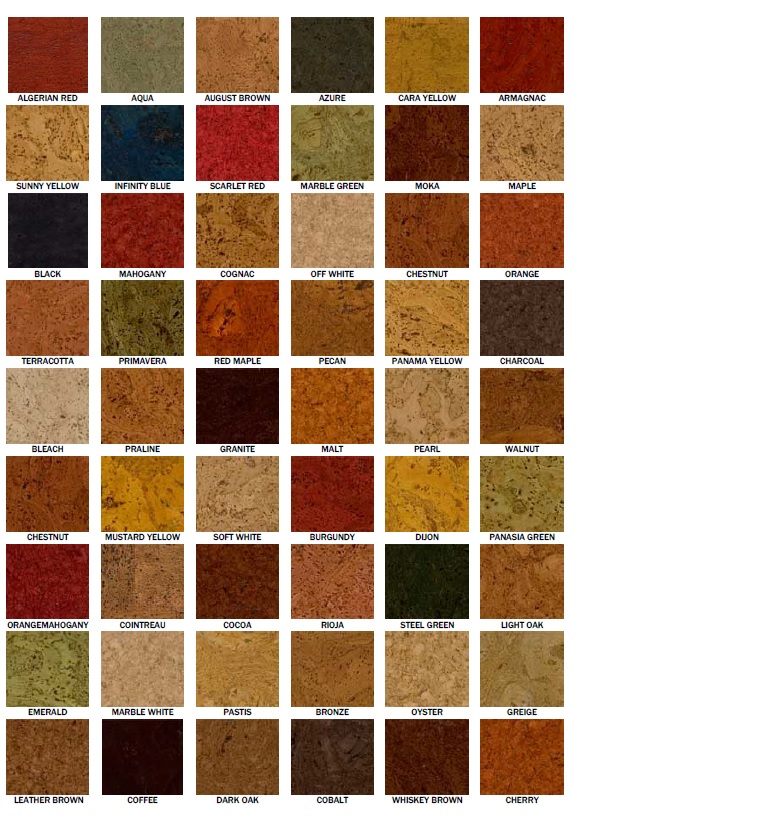
- Cork Floor Colours
Cork Flooring Square Tiles: A Sustainable and Stylish Choice for Your Home
Introduction:
Cork flooring has gained popularity in recent years as a sustainable and versatile option for homeowners. Among the various forms of cork flooring available, cork flooring square tiles offer a unique blend of eco-friendliness, durability, and aesthetic appeal. In this article, we will delve into the world of cork flooring square tiles, exploring their benefits, installation process, maintenance requirements, and frequently asked questions.
I. The Benefits of Cork Flooring Square Tiles:
Cork flooring square tiles offer numerous advantages that make them an attractive choice for homeowners. Here are some key benefits:
1. Sustainability: Cork is an environmentally friendly material as it is harvested from the bark of cork oak trees without causing any harm to them. The trees regenerate their bark over time, making cork a renewable resource. By choosing cork flooring square tiles, you contribute to the preservation of forests and reduce your carbon footprint.
2. Durability: Cork is known for its durability and resilience. The natural structure of cork consists of millions of air-filled cells, which give it a cushioning effect and make it resistant to impact and pressure. This quality makes cork flooring square tiles ideal for high-traffic areas in your home, such as hallways or living rooms.
3. Comfort and Insulation: Cork has excellent thermal and acoustic properties due to its cellular structure. It helps to maintain a comfortable temperature in your home by acting as a natural insulator against heat loss or gain. Additionally, walking on cork flooring feels soft and warm underfoot, providing comfort and reducing strain on joints.
4. Noise Reduction: Another notable benefit of cork flooring square tiles is their ability to reduce noise transmission within your home. The natural sound-absorbing properties of cork help to minimize footsteps’ impact noise and reduce echoes in rooms.
5. Allergy-Friendly: Cork is hypoallergenic as it resists the growth of mold, mildew, and bacteria. It also repels dust mites, making it an excellent flooring option for individuals with allergies or respiratory sensitivities.
II. The Installation Process:
Installing cork flooring square tiles requires attention to detail and precision. Here is a step-by-step guide to help you through the installation process:
1. Prepare the Subfloor: Ensure that the subfloor is clean, dry, and level. Remove any existing flooring and repair any imperfections or unevenness in the subfloor.
2. Acclimate the Tiles: Allow the cork flooring square tiles to acclimate to the room’s temperature and humidity for at least 48 hours before installation. This step helps prevent any potential warping or buckling of the tiles in the future.
3. Lay Out the Tiles: Start by determining the layout of your cork flooring. Begin from a corner of the room and work your way outward. Use a chalk line to create straight guidelines for accurate placement of the tiles.
4. Apply Adhesive: Apply a recommended adhesive to both the subfloor and the backside of each cork tile using a trowel. Follow the manufacturer’s instructions regarding adhesive application, as it may vary depending on the product.
5. Install the Tiles: Place each cork tile firmly onto the adhesive, aligning them with the guidelines created earlier. Use a rubber mallet or a tapping block to ensure proper adhesion and eliminate any air pockets beneath the tiles.
6. Finishing Touches: Once all tiles are installed, trim any excess material along The edges of the room using a utility knife. Install baseboards or molding to cover the gaps between the cork flooring and the walls. Finally, clean the floor thoroughly to remove any adhesive residue or dirt.
III. Maintenance and Care:
Proper maintenance and care are essential to keep your cork flooring square tiles looking beautiful and extending their lifespan. Here are some tips to follow:
1. Regular Cleaning: Sweep or vacuum the floor regularly to remove dirt and debris. Avoid using abrasive brushes or harsh chemicals that can damage the surface of the cork tiles.
2. Moisture Protection: Cork is resistant to moisture, but excessive water exposure can still cause damage. Clean up spills immediately and use mats or rugs in areas prone to moisture, such as kitchens or bathrooms.
3. Avoid Direct Sunlight: Prolonged exposure to direct sunlight can cause color fading and damage to cork flooring. Use curtains or blinds to minimize sunlight exposure or apply UV-protective coatings on windows.
4. Furniture Protection: Place felt pads or furniture glides under heavy furniture legs to prevent scratching or denting the cork surface when moving them around.
5. Refinishing: Over time, cork flooring may show signs of wear and tear. You can refinish it by lightly sanding the surface and applying a new layer of finish or sealer according to the manufacturer’s instructions.
In conclusion, cork flooring square tiles offer numerous benefits such as durability, comfort, noise reduction, and allergy-friendliness. The installation process requires careful preparation, proper adhesive application, and precise placement of each tile. Regular maintenance and care will help preserve the beauty and longevity of your cork flooring. To create straight guidelines for accurate placement of the tiles, follow these steps:
1. Measure and Mark: Use a tape measure and a pencil to mark the center of each wall in the room. Connect the marks with a chalk line to create a straight guideline across the floor.
2. Divide the Room: Measure and mark the midpoint of each wall and use the chalk line to connect these marks, creating two intersecting lines that divide the room into quadrants.
3. Extend the Guidelines: From the center point where the lines intersect, use a straightedge or a long level to extend the guidelines to the edges of the room. This will ensure that your tiles are aligned properly.
4. Apply Adhesive: Apply a recommended adhesive to both the subfloor and the backside of each cork tile using a trowel. Follow the manufacturer’s instructions regarding adhesive application, as it may vary depending on the product.
5. Install the Tiles: Place each cork tile firmly onto the adhesive, aligning them with the guidelines created earlier. Use a rubber mallet or a tapping block to ensure proper adhesion and eliminate any air pockets beneath the tiles.
6. Finishing Touches: Once all tiles are installed, trim any excess material along The edges of the room using a utility knife. Install baseboards or molding to cover the gaps between the cork flooring and the walls. Finally, clean the floor thoroughly to remove any adhesive residue or dirt.
Remember to always refer to manufacturer’s instructions for specific guidelines and recommendations for your particular cork flooring product. Additionally, it is important to regularly clean your cork flooring to maintain its appearance and longevity. Use a broom or vacuum with a soft brush attachment to remove dirt and debris. Avoid using harsh cleaners or abrasive materials that can damage the cork surface. Instead, use a damp mop with a mild soap or specialized cork floor cleaner. Wipe up any spills immediately to prevent staining or damage to the cork.
Lastly, it is recommended to use furniture pads or coasters under heavy furniture to prevent scratching or denting the cork surface. Avoid dragging furniture across the floor and lift it instead when moving it around.
By following these guidelines and properly maintaining your cork flooring, you can enjoy its benefits for many years to come.