Since 1890 the first Congregational Church found Chicago has experienced their cork floor that shows amazing durability. By this point you ought to realize that cork is an eco friendly material and good for the environment. It's almost a pity to miss any opportunity to operate it environmentally friendly information every single day. The floor will not absorb dust or perhaps let some molds or fungi to grow.
Here are Images about Cork Flooring In A Bathroom
Cork Flooring In A Bathroom

It is able to normally repel mildew and mold also. Cork flooring is such a popular option among homeowners, interior designers and architects for both commercial and residential use. The same will happen with furniture left on your cork based floors. The cork is actually baked in temperature ovens which are high while it's being created, and manufacturers have discovered that the longer they maintain the cork slabs of the oven, the darker it gets.
Will Cork Float for Your Bathroom Floor?

Cork is actually regarded as a sustainable and renewable resource as just 50 % of this cork bark is eliminated. Since cork is actually hypoallergenic anybody in your household will benefit by using cork throughout allergy season. With average prices which range from $4. To begin with, it is generally a good plan to not have this item in constant direct sunlight.
Images Related to Cork Flooring In A Bathroom
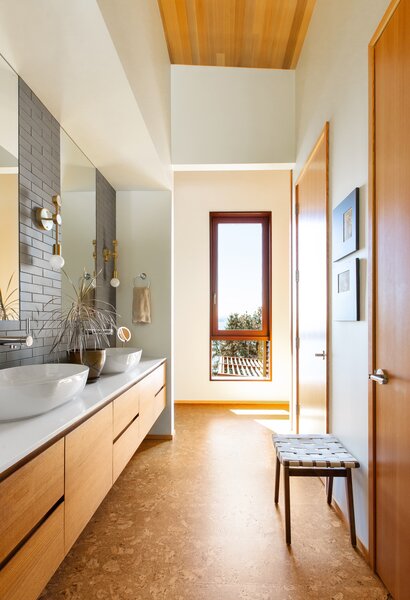
Bathroom Cork Floors Design Photos and Ideas – Dwell
Can Cork Flooring Be Installed in A Bathroom? – Decor Snob

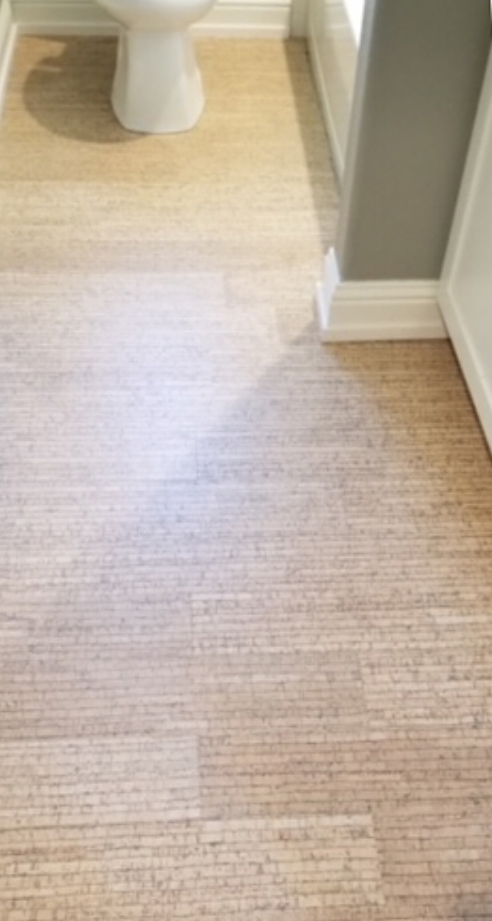
Cork Flooring Materials In Humid Bathroom Conditions
/assorted-cork-tiles-elevated-view-200544917-001-5849d2215f9b58a8cdcf1344.jpg)
3 Reasons to Install a Cork Flooring in Your Bathroom

Cork Flooring In the Bathroom?Learning Center

Best Natural Floors for Bathrooms u2014 Naturlich Flooring
15 Bathroom Designs with Cork Flooring ideas cork flooring, cork

Cork Flooring 101: Cost, Types, u0026 Installation – This Old House
:no_upscale()/cdn.vox-cdn.com/uploads/chorus_asset/file/23087833/0421_NB_All_About_Cork_Floors_09_cork_floors_in_wood_slate_shapes_for_a_bathroom.jpg)
I installed cork floors in my bathroom : r/HomeImprovement

Cork Flooring Pros and Cons
/cork-flooring-pros-and-cons-1314688_hero_0032-9ed702033d384a5aad92329dc679a300.jpg)
Depiction of Choose the Best Flooring Options for Kitchens Cork

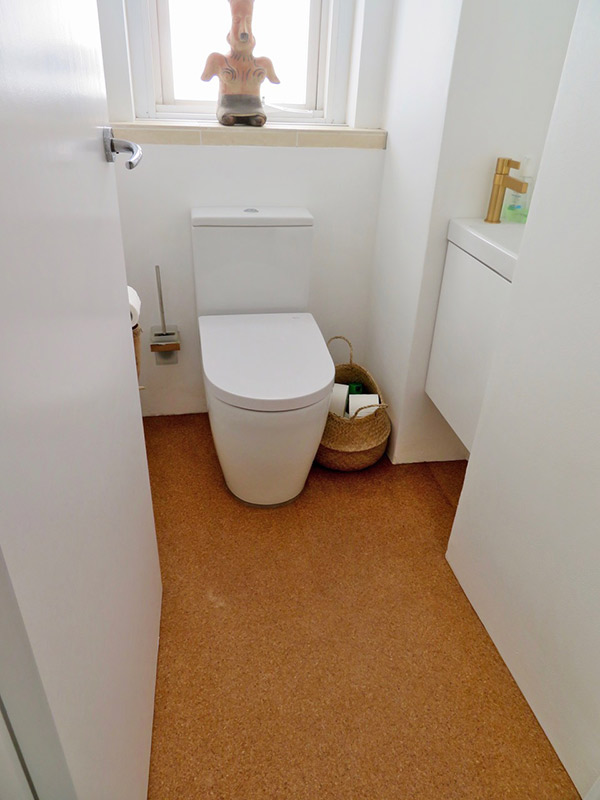
cork-floor-interior-bathroom-3 – SeaCorkSeaCork
Related articles:
- Vintage Cork Floor
- Cork Flooring For Bathroom
- How To Clean Cork Flooring
- Cork Flooring Laundry Room
- Cork Floor Tiles
- Underlayment For Cork Floor
- Laying Cork Flooring
- Floating Cork Flooring
- Disadvantages Of Cork Floors
- Cork Floor Colours
Cork Flooring In A Bathroom: A Sustainable and Stylish Choice
Introduction:
When it comes to bathroom flooring, homeowners are often faced with a myriad of options. From traditional tiles to trendy vinyl, the choices can be overwhelming. However, one option that is gaining popularity for its unique combination of sustainability, durability, and style is cork flooring. In this article, we will delve into the world of cork flooring in a bathroom and explore its benefits, installation process, maintenance tips, and frequently asked questions.
Benefits of Cork Flooring in a Bathroom:
1. Sustainable and Eco-Friendly:
Cork flooring is an environmentally friendly choice for your bathroom. It is made from the bark of cork oak trees, which naturally grow back every 9-12 years. This sustainable harvesting method ensures that the trees remain unharmed while providing a renewable source of raw material.
FAQ: Is cork flooring biodegradable?
Answer: Yes, cork flooring is biodegradable. When disposed of properly, it will break down naturally without releasing harmful toxins into the environment.
2. Water-Resistant and Moisture-Resilient:
Contrary to popular belief, cork flooring is highly resistant to water and moisture. The cellular structure of cork contains millions of air-filled cells that act as a natural barrier against liquid penetration. Additionally, most cork floors come with a protective sealant that further enhances their water-resistance properties.
FAQ: Can I install cork flooring in a bathroom with high humidity?
Answer: Yes, cork flooring can withstand high humidity levels typically found in bathrooms. However, proper installation and periodic sealing are necessary to maintain its water-resistance capabilities.
3. Comfortable Underfoot:
One of the standout features of cork flooring is its exceptional comfort underfoot. The softness and resilience of cork make it an ideal choice for bathrooms where you often walk barefoot or stand for long periods. The cushioning effect helps reduce strain on joints and provides a more comfortable experience.
FAQ: Is cork flooring warm to the touch?
Answer: Yes, cork flooring is naturally warm to the touch. Its insulating properties help maintain a comfortable temperature in your bathroom, making it an excellent choice for colder climates.
4. Noise Reduction:
If you live in an apartment or have a two-story house, you know how annoying it can be to hear footsteps echoing through the floors. Cork flooring acts as a natural sound absorber, significantly reducing noise transmission between floors. This is especially beneficial in bathrooms where privacy and tranquility are often desired.
FAQ: Does cork flooring reduce echo in a bathroom?
Answer: Yes, cork flooring effectively reduces echo and sound reverberation in a bathroom, creating a quieter and more peaceful environment.
Installation Process:
Installing cork flooring in a bathroom requires careful planning and attention to detail. Here are the essential steps involved:
1. Prepare the Subfloor:
Ensure that the subfloor is clean, dry, and free from any debris or imperfections. Remove old flooring materials and repair any cracks or unevenness to create a smooth surface for the cork tiles.
2. Acclimate the Cork Tiles:
Cork tiles need to acclimate to the bathroom’s environment before installation. Place them in the room for at least 48 hours to allow them to adjust to the temperature and humidity levels.
3. Lay Out the Tiles:
Start by finding the center point of the bathroom floor using measuring tape and chalk lines. Begin laying out the tiles from this central point, working your way towards the walls. Ensure that the tiles are laid out evenly and leave space for expansion joints along the walls and any fixed structures in the bathroom.
4. Apply Adhesive:
Apply a recommended adhesive to the subfloor using a trowel, following the manufacturer’s instructions. Spread the adhesive evenly and work in small sections to prevent it from drying out before laying the tiles.
5. Install the Tiles:
Carefully place each cork tile onto the adhesive, pressing it firmly to ensure proper adhesion. Use a rubber mallet or a rolling pin to gently tap down the tiles and ensure they are level and flush with each other.
6. Seal the Tiles:
Once the installation is complete, apply a protective sealant to the cork tiles. This will enhance their water-resistance capabilities and provide additional durability.
7. Allow for Drying Time:
Give the adhesive and sealant enough time to fully dry before allowing foot traffic on the newly installed cork flooring. Follow the manufacturer’s instructions for drying time recommendations.
8. Maintain and Clean:
Regularly clean your cork flooring using a damp mop or cloth with mild soap or a recommended cleaning solution. Avoid using excessive amounts of water to prevent damage to the cork.
By following these installation steps and properly maintaining your cork flooring, you can enjoy its many benefits in your bathroom for years to come. Cork flooring offers several advantages in a bathroom, including its natural insulating properties that help reduce noise and create a quieter environment. Additionally, cork is a comfortable and soft surface to walk on, providing a more peaceful atmosphere in the bathroom.
The installation process for cork flooring in a bathroom involves several steps:
1. Prepare the Subfloor: Ensure that the subfloor is clean, dry, and free from debris or imperfections. Remove any old flooring materials and repair cracks or unevenness to create a smooth surface for the cork tiles.
2. Acclimate the Cork Tiles: Before installation, allow the cork tiles to acclimate to the bathroom’s environment. Leave them in the room for at least 48 hours to adjust to the temperature and humidity levels.
3. Lay Out the Tiles: Find the center point of the bathroom floor using measuring tape and chalk lines. Start laying out the tiles from this central point, working towards the walls. Ensure they are evenly laid out and leave space for expansion joints along the walls and fixed structures.
4. Apply Adhesive: Use a recommended adhesive and apply it to the subfloor using a trowel, following the manufacturer’s instructions. Spread the adhesive evenly and work in small sections to prevent it from drying out before laying the tiles.
5. Install the Tiles: Carefully place each cork tile onto the adhesive, pressing it firmly for proper adhesion. Use a rubber mallet or rolling pin to gently tap down the tiles and ensure they are level and flush with each other.
6. Seal the Tiles: Once installation is complete, apply a protective sealant to enhance water-resistance capabilities and provide additional durability to the cork tiles.
7. Allow for Drying Time: Give both the adhesive and sealant enough time to fully dry before allowing foot traffic on the newly installed cork flooring. Follow manufacturer’s instructions for recommended drying time.
8. Maintain and Clean: Regularly clean the cork flooring using a damp mop or cloth with mild soap or a recommended cleaning solution. Avoid using excessive amounts of water to prevent damage to the cork.
By following these installation steps and properly maintaining the cork flooring, you can enjoy its benefits in your bathroom for many years.