Being hypoallergenic gives cork several excellent health benefits to those that have allergies, along with opposition to mold, bacteria and mildew. The advantages just keeping rolling out for cork flooring do not they? Well, we're not finished just yet, there are a couple of more you have to find out about. These days, cork flooring is available in a riot of colors.
Here are Images about Cork Floor Panels
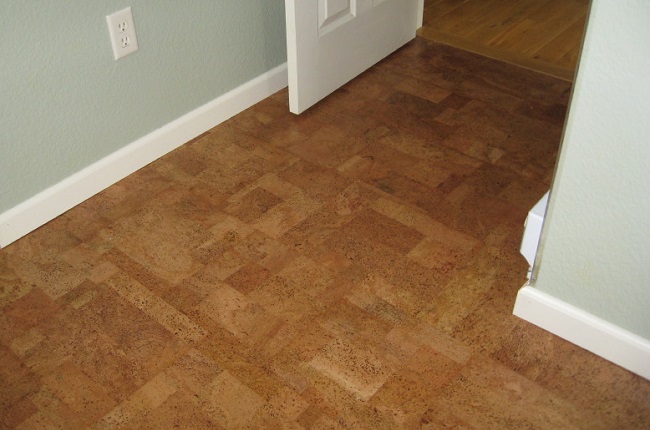
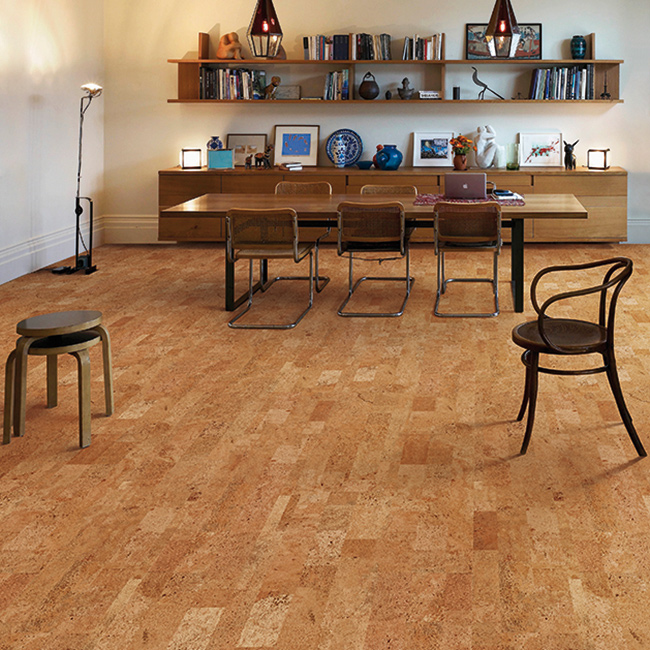
Cork Floor Panels
/cdn.vox-cdn.com/uploads/chorus_image/image/65892042/h1006handbook08.0.jpg)
You'd be astounded how much strength cork has. If you are going light green in your house you'll have to provide cork based floors major concern. This process doesn't harm the cork oak tree and allows it to re-grow a new stratum of bark. Cork flooring is an all natural flooring product. This means no deforestation is actually necessary to harvest cork materials.
Cork Flooring Samples Samples of Cork Floor Tiles AmCork

Cork is the principal compound in this particular flooring item, along with a few other things based on the manufacture. If you have older, heavy framed dressers, armoires and a bed, you might want to choose hardwood flooring or perhaps bamboo floors instead. The last profit we need to note is actually great for you homeowners with allergen hypersensitivity since cork is actually hypoallergenic.
Images Related to Cork Floor Panels
Cork Flooring Pros and Cons
:max_bytes(150000):strip_icc()/cork-flooring-pros-and-cons-1314688_cleaning_0040-d62159c2ce18440a9f2f035e64a9ac25.jpg)
Cork Flooring Pros and Cons
/cork-flooring-pros-and-cons-1314688_hero_0032-9ed702033d384a5aad92329dc679a300.jpg)
Jelinek Cork Flooring Types u2014 Jelinek Cork Group®
Cork, cork flooring, cork wall coverings, cork rolls u0026 sheets

Cork Flooring Prices and Installation Cost 2021

Different Types of Cork Flooring – Learning CenterLearning Center

Bespoke Cork Flooring Wicanders Flooring Puretree Cork
Using Cork Floor Tiles in Your Kitchen
:max_bytes(150000):strip_icc()/cork-flooring-in-unfurnished-new-home-647206431-57e7c0c95f9b586c3504ca07.jpg)
Globus Cork Eco-Friendly Flooring Brooklyn NY

Cork Flooring Materials In Humid Bathroom Conditions
/assorted-cork-tiles-elevated-view-200544917-001-5849d2215f9b58a8cdcf1344.jpg)
How to Seal Cork Flooring – A DIY Guide BuildDirectLearning Center

Solid Corkboard Parquet Flooring Tile Cork Board Floor Squares

Related articles:
- Vintage Cork Floor
- Cork Flooring For Bathroom
- How To Clean Cork Flooring
- Cork Flooring Laundry Room
- Cork Floor Tiles
- Underlayment For Cork Floor
- Laying Cork Flooring
- Floating Cork Flooring
- Disadvantages Of Cork Floors
- Cork Floor Colours
Cork Floor Panels: A Sustainable and Stylish Flooring Option
Introduction:
In recent years, cork floor panels have gained popularity as a sustainable and stylish flooring option. With its unique properties and eco-friendly credentials, cork has become a favored choice among homeowners, interior designers, and architects alike. In this article, we will explore the various aspects of cork floor panels, including their benefits, installation process, maintenance tips, and frequently asked questions.
Benefits of Cork Floor Panels:
1. Sustainability: One of the key advantages of cork floor panels is their sustainability. Cork is harvested from the bark of cork oak trees without causing any harm to the tree itself. The bark grows back over time, making it a renewable resource. This sustainable harvesting process ensures that cork flooring is an environmentally friendly choice.
2. Durability: Despite its soft and cushiony feel underfoot, cork is surprisingly durable. Its cellular structure consists of millions of air-filled chambers that act as natural shock absorbers. This property makes cork floor panels resilient to everyday wear and tear. Additionally, cork is resistant to moisture, mold, mildew, and pests, making it suitable for high-traffic areas like kitchens and bathrooms.
3. Thermal Insulation: Another remarkable characteristic of cork floor panels is their excellent thermal insulation properties. The air-filled cells within the material help to retain heat during colder months and keep interiors cool in warmer climates. This insulation quality not only contributes to energy savings but also enhances the comfort level inside your home.
4. Acoustic Properties: Cork has exceptional acoustic qualities due to its ability to absorb sound vibrations. When installed as flooring material, it effectively reduces noise transmission between floors and rooms. This feature makes cork floor panels an ideal choice for residential spaces where noise reduction is desired, such as bedrooms or home offices.
5. Comfort Underfoot: Cork’s natural elasticity provides a comfortable walking surface that cushions your feet as you walk or stand for extended periods. This makes it particularly appealing for those who spend long hours on their feet, such as chefs or individuals with joint problems. The softness of cork also helps to reduce leg fatigue and impact on joints.
Installation Process:
Installing cork floor panels requires careful preparation and attention to detail. Here is a step-by-step guide to help you through the installation process:
1. Preparing the Subfloor: Ensure that the subfloor is clean, dry, and level. Remove any existing flooring, adhesive residues, or debris. If necessary, use a self-leveling compound to even out any uneven areas.
2. Acclimation: Before installation, allow the cork floor panels to acclimate to the room’s temperature and humidity levels for at least 48 hours. This helps prevent any potential expansion or contraction issues later on.
3. Layout Planning: Plan the layout of your cork floor panels carefully, considering the direction of natural light and room dimensions. Start from a straight wall and work your way across the room.
4. Adhesive Application: Apply a suitable adhesive recommended by the manufacturer evenly onto the subfloor using a trowel. Follow the instructions regarding drying time and open time for optimal bonding.
5. Panel Installation: Begin installing the cork floor panels, making sure to leave a small gap around the perimeter of the room for expansion. Use a tapping block and rubber mallet to ensure each panel is securely in place and level with adjacent ones.
6. Finishing Touches: Once all panels are installed, remove any excess adhesive using a damp cloth or Cleaner. Allow the adhesive to dry completely before moving furniture back into the room.
7. Sealing: Depending on the type of cork floor panels you have chosen, you may need to apply a sealant or finish to protect the surface from spills and stains. Follow the manufacturer’s instructions for proper application and drying time.
8. Regular Maintenance: To keep your cork floor panels looking their best, regularly sweep or vacuum to remove dirt and debris. Avoid using harsh chemicals or abrasive cleaners that can damage the surface. Instead, use a mild cleaner specifically designed for cork floors and a damp mop for regular cleaning.
9. Preventive Measures: To prevent scratches or damage, use felt pads on furniture legs and avoid dragging heavy objects across the floor. Place doormats at entryways to trap dirt and moisture before it reaches the cork surface.
10. Reapplication of Sealant: Over time, the sealant on your cork floor panels may wear off. It is recommended to reapply a new layer of sealant every few years to maintain its protective properties.
By following these installation steps and proper maintenance practices, you can enjoy the many benefits of cork floor panels in your high-traffic areas like kitchens and bathrooms. Cork floor panels are a popular choice for high-traffic areas like kitchens and bathrooms due to their durability, comfort, and eco-friendly nature. Installing cork floor panels requires some preparation and careful attention to detail. Here is a step-by-step guide to help you through the installation process:
1. Preparing the Subfloor: Start by ensuring that the subfloor is clean, dry, and level. Remove any existing flooring, adhesive residues, or debris. If there are any uneven areas on the subfloor, use a self-leveling compound to even them out.
2. Acclimation: Before installation, allow the cork floor panels to acclimate to the room’s temperature and humidity levels for at least 48 hours. This helps prevent any potential expansion or contraction issues later on.
3. Layout Planning: Plan the layout of your cork floor panels carefully. Consider factors such as the direction of natural light and room dimensions. It is recommended to start from a straight wall and work your way across the room.
4. Adhesive Application: Apply a suitable adhesive recommended by the manufacturer evenly onto the subfloor using a trowel. Follow the instructions regarding drying time and open time for optimal bonding.
5. Panel Installation: Begin installing the cork floor panels, making sure to leave a small gap around the perimeter of the room for expansion. Use a tapping block and rubber mallet to ensure each panel is securely in place and level with adjacent ones.
6. Finishing Touches: Once all panels are installed, remove any excess adhesive using a damp cloth or cleaner recommended by the manufacturer. Allow the adhesive to dry completely before moving furniture back into the room.
7. Sealing: Depending on the type of cork floor panels you have chosen, you may need to apply a sealant or finish to protect the surface from spills and stains. Follow the manufacturer’s instructions for proper application and drying time.
8. Regular Maintenance: To keep your cork floor panels looking their best, regularly sweep or vacuum to remove dirt and debris. Avoid using harsh chemicals or abrasive cleaners that can damage the surface. Instead, use a mild cleaner specifically designed for cork floors and a damp mop for regular cleaning.
9. Preventive Measures: To prevent scratches or damage, use felt pads on furniture legs and avoid dragging heavy objects across the floor. Place doormats at entryways to trap dirt and moisture before it reaches the cork surface.
10. Reapplication of Sealant: Over time, the sealant on your cork floor panels may wear off. It is recommended to reapply a new layer of sealant every few years to maintain its protective properties.
By following these installation steps and proper maintenance practices, you can enjoy the many benefits of cork floor panels in your high-traffic areas like kitchens and bathrooms.