By failing to give far more thought to the kitchen floor alternatives of yours and selecting the wrong floor surface will guarantee that an overall outstanding kitchen will look just natural, and also get dated quicker. You can go from an incredibly plain look to really stylish in kitchen flooring. Part of what makes it easy to maintain pure is seamless inside design.
Here are Images about Cheap Kitchen Flooring DIY
Cheap Kitchen Flooring DIY

Despite the very best type of sealant if you allow water to sit on top of your cork floors it's about to harm them so I continually recommend a mat where water is a possible problem along with making sure that any fluid spill is wiped up immediately. They include bar stools to sit on and everyone can talk and enjoy the cooking experience together.
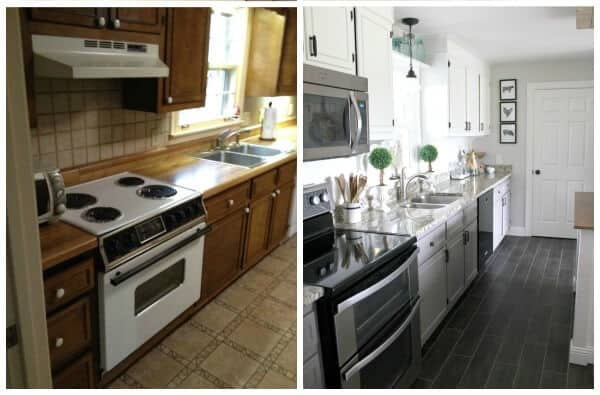
DIY Flooring: How We Changed our Kitchen in 3 days for Less than
Bear in mind that the primary things to consider while selecting upon the type of kitchen area flooring should not always be the strategy you want the floor to look but focus on the materials durability, ease of strength as well as maintenance before you consider the spending budget. Locating the right buys on bamboo kitchen area flooring is easy when you are on the Internet.
Images Related to Cheap Kitchen Flooring DIY
20 Cheap DIY Flooring Ideas You Need To Know About

25 Cheap Flooring Ideas – Stunning DIY Floors to Try – Joyful

9 inexpensive kitchen flooring options you can DIY Real Homes
DIY Flooring: How We Changed our Kitchen in 3 days for Less than
4 Inexpensive Options for Kitchen Flooring Options
/inexpensive-kitchen-flooring-ideas-1315016-hero-6a719a2e295546458826b7d01d1ff71a.jpg)
DIY Flooring: How We Changed our Kitchen in 3 days for Less than

Inexpensive Rustic Wood Kitchen Floors + Kitchen Faucet Upgrade

RENTER FRIENDLY KITCHEN FLOOR DIY ON A BUDGET – INEXPENSIVE HOME DECOR IDEAS!
Home on Hidden Oaks: 16 Affordable Flooring Options Kitchen

4 Inexpensive Options for Kitchen Flooring Options
:max_bytes(150000):strip_icc()/inexpensive-kitchen-flooring-ideas-1315016-01-f18479366fe9430f886ae0ce3c9419ec.jpeg)
Kitchen Flooring Materials and Ideas – This Old House
/cdn.vox-cdn.com/uploads/chorus_asset/file/19866713/May_June2019_sleek_pulls.jpg)
34 DIY Flooring Projects That Could Transform The Home

Related articles:
- Stained Concrete Basement Floor
- Finishing Basement Floor
- Refinish Concrete Basement Floor
- Best Flooring For Basement
- Basement Gym Flooring Ideas
- Laminate Flooring In Basement
- Basement Concrete Floor Sweating
- Basement Floor Finishing Ideas
- Painting Unfinished Basement Floor
- Unique Basement Flooring
Cheap Kitchen Flooring DIY: Transforming Your Kitchen on a Budget
Introduction:
When it comes to kitchen renovations, one of the most crucial decisions you’ll face is choosing the right flooring. However, the cost of new kitchen flooring can be a major concern for many homeowners. Luckily, with a little creativity and some DIY skills, it’s possible to achieve a beautiful and durable kitchen floor without breaking the bank. In this article, we will explore various affordable options and provide step-by-step instructions on how to install them yourself, saving you money while creating a stunning kitchen space.
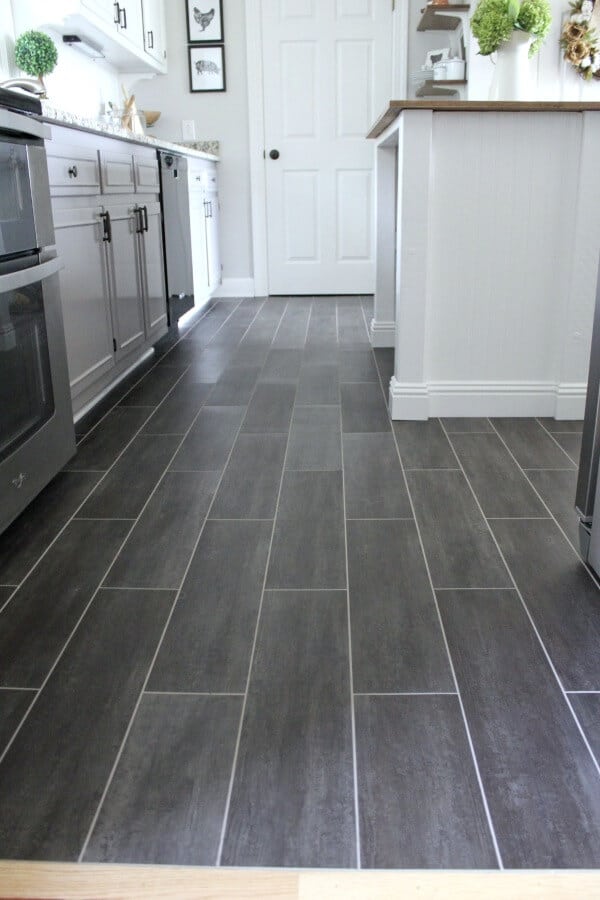
1. Vinyl Plank Flooring: Affordable Elegance for Every Budget
Vinyl plank flooring has gained immense popularity in recent years due to its affordability, durability, and easy installation. With its realistic wood or stone appearance, vinyl plank flooring can transform your kitchen into a stylish and inviting space without the hefty price tag.
Installation:
– Begin by thoroughly cleaning and preparing your existing kitchen floor.
– Measure the area accurately and purchase enough vinyl planks to cover the entire space.
– Start by laying the first row of planks along one wall, ensuring they are straight and tight together.
– Continue adding planks row by row, using a utility knife to cut them to fit around corners and edges.
– Once all planks are in place, use a roller to ensure proper adhesion.
FAQs:
Q: Is vinyl plank flooring suitable for kitchens?
A: Yes, vinyl plank flooring is an excellent choice for kitchens as it is water-resistant and easy to clean. It also provides cushioning underfoot, making it comfortable to stand on during long hours of cooking.
Q: Can I install vinyl plank flooring over existing ceramic tiles?
A: Yes, you can install vinyl plank flooring over ceramic tiles as long as they are in good condition and properly prepared. Ensure that the surface is clean and level before starting the installation process.
2. Laminate Flooring: Budget-Friendly and Stylish
Laminate flooring is another cost-effective option that can mimic the look of hardwood, stone, or tile. With its durable construction and easy installation, laminate flooring is a popular choice for those seeking a beautiful kitchen floor on a budget.
Installation:
– Begin by removing any existing flooring and thoroughly clean the subfloor.
– Measure the area accurately and purchase enough laminate planks to cover the entire space.
– Install an underlayment to provide additional cushioning and noise reduction.
– Start laying the first row of planks along one wall, ensuring they are straight and tight together.
– Continue adding planks row by row, using a tapping block and mallet to lock them in place.
– Trim the last row of planks to fit using a jigsaw or circular saw.
– Finish the installation by adding baseboards or trim to cover the expansion gap.
FAQs:
Q: Is laminate flooring suitable for kitchens?
A: Yes, laminate flooring is suitable for kitchens as long as it is properly installed and maintained. However, it is essential to clean up spills promptly to prevent water damage.
Q: Can I install laminate flooring over an uneven subfloor?
A: It is not recommended to install laminate flooring over an uneven subfloor. Ensure that the subfloor is level before starting the installation process. If necessary, use self-leveling compound or plywood to create a smooth surface.
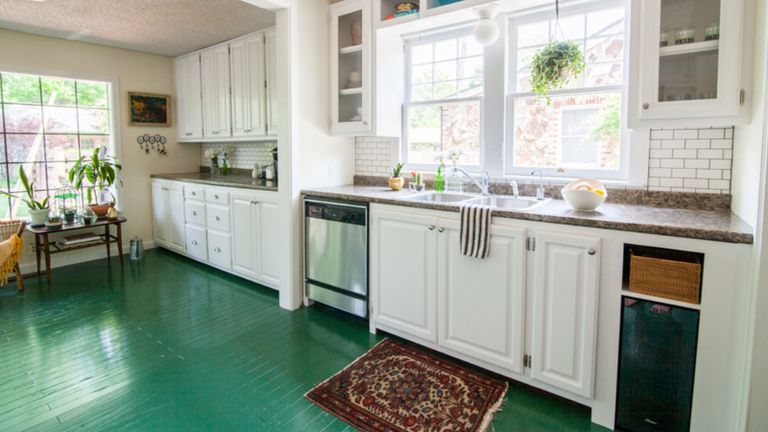
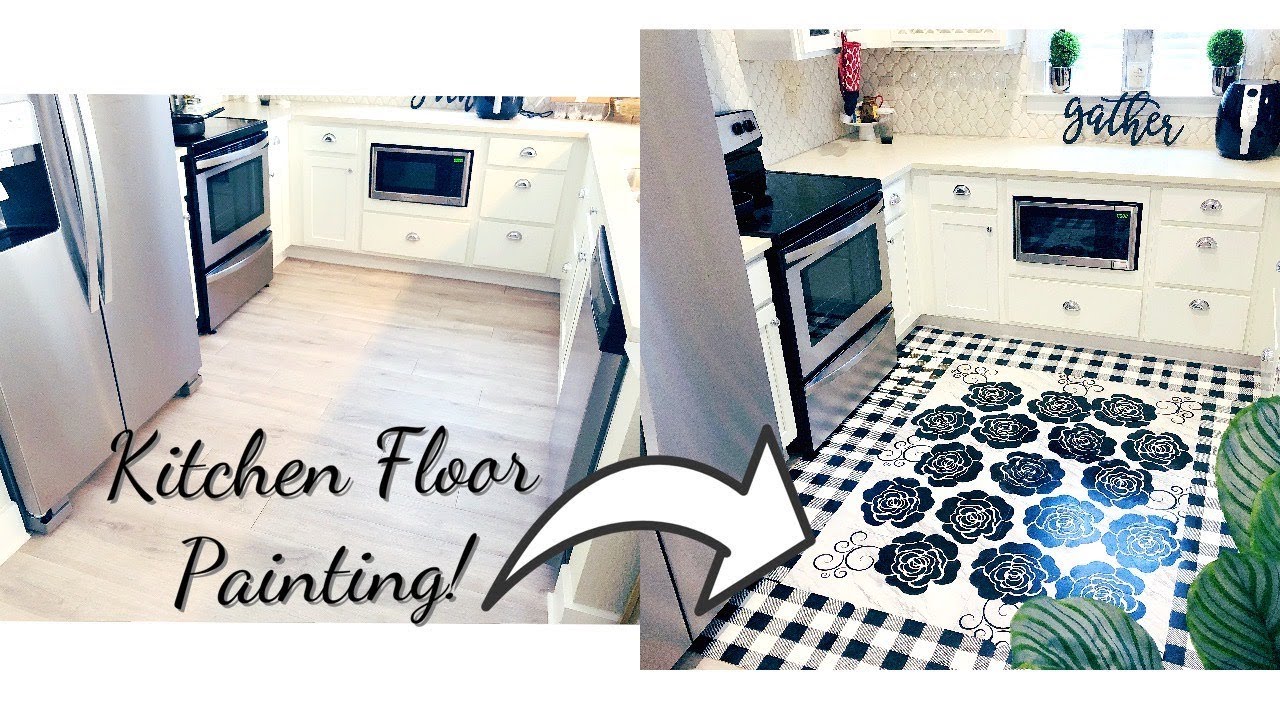
3. Painted Concrete Floors: A Budget-Friendly DIY Transformation
If you’re looking for an ultra-affordable option that Can completely transform the look of your kitchen, consider painting your concrete floors. This budget-friendly option allows you to customize the color and design of your floors while adding a fresh and modern touch to your kitchen space.
Installation:
– Begin by thoroughly cleaning the concrete surface and allowing it to dry completely.
– Repair any cracks or imperfections in the concrete using a patching compound.
– Apply a coat of concrete primer to ensure proper adhesion of the paint.
– Choose a high-quality concrete floor paint in the desired color and apply it using a roller or brush, working in small sections.
– Allow the first coat to dry completely before applying additional coats for better coverage.
– Finish with a clear topcoat to protect the painted surface from wear and tear.
FAQs:
Q: Is it necessary to use a primer before painting concrete floors?
A: Yes, using a primer is essential when painting concrete floors as it helps with adhesion and ensures better durability of the paint.
Q: How long does painted concrete flooring last?
A: The lifespan of painted concrete floors depends on various factors such as foot traffic, maintenance, and quality of products used. With proper care, painted concrete floors can last for several years. Touch-ups may be needed over time to maintain their appearance.
Q: Can I paint over existing floor coverings, such as tiles or vinyl?
A: It is generally not recommended to paint over existing floor coverings. It is best to remove any old flooring and properly prepare the concrete surface before painting.
Q: How do I maintain painted concrete floors?
A: To maintain painted concrete floors, regularly sweep or vacuum to remove dirt and debris. Clean spills promptly with a mild detergent and water. Avoid using abrasive cleaners or tools that can scratch the paint. Additionally, consider applying a fresh topcoat every few years for added protection.
Q: Can I use any type of paint for concrete floors?
A: It is important to use a high-quality concrete floor paint specifically designed for use on floors. These paints are formulated to withstand foot traffic and provide durability. Ordinary wall paints are not suitable for painting concrete floors.
Q: Can I add patterns or designs to painted concrete floors?
A: Yes, you can add patterns or designs to painted concrete floors using stencils or tape. This allows you to create unique and customized looks for your kitchen floor.
Q: Does painting concrete floors require any special equipment?
A: Painting concrete floors typically requires basic tools such as rollers, brushes, and trays. However, if you plan on applying multiple coats or have a large area to cover, using a paint sprayer may be more efficient.
It’s important to note that these FAQs are based on general information and it’s always recommended to follow the specific instructions provided by the manufacturer of the paint or flooring product you choose. Additionally, it is important to properly prepare the concrete surface before painting by cleaning it thoroughly and repairing any cracks or imperfections. It may also be necessary to etch or sand the surface to create a rough texture that will help the paint adhere better. Following these steps and using high-quality products will ensure a successful and long-lasting paint job on your concrete floors.