The most essential thing to consider when completing a finishing task on a basement floors made of concrete is the matter of moisture. Additionally, polyurea is actually versatile; it comes in, or is usually ordered in numerous styles and colors to match any decor. Basement flooring installation is actually a significant part of basement remodeling.
Here are Images about Best Way To Seal Cracks In Basement Floor
Best Way To Seal Cracks In Basement Floor
Basement flooring must complement whatever theme you're using the kitchen for. You will be content for many years down the street. Be sure to contact a professional contractor that will be ready to evaluate the first floor and after that provide you with an estimation. You might have to have the concrete subfloor sealed and also install a moisture barrier.
Concrete Slab Crack Repair Instructional Video
Some people take more of a step by step approach, waiting to discover the types of fees they'll be facing, exactly how things are turning out and ultimately what the suitable option will be. A self contained suite or additional family bedrooms are also options which come to mind. Install the new floor for the basement in addition to the overlay.
Images Related to Best Way To Seal Cracks In Basement Floor
Repairing Common Concrete Slab Problems – Concrete Network
Foundation Floor Crack Repair CrackX

Basement u0026 Foundation Floor Cracks Repair in Atlanta Georgia

Why Cracks in Basement Floors Canu0027t be Fixed by U.S. Waterproofing

Basement Floor Cracks – How To Fix Cracks In A Basement Floor
How to Make a Concrete Floor Patch
/Repairing-Concrete-Floor-173836996-56a4a08d5f9b58b7d0d7e412.jpg)
Sealing Cracks – VSI Radon Reduction Corp

Basement Floor Crack Repair Repairing Leaking Cracks In Concrete

Basement Floor Crack Repair in MN, ND, SD u0026 Eastern MT

Basement Floor Cracks: Causes and How To Repair

Why your basement floor is cracked News and Events for TerraFirma
Basement Floor Cracks: How They Occur and Whyu2026 U.S. Waterproofing

Related articles:
- Stained Concrete Basement Floor
- Finishing Basement Floor
- Refinish Concrete Basement Floor
- Best Flooring For Basement
- Basement Gym Flooring Ideas
- Laminate Flooring In Basement
- Basement Concrete Floor Sweating
- Basement Floor Finishing Ideas
- Painting Unfinished Basement Floor
- Unique Basement Flooring
Best Way To Seal Cracks In Basement Floor
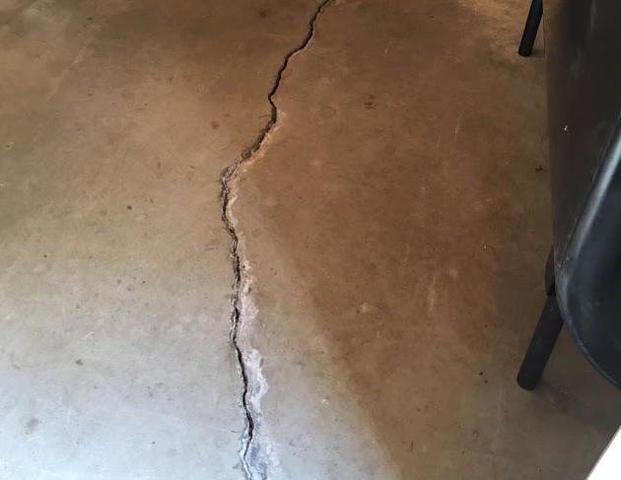
A crack in the basement floor can be a homeowner’s worst nightmare. Not only can it lead to water seepage and moisture issues, but it can also compromise the structural integrity of your home. Therefore, it is crucial to address any cracks in your basement floor promptly and effectively. In this article, we will discuss the best way to seal cracks in a basement floor, providing you with step-by-step instructions and valuable tips.
Understanding the Causes of Basement Floor Cracks
Before we delve into the process of sealing cracks in a basement floor, it is essential to understand the common causes of these cracks. By identifying the underlying issue, you can prevent future cracks and ensure a long-lasting repair.
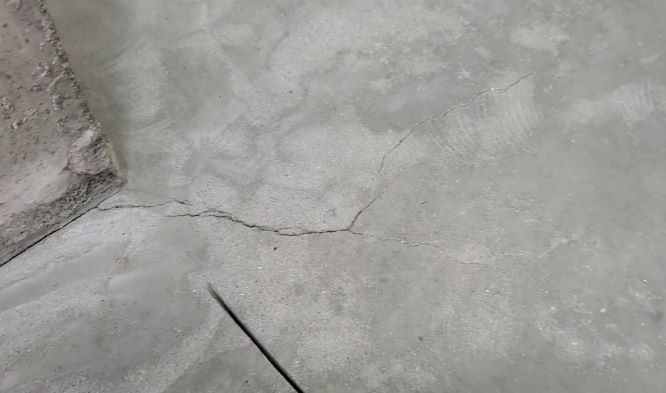
1. Settlement: One of the primary reasons for basement floor cracks is settlement. Over time, the soil beneath your home may shift or settle, causing the concrete floor to crack.
2. Hydrostatic Pressure: Excessive water pressure around your foundation can exert force on your basement floor, leading to cracks. This hydrostatic pressure often occurs due to poor drainage or inadequate waterproofing.
3. Temperature Changes: Extreme temperature fluctuations can cause concrete to expand and contract, resulting in cracks over time. This is especially common in regions with harsh weather conditions.
4. Poor Construction: If your home was not built with proper reinforcement techniques or if low-quality materials were used during construction, it may be more prone to cracking.
Now that you have a better understanding of what causes basement floor cracks let’s move on to the steps involved in sealing them effectively.
Step 1: Preparation
Before you begin the crack sealing process, you need to prepare the area properly. Here’s what you should do:
1. Clean the Crack: Start by removing any dirt, debris, or loose concrete from the crack using a wire brush or scraper. This will ensure that the sealant adheres properly to the surface.
2. Vacuum the Crack: Once you have cleaned the crack, use a vacuum cleaner with a narrow attachment to remove any remaining particles. This will create a clean surface for the sealant application.
3. Inspection: Carefully inspect the crack to determine its size and depth. This will help you choose the appropriate sealant and ensure that it penetrates the crack fully.
FAQ: How do I know if my basement floor crack requires professional attention?
If your basement floor crack is wider than 1/8 inch, extends through the entire thickness of the concrete, or is accompanied by other signs of structural damage (such as uneven floors or doors that no longer close properly), it is recommended to consult a professional contractor.
Step 2: Choosing the Right Sealant
Selecting the right sealant is crucial for a successful crack repair. There are various types of sealants available, each with its unique properties and suitability for different types of cracks. Here are some common options:
1. Epoxy Sealants: Epoxy sealants are ideal for structural cracks as they offer excellent strength and durability. They can withstand heavy loads and provide a long-lasting repair solution.
2. Polyurethane Sealants: Polyurethane sealants are flexible and can accommodate slight movements in the foundation. They are resistant to water infiltration and can be used for both interior and exterior cracks.
3. Concrete Caulk: Concrete caulk is a versatile option that works well for smaller cracks. It is easy to apply, dries quickly, and provides a seamless finish To the crack. However, it may not be as durable as epoxy or polyurethane sealants.
4. Acrylic Sealants: Acrylic sealants are commonly used for hairline cracks and minor repairs. They are easy to apply and can be painted over, making them a popular choice for cosmetic purposes.
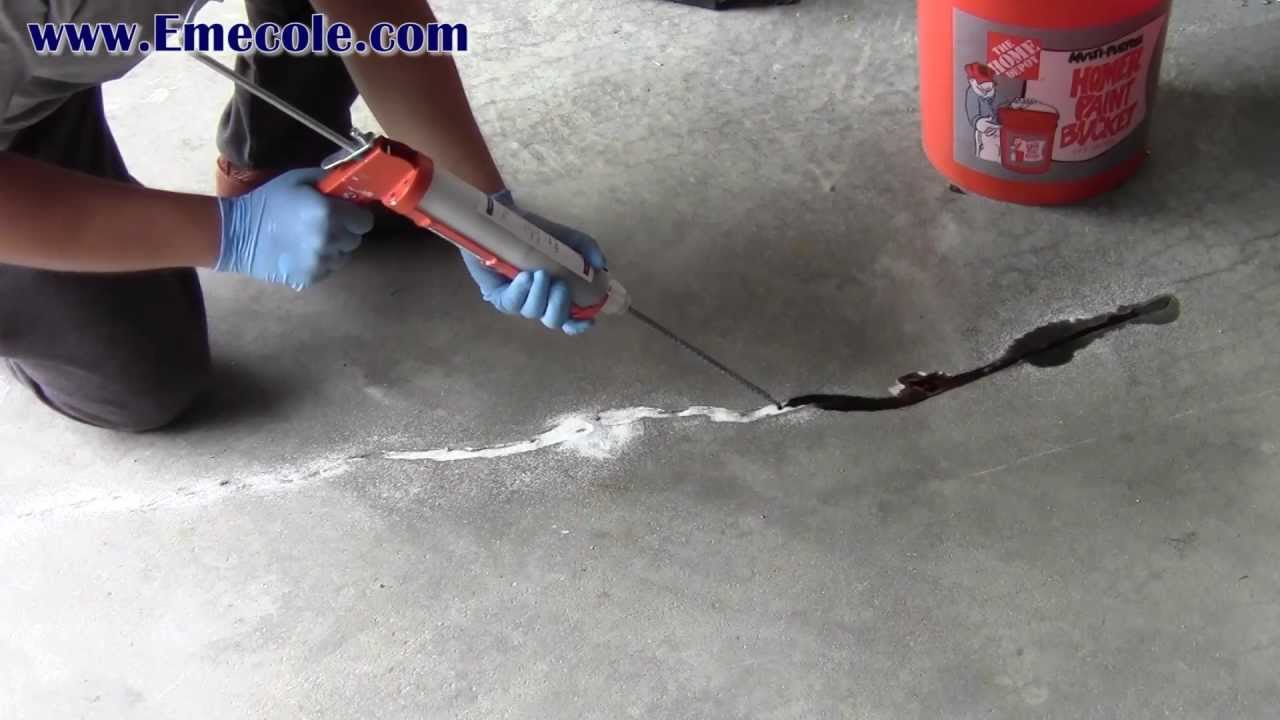
Step 3: Applying the Sealant
Once you have chosen the appropriate sealant, follow these steps to apply it effectively:
1. Prepare the Sealant: Follow the manufacturer’s instructions to prepare the sealant. This may involve mixing two components or simply opening a ready-to-use tube.
2. Fill the Crack: Use a caulk gun or trowel to carefully fill the crack with the sealant. Make sure to completely fill the crack and smooth out any excess sealant on the surface.
3. Allow Drying Time: Different sealants have different drying times, so refer to the product instructions for guidance. It is important to allow sufficient drying time before subjecting the repaired area to any stress or pressure.
4. Apply a Second Coat (Optional): Depending on the size and depth of the crack, you may need to apply a second coat of sealant for optimal results. Follow the same process as before, allowing proper drying time between coats.
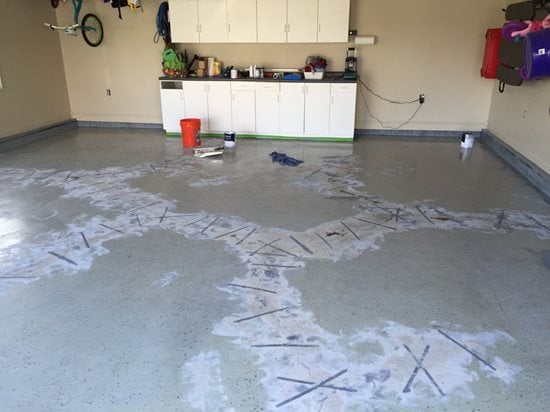
Step 4: Finishing Touches
After applying the sealant, there are a few finishing touches you can do to improve the appearance and longevity of the repair:
1. Smooth out the Surface: Use a putty knife or trowel to smooth out the surface of the sealant, ensuring a seamless finish that matches the surrounding area.
2. Clean up Excess Sealant: Wipe away any excess sealant with a damp cloth or sponge before it fully dries. This will prevent it from hardening and creating an unsightly or uneven surface.
3. Allow Curing Time: Depending on the sealant used, it may take several days for it to fully cure and reach its maximum strength. Avoid putting excessive stress on the repaired area during this time.
In conclusion, sealing basement floor cracks is an important step in maintaining the integrity and functionality of your home. By properly preparing the crack, choosing the right sealant, applying it effectively, and finishing with care, you can ensure a successful repair that will withstand the test of time. Overall, the choice between epoxy and polyurethane sealants depends on the specific needs of the crack being repaired. Epoxy sealants are known for their strength and durability, making them a good choice for larger cracks or areas with heavy traffic. Polyurethane sealants, on the other hand, are more flexible and are better suited for smaller cracks or areas that may experience some movement. Additionally, acrylic sealants can be used for hairline cracks and minor repairs, especially if cosmetic purposes are a priority.
When applying the sealant, it is important to follow the manufacturer’s instructions for preparation and application. This may involve mixing components or using ready-to-use tubes. Carefully fill the crack with the sealant, ensuring it is completely filled and smoothing out any excess on the surface. Different sealants have different drying times, so it is crucial to allow sufficient drying time before subjecting the repaired area to stress or pressure. Depending on the size and depth of the crack, a second coat of sealant may be necessary.
After applying the sealant, there are a few finishing touches that can be done to improve the appearance and longevity of the repair. Smooth out the surface of the sealant with a putty knife or trowel to achieve a seamless finish that matches the surrounding area. Clean up any excess sealant before it fully dries to prevent an unsightly or uneven surface. Finally, allow sufficient curing time for the sealant to reach its maximum strength before putting excessive stress on the repaired area.
In conclusion, proper sealing of basement floor cracks is essential for maintaining the integrity and functionality of your home. By following these steps and choosing the right sealant for your specific needs, you can ensure a successful repair that will last.