If you finish your basement into additional living room for your house, you will want to perform away with the concrete floor by putting down some type of downstairs room floor coverings. Don't settle for any cellar flooring ideas that don't fit your overall image for everything you need completed.
Here are Images about Basement Floor Drainage Channel
Basement Floor Drainage Channel
.jpg?vu003dffdebe6du0026modeu003dh)
Like every other room in your home, compare and contrast your choices when you're looking for basement flooring. It is going to last long to a number of years and maintains the neat look. An extremely popular option when applying commercial carpet tiles is to use 2 or maybe 3 colors to earn contemporary designs or checkerboard.
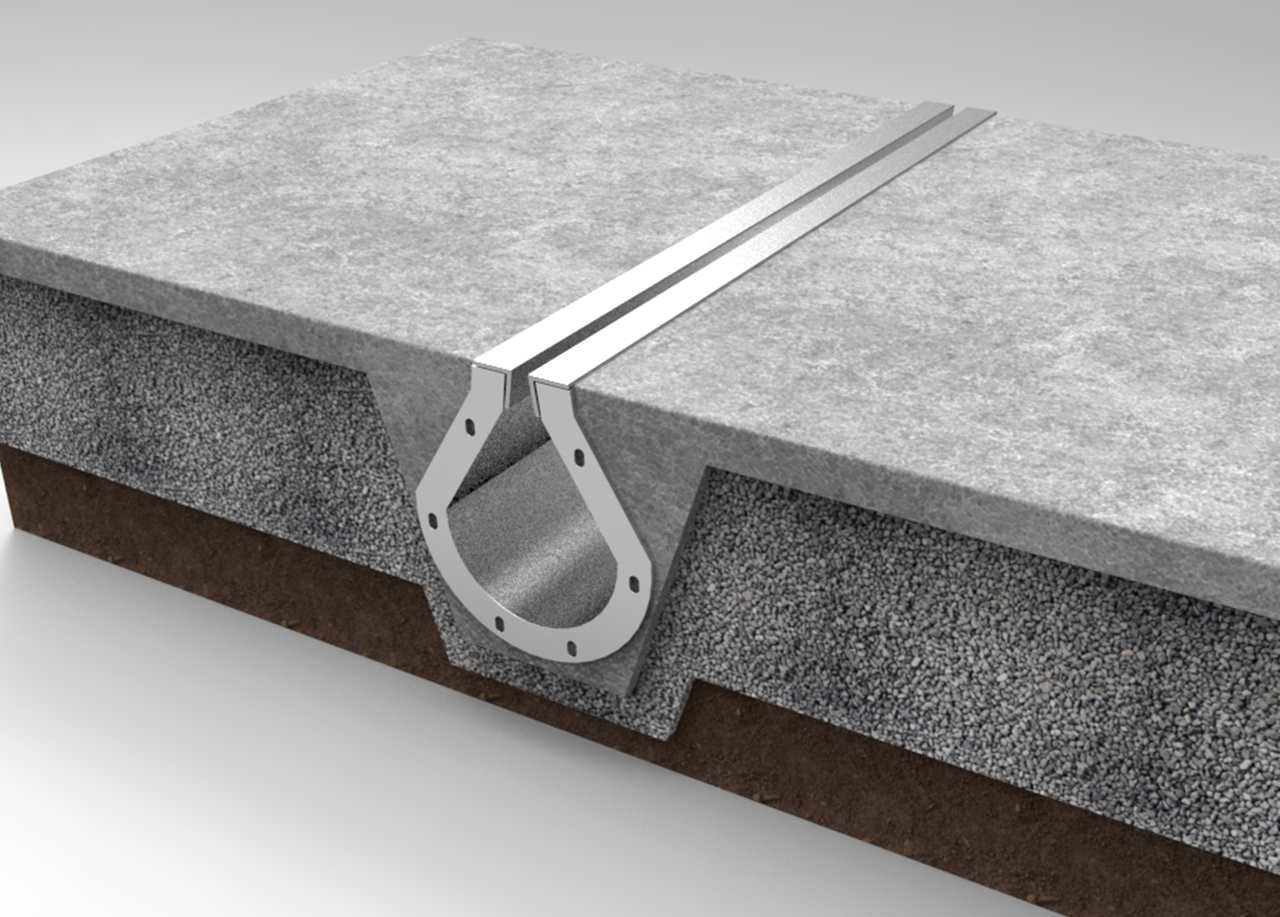
Davenport – Trench Drain [Drainage Solutions] MidAmerica

One of the main substances to a booming basement renovation is actually the flooring subject matter which can be used. No one definitely pays attention to it and it is simply a flooring of course. You may wish to convert your existing basement room originating from a storage area to a leisure room for the family members of yours to invest time together.
Images Related to Basement Floor Drainage Channel
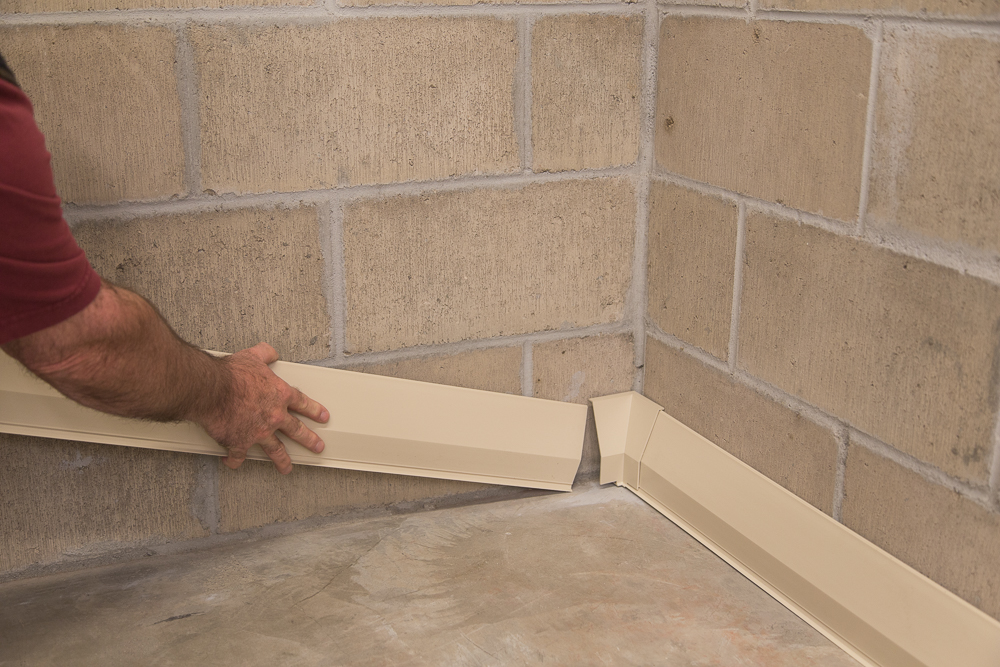
Waterguard Perimeter Basement Drainage Channel 30ft / Box (best value at 11.97/ft pro-rata).

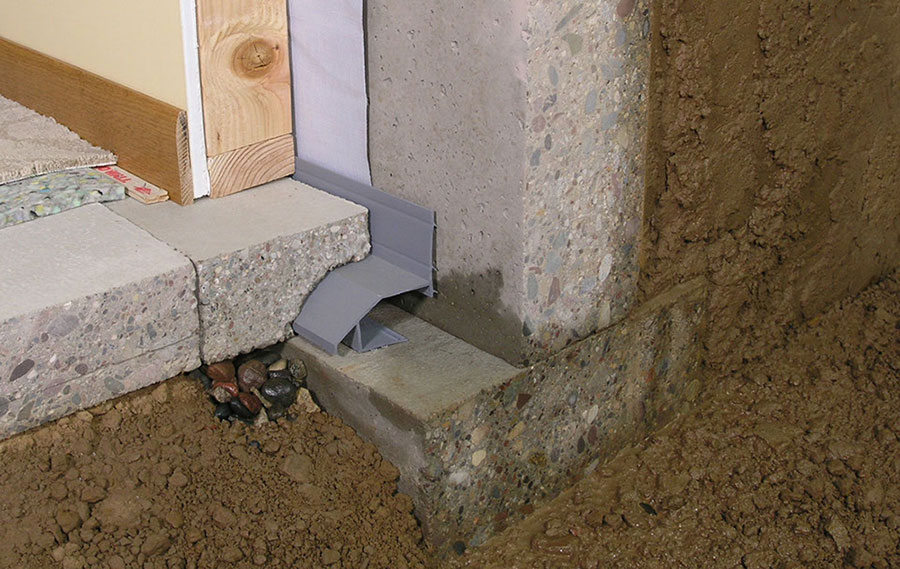
DryTrak® Basement Drainage System for Monolithic Foundations

Installing a Channel Drain in Existing Concrete: Important
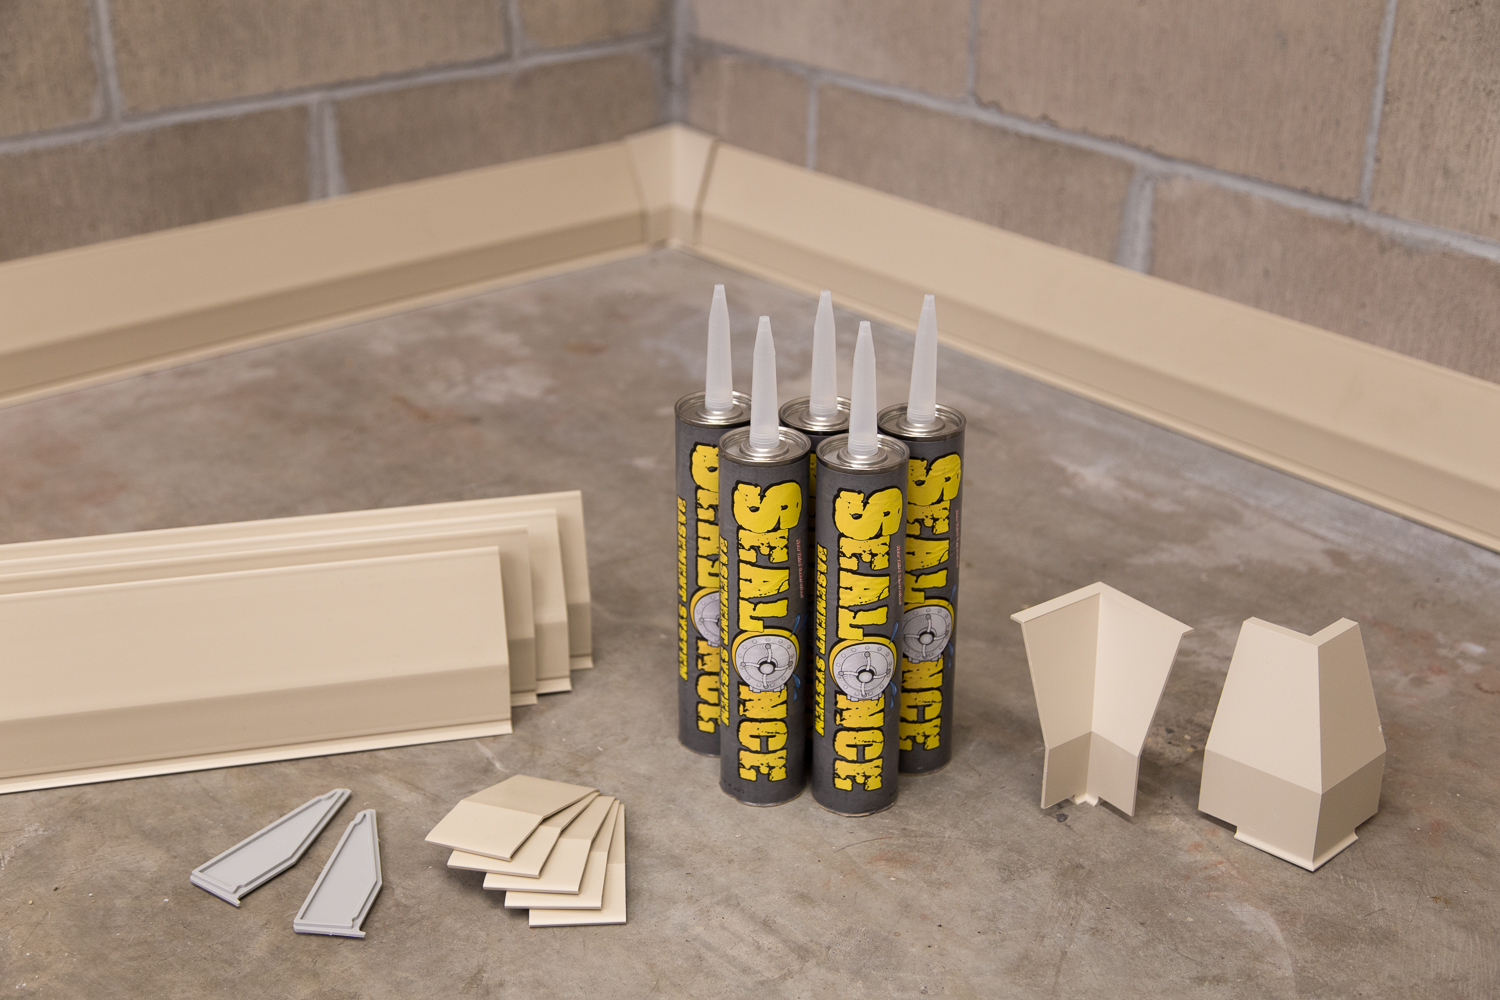
DIY Basement Waterproofing – SealOnce Basement System – Easy
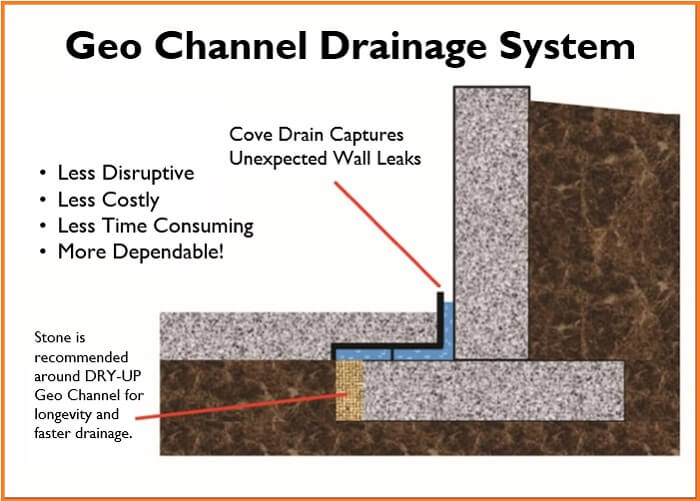
DRY-UP™ Geo Channel u2013 Resch Enterprises
Basement Photos – Basement Waterproofing Nationwide

DryTrak® Basement Drainage System for Monolithic Foundations

DryTrak® Basement Drainage System for Monolithic Foundations

Interior Basement Drainage in Pennsylvania Basement Drain System
Remedial Drainage Options WATERPROOF! Magazine
How to Waterproof a Basement – Easy Video Installation Guide
How to Cut a Drainage Channel into a Concrete Slab

Related articles:
- Stained Concrete Basement Floor
- Finishing Basement Floor
- Refinish Concrete Basement Floor
- Best Flooring For Basement
- Basement Gym Flooring Ideas
- Laminate Flooring In Basement
- Basement Concrete Floor Sweating
- Basement Floor Finishing Ideas
- Painting Unfinished Basement Floor
- Unique Basement Flooring
Basement Floor Drainage Channel: Keeping Your Basement Dry and Protected
Introduction:
A basement is an integral part of any home, providing valuable space for storage, recreation, or even additional living areas. However, basements are also prone to moisture-related issues, which can lead to damage and decrease the overall value of your property. To combat this problem, many homeowners opt for basement floor drainage channels. In this article, we will delve into the world of basement floor drainage channels and explore their benefits, installation process, maintenance requirements, and frequently asked questions.
1. Understanding Basement Floor Drainage Channels:
Basement floor drainage channels are specially designed systems that help collect and redirect water away from your basement. These channels consist of a trench or groove embedded into the floor surface, along with a drain pipe and grate system. When water enters the channel through the grate, it is guided towards the drain pipe and safely channeled away from your basement.
2. Benefits of Basement Floor Drainage Channels:
a) Prevents Basement Flooding: One of the primary benefits of installing a basement floor drainage channel is its ability to prevent basement flooding. By effectively collecting and redirecting water away from your basement, these channels serve as a crucial line of defense against water damage.
b) Protects Foundation: Excess moisture in the soil surrounding your foundation can lead to foundation cracks and structural instability. A properly installed drainage channel helps to keep the soil around your foundation dry, minimizing the risk of such issues.
c) Reduces Mold and Mildew Growth: Moist environments are breeding grounds for mold and mildew. With a basement floor drainage channel in place, you can significantly reduce the chances of mold and mildew growth by keeping your basement dry.
d) Preserves Property Value: A dry and well-maintained basement adds value to your property. Installing a basement floor drainage channel demonstrates proactive measures against potential water damage, making your home more attractive to potential buyers.
3. Installation Process:
a) Preparation: The first step in installing a basement floor drainage channel is to prepare the area. This involves removing any existing flooring and ensuring that the floor surface is clean and level.
b) Trenching: Next, a trench is excavated along the perimeter of the basement or in areas prone to water accumulation. The depth of the trench should be sufficient to accommodate the drainage channel system.
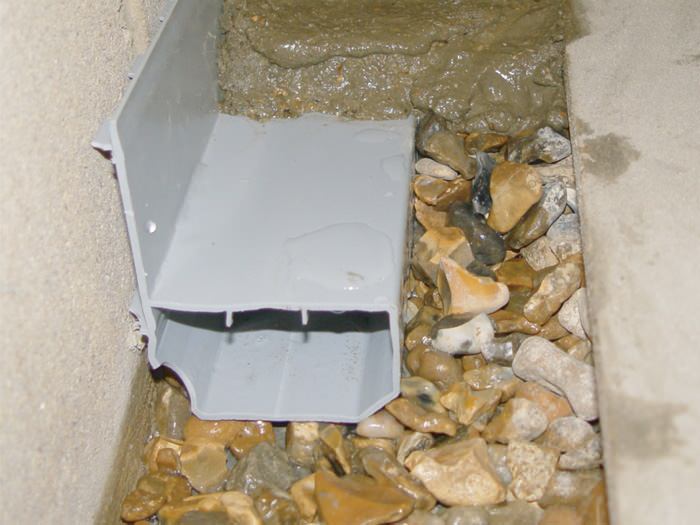
c) Installation of Drainage Channel: The drainage channel, consisting of a trench drain or a pre-formed channel, is then installed into the trench. It is important to ensure that the channel is properly aligned and securely fitted.
d) Connection to Drain Pipe: Once the drainage channel is in place, a drain pipe is connected to it. This pipe will carry the collected water away from your basement. It is essential to ensure proper slope and alignment for efficient water flow.
e) Grate Installation: Finally, grates or covers are installed on top of the drainage channel. These grates not only prevent debris from entering the channel but also provide an aesthetically pleasing finish.
4. Maintenance Requirements:
a) Regular Cleaning: To ensure optimal performance, it is important to clean your basement floor drainage channels regularly. Remove any debris or sediment that may accumulate on the grates or inside the channel.
b) Check for Blockages: Periodically check for blockages in the drain pipe by pouring water into the channel and observing its flow. If you notice slow drainage or standing water, there may be a blockage That needs to be cleared.
c) Inspect for Damage: Regularly inspect the drainage channel and grates for any signs of damage or wear. Replace any damaged parts to maintain the effectiveness of the system.
d) Maintain Proper Slope: Ensure that the drain pipe and drainage channel are properly sloped to allow for efficient water flow. If you notice any changes in the slope, adjust as necessary.
e) Address Any Plumbing Issues: If you notice any leaks or plumbing issues related to your basement floor drainage system, address them promptly to prevent further damage.
5. Cost Considerations:
The cost of installing a basement floor drainage channel can vary depending on several factors, including the size of your basement, the extent of water issues, and the specific materials and systems chosen. It is recommended to consult with a professional contractor for an accurate cost estimate. However, it is important to consider this cost as an investment in protecting your home from potential water damage and maintaining its value over time. Installing a basement floor drainage channel is an important step in preventing water damage and maintaining the value of your home. The process involves several steps, including preparation, trenching, installation of the drainage channel, connection to a drain pipe, and grate installation. Regular maintenance is also necessary to ensure optimal performance of the system. Cost considerations will vary depending on factors such as the size of your basement and the extent of water issues, so it is recommended to consult with a professional contractor for an accurate cost estimate. However, it is important to view this cost as an investment in protecting your home from potential water damage. Installing a basement floor drainage channel is an important step in preventing water damage and maintaining the value of your home. Here are the steps involved in the installation process:
1. Preparation: Before starting the installation, it is important to clear the area of any obstructions and ensure that the basement floor is clean and dry.
2. Trenching: A trench is dug along the perimeter of the basement floor where the drainage channel will be installed. The depth and width of the trench will depend on the specific system being used.
3. Installation of Drainage Channel: The drainage channel is placed in the trench, ensuring that it is level and aligned properly. It may be necessary to cut or connect multiple sections of the channel to fit the dimensions of your basement.
4. Connection to Drain Pipe: Once the channel is in place, a drain pipe is connected to it. This pipe will carry the collected water away from your basement. It is essential to ensure proper slope and alignment for efficient water flow.
5. Grate Installation: Finally, grates or covers are installed on top of the drainage channel. These grates not only prevent debris from entering the channel but also provide an aesthetically pleasing finish.
Regular maintenance is also necessary to ensure optimal performance of the system. Here are some maintenance requirements:
a) Regular Cleaning: Clean your basement floor drainage channels regularly to remove debris or sediment that may accumulate on the grates or inside the channel.
b) Check for Blockages: Periodically check for blockages in the drain pipe by pouring water into the channel and observing its flow. If you notice slow drainage or standing water, there may be a blockage that needs to be cleared.
c) Inspect for Damage: Regularly inspect the drainage channel and grates for any signs of damage or wear. Replace any damaged parts to maintain the effectiveness of the system.
d) Maintain Proper Slope: Ensure that the drain pipe and drainage channel are properly sloped to allow for efficient water flow. If you notice any changes in the slope, adjust as necessary.
e) Address Any Plumbing Issues: If you notice any leaks or plumbing issues related to your basement floor drainage system, address them promptly to prevent further damage.
Cost considerations will vary depending on factors such as the size of your basement and the extent of water issues. It is recommended to consult with a professional contractor for an accurate cost estimate. However, it is important to view this cost as an investment in protecting your home from potential water damage and maintaining its value over time.